VT3000 How To Guides
Jump to navigation
Jump to search


|

|

|
Configuration
- Shifts/Schedules ______________________________________
- Routes ________________________________________________
- Output - Add __________________________________________
- Output - Testing ______________________________________
- Output - Print Out ____________________________________
Device Configuration
- Alarm _________________________________________________
- Count/Sampler _________________________________________
- Data Field ____________________________________________
- Process _______________________________________________
- Print Out _____________________________________________
Diagnostics
- Device Status _________________________________________
- Change ISO Code - Micro SD Card - BSC & PSM Change ISO Code - Touch Screen - BSC & PSM Change ISO Code - VT3000 Software - BSC & PSM
- Change ISO Code - Micro SD Card - Call Station Change ISO Code - Buttons - Call Station Change ISO Code - VT3000 Software - Call Station
- Update Configuration - Call Station - Battery Powered Update Configuration - Call Station - Powered Update Configuration - BSC & PSM
- Device Status Overview
- Logs __________________________________________________
- Active Information ____________________________________
Administration
- System Settings _______________________________________
- Active Directory User Authentication (LDAP) Email Server - (SMTP) Settings Device Monitoring
- VT3000 Core - System Name, System Key & Product Key VT3000 Core - Database Locations Turn Debug Mode On/Off
- Control Center & Text to Voice Settings Coordinator Settings Change the ISO Code - Coordinator
- Paging Transmitter Settings 2-Way Radio Settings Phone Modem Settings
- Control Center ________________________________________
- Database Backup - Local Database Backup - Downloadable Zip File Database Backup - Email to VersaCall
- Restore Database(s) - Local Backup Restore Database(s) - External Backup or Zip File Software Version
- Restart - AMS Service Restart - Connectivity Service Restart - Virtual Panels IV Service
- Restart - Reporting Software Service Restart - VT3000 Service Restart - VT3000 Control Center
- Upgrade - VersaCall Software
- Plug-Ins ______________________________________________
- Users & User Groups ___________________________________
Hardware Devices
- BSC ___________________________________________________
- Call Station __________________________________________
- Install Hardware - Battery Install Hardware - Powered Add New Configuration
- Duplicate Configuration Update Configuration - Battery Update Configuration - Powered
- Wirelessly Update Firmware - Battery Wirelessly Update Firmware - Powered Manually Update Firmware
- Install/Attach Stack Light Configure Attached Stack Light Setup Attached Stack Light Usage
- Test Mesh Signal Strength - Battery Test Mesh Signal Strength - Powered Change ISO Code - Device Buttons
- Change ISO Code - Micro SD Card Change ISO Code - VT3000 Software
- PSM ___________________________________________________
- BSC & PSM _____________________________________________
- Update Configuration Pair Existing Touch Screen Pair Replacement Touch Screen
- Replace Micro SD Card - I/O Module Test Bluetooth Signal Strength Update Date & Time - Touch Screen
- Manually Update Firmware Wirelessly Update Firmware Test Mesh Signal Strength
- Install/Attach Stack Light - I/O Module Configure Stack Attached Stack Light Setup Attached Stack Light Usage
- Change ISO Code - Micro SD Card Change ISO Code - Touch Screen Change ISO Code - VT3000 Software
- Wireless Audio Device _________________________________
- Wireless Light ________________________________________
- Repeater ______________________________________________
PC Devices
- PC Call Station _______________________________________
- PC BSC ________________________________________________
- PC Input Module _______________________________________
Other Software
- SQL Server ____________________________________________
- Windows/Miscellaneous _________________________________
Panels - Colors - Tags - Images
- Defined Colors ________________________________________
- Panels ________________________________________________
- Tags __________________________________________________
Reporting
- Real-Time Reports _____________________________________
- Automated Reports _____________________________________
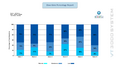
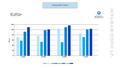
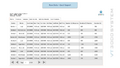
Reports - Communications
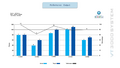
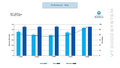
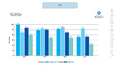
Click through the slides to view samples of each report. Click on the image for instructions on how to Run the Report.
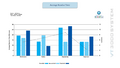
Report 1 of 3
Report 2 of 3
Report 3 of 3
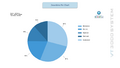
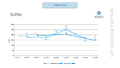
Reports - Downtime
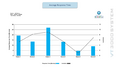
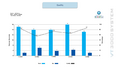
Click through the slides to view samples of each report. Click on the image for instructions on how to Run the Report.

Report 1 of 5
Report 2 of 5
Report 3 of 5
Report 4 of 5
Report 5 of 5
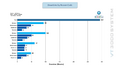
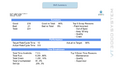
Reports - Production
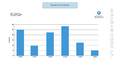
Click through the slides to view samples of each report. Click on the image for instructions on how to Run the Report.
Report 1 of 5
Report 2 of 5
Report 3 of 5
Report 4 of 5

Report 5 of 5
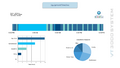
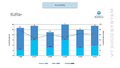
Reports - Analytics
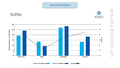
Click through the slides to view samples of each report. Click on the image for instructions on how to Run the Report.
Report 1 of 6

Report 2 of 6
Report 3 of 6
Report 4 of 6
Report 5 of 6
Report 6 of 6
Reports - Export
Click through the slides to view samples of each report. Click on the image for instructions on how to Run the Report.
Report 1 of 1
Keyword Search
| Type Subject or Key Word to Query Archives |
|---|

|