Difference between revisions of "VT3000 - Add Cell Phone (Text Message)"
SupportAdmin (talk | contribs) m (SupportAdmin moved page Add A Cell Phone - Text Message - (VT3000) to Add a Cell Phone - Text Message - (VT3000) without leaving a redirect) |
SupportAdmin (talk | contribs) m (SupportAdmin moved page Add a Cell Phone - Text Message - (VT3000) to VT3000 - Add Cell Phone (Text Message) without leaving a redirect) |
(No difference)
| |
Revision as of 19:32, 3 August 2017
All Cell Phones intended to get text messages must be set up in Outputs. The VT3000 software must be setup to send emails. If email is not currently set up on your system, contact VersaCall for further assistance.
1. Open the VT3000 web interface – log in with user name and password – select Configuration – select Outputs.
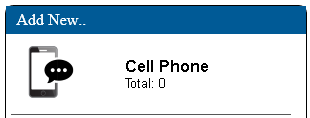
2. Select the Cell Phone icon under the Add New list.
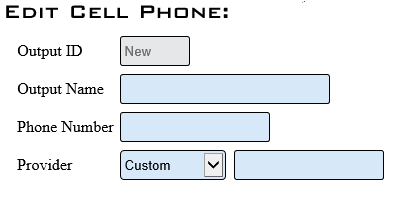
3. Cell Phone Properties:
    a. Output ID – assigned by the system - not an editable field.
    b. Output Name – enter a name for the cell phone.
    c. Phone Number – enter the phone number without dashes or spaces.
    d. Provider – click the down arrow for a list of the most common service providers.
NOTE: If your provider is not listed, you will select Custom and type in the .com email address for the provider. Contact the provider if you do not know this information.
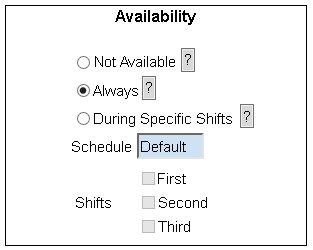
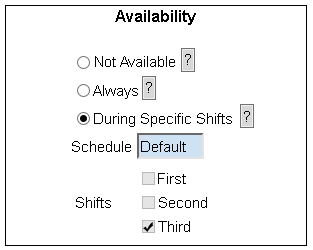
4. Cell Phone Availability.
    a. Not Available – no messages will be sent to the phone.
    b. Always – messages will be sent 24 hours a day 7 days a week.
    c. During Specific Shifts – select the specific shift(s) that messages are to be sent.
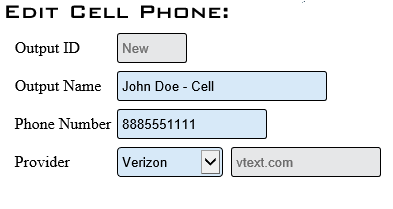
5. Below is an example of a phone on Verizon set to receive messages for 3rd shift only.
7. Click on the Save & Exit button to return to the Outputs page. When adding multiple phones, select Save & Add New. Select Discard & Exit to delete the phone entered and return to the Outputs page.


