VT3000 - Install - Pre-Requisites

From Versacall Support
Jump to navigation Jump to search
Call Now 858-677-6766 SubmitTckBtn.png EmailUsBtn.png


Overview
Before installing the VersaCall software, there are some settings that need to be changed/configured in Windows. The VersaCall software uses SQL Databases so you will need to install SQL Server. Our software is compatible with any version of SQL Server 2008 R2 and above. You will need to update your Windows operating system completely before proceeding with the steps below.


Requirements
See Requirements Here
1. Administrator Privilege's to Enable Windows Features & Install Software.


Instructions


Step 1.
Click on the Search icon next to the Windows Start button if the search field is not visible. Type in Control Panel into the field.
PreReq1.png


Step 2.
A list of applications will appear above the search field - select the Control Panel App.
PreReq2.png


Step 3.
On the Control Panel Window, type in Programs & Features into the search field in the top right corner of the window.
PreReq3.png


Step 4.
Select the Programs heading/icon.
PreReq4.png


Step 5.
Select the Turn Windows Features On or Off option.
PreReq5.png


Step 6.
On the Features window find the .NET 4.x (your version maybe higher or lower than our example) Advanced Service - click on the heading so that it is highlighted. Click on the expand icon (Plus inside the Square) on the left side of the item.
PreReq6.png


Step 7.
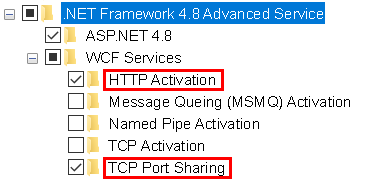
Under the expanded item you will see WCF Services - click on the expand icon to expand this section. Click on the boxes next to HTTP Activation and TCP Port Sharing so that a checkmark shows in each box.
PreReq7.png


Step 8.
Move down the list and find the Internet Information Services - click on the heading so that it is highlighted. Click on the expand icon (Plus inside the Square) on the left side of the item.
PreReq8.png


Step 9.
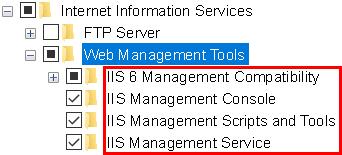
Under the expanded item you will see Web Management Tools - click on the expand icon to expand this section. Under the expanded item click on the boxes next to IIS 6 Management Compatibility - IIS Management Console - IIS Management Scripts and Tools - IIS Management Service so that a checkmark shows in each box. The box for IIS 6 Management Compatibility will have a black square instead of a checkmark.
PreReq9.png


Step 10.
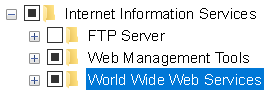
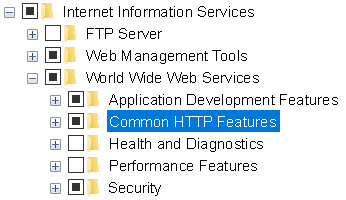
Move down the expanded section and find World Wide Web Services click on the heading so that it is highlight. Click on the expand icon (Plus inside the Square) on the left side of the item.
PreReq10.png


Step 11.
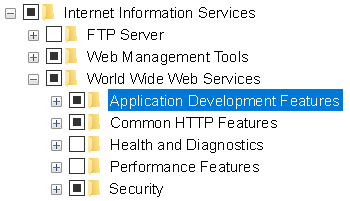
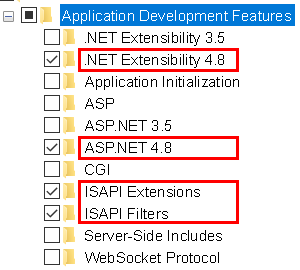
Under the expanded section find the Application Development Features section, click on the heading so that it is highlighted. Click on the expand icon (Plus inside the Square) on the left side of the item.
PreReq11.png


Step 12.
Under the expanded item click on the boxes next to .NET Extensibility 4.x - ASP.NET 4.x - ISAPI Extensions - ISAPI Filters so that a checkmark shows in each box.
PreReq12.png


Step 13.
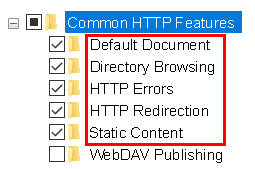
Under the expanded World Wide Web Services section find the Common HTTP Features section, click on the heading so that it is highlighted. Click on the expand icon (Plus inside the Square) on the left side of the item.
PreReq13.png


Step 14.
Under the expanded item click on the boxes next to Default Document - Directory Browsing - HTTP Errors - HTTP Redirection - Static Content so that a checkmark shows in each box.
PreReq14.png


Step 15.
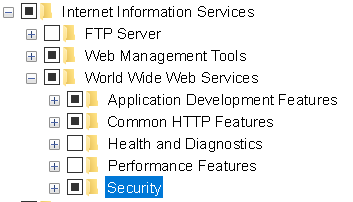
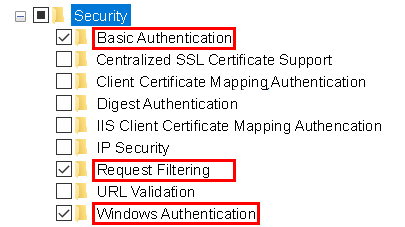
Under the expanded World Wide Web Services section find the Security section, click on the heading so that it is highlighted. Click on the expand icon (Plus inside the Square) on the left side of the item.
PreReq15.png


Step 16.
Under the expanded item click on the boxes next to Basic Authentication - Request Filtering - Windows Authentication so that a checkmark shows in each box.
PreReq16.png


Step 17.
Once all options have been selected click on the OK button at the bottom of the Features window.
PreReq17.png


Step 18.
A confirmation screen may appear - select to Allow if it shows. A progress bar will show on the screen while the changes are made - wait until this is completed.
3164 10.png


Step 19.
Close all open Windows. Click on the Search icon next to the Windows Start button if the search field is not visible. Type in IIS Manager into the field.
PreReq18.png


Step 20.
A list of applications will appear above the search field - select the Internet Information Services (IIS) Manager app.
PreReq19.png


Step 21.
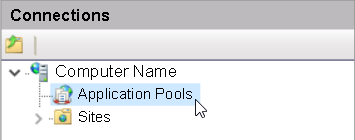
On the IIS Manager window find the Connections section. Under that heading you will see your computer name - click on the expand icon on the left side of the heading.
PreReq20.png


Step 22.
Under the expansion find the Application Pools heading - click on it so that it is highlighted.
PreReq21.png


Step 23.
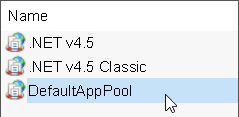
On the right side of the Connections section you will see a list of Application Pools. Find the Default App Pool in the list - click on it so that it is highlighted.
PreReq22.png


Step 24.
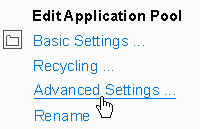
On the right side of the Application Pools section you will see some section/headings. Find the Edit Application Pool heading - click on the Advanced Settings option under the heading.
PreReq23.png


Step 24.
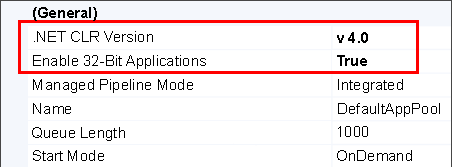
A Settings Window will show. Find the General section. Under this section find the .NET CLR Version option - select v4.0 for the option on the right side. Find the Enable 32-Bit Applications option - select True for the option on the right side.
PreReq24.png


Step 24.
Move down the window until you find the Process Model section. Under this section find the Identity option - select LocalSystem for the option on the right side.
PreReq25.png


Step 25.
Once those options are set - click on the OK button at the bottom of the window.
PreReq26.png


Step 26.
Close all open windows. Return to the Installation Page and move on Step #2. Click Here for the Installation Page.


RelatedHowTos.png
Select a Guide Here
System Layout for IT Considerations/Information Purposes
Minimum Requirements - Customer Providing the Computer or Server
Installation Instructions for Mini PC Provided by VersaCall
Installation Instructions for Standard PC Provided by VersaCall
Installation Insructions for Rack Mount Server Provided by VersaCall


SearchHeader.png


VC Footer.png
Follow Us On LinkedIn View our Blog