Difference between revisions of "VRS - Create a Saved Report"
SupportAdmin (talk | contribs) |
SupportAdmin (talk | contribs) |
||
| Line 1: | Line 1: | ||
=Overview= | =Overview= | ||
A Saved Report is used to allow a user to run an ongoing report with the least amount of steps. When running a report that has the same parameters frequently, a saved report can be created to limit the number of steps required to run the report. | A Saved Report is used to allow a user the ability to run an ongoing report with the least amount of steps. When running a report that has the same parameters frequently, a saved report can be created to limit the number of steps required to run the report. | ||
==Instructions== | ==Instructions== | ||
'''1.''' Run | '''1.''' Run a report as you normally would - complete all 8 steps. | ||
[[File:Saved22.png]] | |||
'''2.''' | |||
'''2.''' The report will run/populate in a new web browser tab - click on the VRS II tab. | |||
[[File:Real1.png]] | [[File:Real1.png]] | ||
| Line 40: | Line 42: | ||
'''6.''' The VRS homepage will load - | '''6.''' The VRS homepage will load - the Saved Report created will be available for selection. | ||
[[File:Saved3.png]] | [[File:Saved3.png]] | ||
Revision as of 18:00, 2 July 2018
Overview
A Saved Report is used to allow a user the ability to run an ongoing report with the least amount of steps. When running a report that has the same parameters frequently, a saved report can be created to limit the number of steps required to run the report.
Instructions
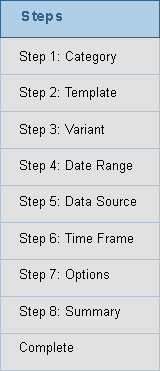
1. Run a report as you normally would - complete all 8 steps.
2. The report will run/populate in a new web browser tab - click on the VRS II tab.
3. Select the "Convert to a Saved Report" button.
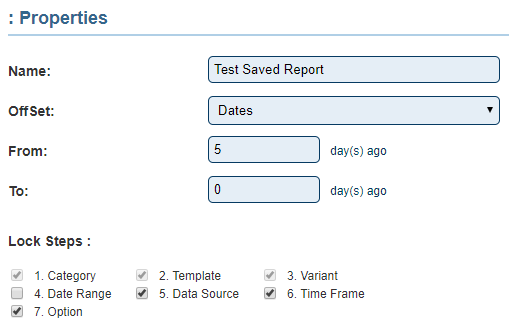
4. The following options are available on the Properties page:
    a. Name - enter a name for the saved report.
    b. Offset - select the type of time offset for the report.
         i. Dates - enter days in From & To field.
         ii Weeks - enter weeks in From & To field.
         iii. Months - enter months in From & To field.
         iv. Years - enter years in From & To field.
    c. From - enter a day, week, month or year for when the report will start.
    d. To - enter a day, week, month or year for when the report will end.
    e. Lock Steps - select the steps, in running a report, that are the same each time the report is run.
NOTE: In our example we selected From 5 To 0 which will run the report for 5 days ago until now within the parameters setup in the report. We also locked all steps except Date Range, each time the saved report is selected we will only have to select the date range the select Run to get the report.
5. Once all fields are completed click on the Save & Exit button.
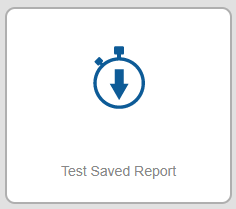
6. The VRS homepage will load - the Saved Report created will be available for selection.


