Difference between revisions of "VT3000 - Install Mini PC"
Jump to navigation
Jump to search
SupportAdmin (talk | contribs) |
SupportAdmin (talk | contribs) |
||
| Line 1: | Line 1: | ||
=Overview= | =Overview= | ||
All New Systems come with a computer or control unit that contains the VersaCall software. The instructions below are for a Mini Control Unit, if this is the type of system you have purchased please proceed with the steps below. | All New Systems come with a computer or control unit that contains the VersaCall software. The instructions below are for a Mini Control Unit, if this is the type of system you have purchased please proceed with the steps below. | ||
==Unpack== | ==Unpack== | ||
| Line 10: | Line 11: | ||
File:mini7.png|Power Cord (Part 2) | File:mini7.png|Power Cord (Part 2) | ||
</gallery> | </gallery> | ||
==Instructions== | ==Instructions== | ||
| Line 15: | Line 17: | ||
'''1.''' Attach a Monitor (not included) to the Control Unit using the DVI or HDMI port. | '''1.''' Attach a Monitor (not included) to the Control Unit using the DVI or HDMI port. | ||
<gallery widths= | <gallery widths=400 heights=240> | ||
File: | File:InstallMini1.gif | ||
</gallery> | </gallery> | ||
| Line 22: | Line 24: | ||
'''2.''' Attach a Keyboard & Mouse (not included) to the Control Unit using the USB or PS/2 ports. | '''2.''' Attach a Keyboard & Mouse (not included) to the Control Unit using the USB or PS/2 ports. | ||
<gallery widths= | <gallery widths=400 heights=240> | ||
File: | File:InstallMini2.gif | ||
</gallery> | </gallery> | ||
| Line 29: | Line 31: | ||
'''3.''' If the unit is going on your network, attach an ethernet cable to the ethernet port. | '''3.''' If the unit is going on your network, attach an ethernet cable to the ethernet port. | ||
<gallery widths= | <gallery widths=400 heights=240> | ||
File: | File:InstallMini3.gif | ||
</gallery> | </gallery> | ||
| Line 36: | Line 38: | ||
'''4.''' Plug the Power Adapter into the power port. Connect the Power Adapter to Power Cord. | '''4.''' Plug the Power Adapter into the power port. Connect the Power Adapter to Power Cord. | ||
<gallery widths= | <gallery widths=400 heights=240> | ||
File: | File:InstallMini4.gif | ||
</gallery> | </gallery> | ||
| Line 44: | Line 45: | ||
'''5.''' Press the Power Button (front). | '''5.''' Press the Power Button (front). | ||
<gallery widths= | <gallery widths=400 heights=240> | ||
File: | File:InstallMini5.gif | ||
</gallery> | </gallery> | ||
'''6.''' After the computer boots - select Your Company Name as the user - select Chrome icon. | '''6.''' After the computer boots - select "Your Company Name" as the user - select the Chrome icon from Windows Desktop. | ||
<gallery widths= | <gallery widths=400 heights=240> | ||
File: | File:InstallMini6.gif | ||
</gallery> | </gallery> | ||
| Line 59: | Line 59: | ||
'''7.''' Type "localhost" in the address bar - select VT3000 button on welcome page. | '''7.''' Type "localhost" in the address bar - select VT3000 button on welcome page. | ||
<gallery widths= | <gallery widths=400 heights=240> | ||
File: | File:InstallMini7.gif | ||
</gallery> | </gallery> | ||
| Line 67: | Line 66: | ||
'''8.''' Enter "admin" for User Name & Password - select Login button. | '''8.''' Enter "admin" for User Name & Password - select Login button. | ||
<gallery widths= | <gallery widths=400 heights=240> | ||
File: | File:InstallMini8.gif | ||
</gallery> | </gallery> | ||
Revision as of 20:20, 29 October 2018
Overview
All New Systems come with a computer or control unit that contains the VersaCall software. The instructions below are for a Mini Control Unit, if this is the type of system you have purchased please proceed with the steps below.
Unpack
You will have the following components after unpacking:
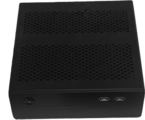
Mini Computer
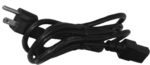
Power Cord (Part 1)

Power Cord (Part 2)


Instructions
1. Attach a Monitor (not included) to the Control Unit using the DVI or HDMI port.

2. Attach a Keyboard & Mouse (not included) to the Control Unit using the USB or PS/2 ports.

3. If the unit is going on your network, attach an ethernet cable to the ethernet port.

4. Plug the Power Adapter into the power port. Connect the Power Adapter to Power Cord.

5. Press the Power Button (front).

6. After the computer boots - select "Your Company Name" as the user - select the Chrome icon from Windows Desktop.

7. Type "localhost" in the address bar - select VT3000 button on welcome page.

8. Enter "admin" for User Name & Password - select Login button.

Having Trouble?

Submit a Service Ticket