VT3000 - Install - Pre-Requisites
Before installing the VersaCall software there are some settings to be completed in Windows and the installation of SQL Server. Update Widows completely before making changes to the system.
Windows Features Configuration:
WINDOWS 7
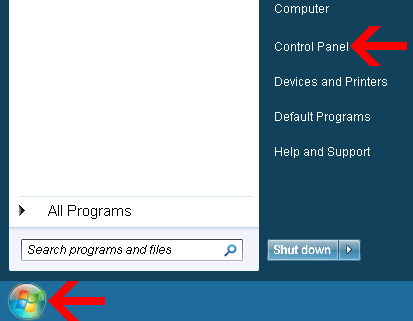
1. Select the Windows Start button – select Control Panel from the menu.
2. Select the Programs & Features icon.
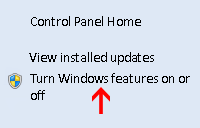
3. Select the “Turn Windows Features On or Off” link.
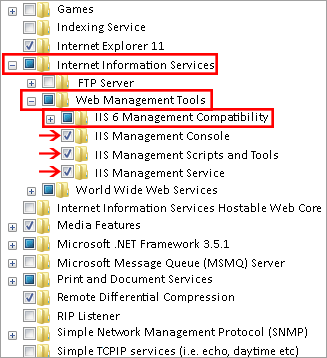
4. Select the plus sign for Internet Information Services – select the plus sign for Web Management Tools – select the plus sign for IIS 6 Management Compatibility – check all boxes shown in the image below. Collapse the section by selecting the minus sign for Web Management Tools.
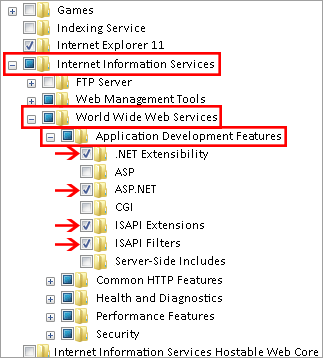
5. Select the plus sign for World Wide Web Services – select the plus sign for Application Development Features – check all boxes shown in the image below. Collapse the section by selecting the minus sign for World Wide Web Services.
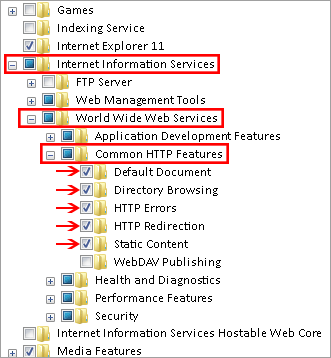
6. Select the plus sign for World Wide Web Services – select the plus sign for Common HTTP Features – check all boxes shown in the image below. Collapse the section by selecting the minus sign for World Wide Web Services.
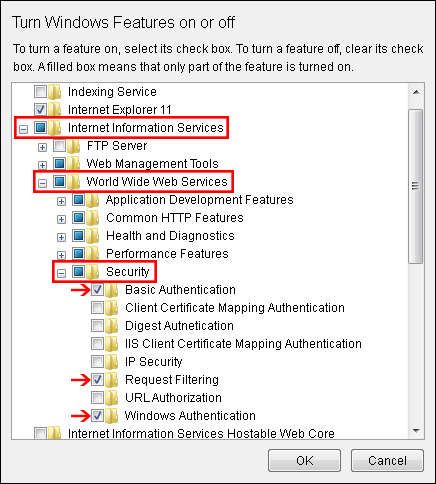
7. Select the plus sign for World Wide Web Services – select the plus sign for Security – check all boxes shown in the image below – select the OK button to save all changes.
8. A window will show displaying the progress of the services - allow this to complete then close all open windows.
WINDOWS 8, 10 & SERVER 2012 & ABOVE:
9. All of the setting shown above will be the same - add the options shown in steps 10 & 11.
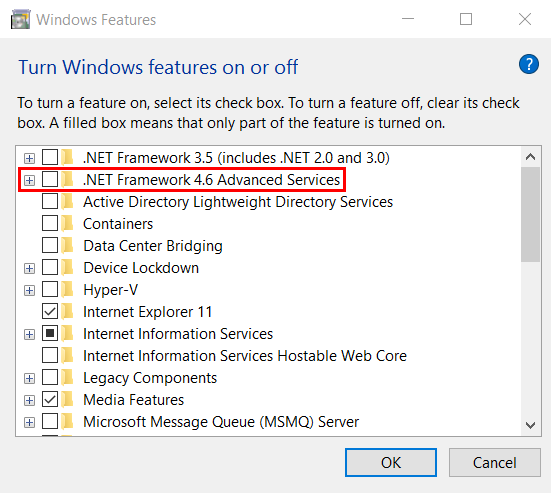
10. Select the plus sign for the .NET Framework 4.0 (or above) Advanced Services option
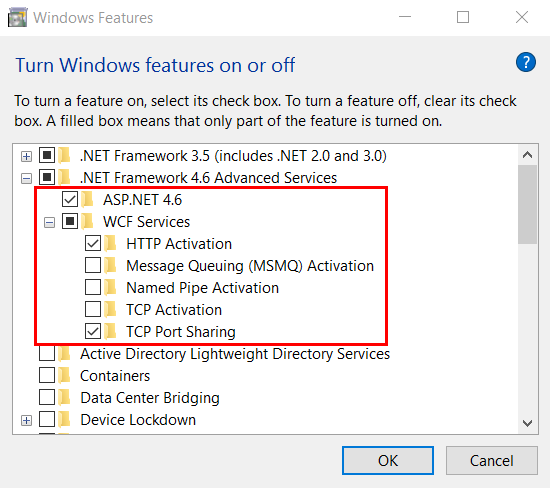
11. Select the plus sign for WCF Services, check all the boxes show in the the example below.
10. Select the OK button at the bottom of the page. A confirmation screen, may appear, stating the same changes will be made to earlier versions of .NET - select to Allow this. A window will show displaying the progress of the services - allow this to complete then close all open windows.
IIS Configuration
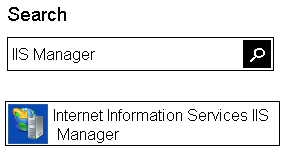
1. Select the Windows Start button – type IISS in the search field (use Cortana on Windows 10) – select Internet Information Services IIS Manager.
2. Expand computer (generally the name of the computer) – select Application Pools.
3. In the middle of the page a list of applications will generate – select DefaultAppPool so that it is highlighted.
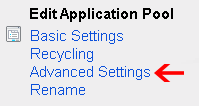
4. On the right side of the page select Advanced Settings under the Edit Application Pool heading.
5. When the Advanced Settings window appears make the following changes – click on the OK button once completed.
General Section
A. .NET Framework Version – set to v4.0 B. Enable 32-Bit Applications – set to True
Process Model Section
C. Identity – set to LocalSystem
6. Once all the IIS settings have been made, you can proceed to installing SQL Server.
SQL Server Installation:
1. Download and install Microsoft SQL Server 2008 R2 RTM – Express with Management Tools. You can search the title on google, ensure you select the link to Microsoft. The link will look like the one in the screen shot below. You can use later versions (2012, 2014 or 2016) of SQL Server, but you must install the version “with Management Tools”. The instructions show below apply to all versions.
2. Once you are on the download page click on the Continue button.
3. When the Registration screen appears you can select to register if you wish or select no. In our example we selected No – click on the Next button.
4. On the choose version screen select either SQLEXPRWT_x64_ENU.exe for a 64 bit operating system or SQLEXPRWT_x86_ENU.exe for 32 bit operating systems. Once you have made your selection click on the Next button.
5. When the Run or Save menu appears select Save.
6. The software will download into your Downloads folder. Once the download is complete navigate to the Downloads folder and right click on the file that you choose to download – select Run As Administrator from the menu.
7. A screen will appear showing that the software is extracting – wait until this process is complete.
8. The SQL Server screen will open asking what type of installation you want – select the New Installation or add features to an existing installation option.
9. A license agreement will load – select to accept the terms – click on the Next button.
10. On the Features window – select all of the features listed – click on the Next button.
11. Leave the Named Instance and the Instance ID as they appear – click on the Next button.
12. For the SQL Server Browser – Startup Type select Automatic – click on the Next button.
13. For the Authentication Mode select Mixed Mode. Enter SQLServer123 for the password – confirm the password – click on the Next button.
14. You can leave the Error Reporting unchecked if you would like – click on the Next button.
15. Once the installation has completed click on the Close button.
16. On the SQL Installation screen, close the window your installation of SQL Server is complete.
17. Click on the Windows Start button – select All Programs
18. Click on the Microsoft SQL Server 2008 R2 folder - click on the Configuration Tools folder - click on SQL Server Configuration Manager – when the confirmation screen appears asking if you want to allow the program to make changes – click on the Yes button.
19. Expand the SQL Server Network Configuration options – click on the Protocols for SQLEXPRESS.
20. On the right side of the page you will see 4 protocols. Each protocol must show a status of Enabled. Click on one of the protocols that is not enabled so that it is highlighted – right click on the protocol – select Enable from the list.
21. Repeat the process for all the protocols on the list until they all show Enabled.
22. On the left side of the screen click on the SQL Server Services option.
23. On the right side of the screen you will see 3 services – we need to restart the SQL Server and the SQL Server Browser service. Click on one of the services so that it is highlighted – right click on the highlighted service – select Restart from the menu. Repeat the process for the other service.
24. Close the SQL Server Configuration Manager window. Proceed to installing software, the order of installation must start with the installation of VT3000 first then you can install any of the other programs.
