Difference between revisions of "VT3000 - Update Database - SQL Server"
SupportAdmin (talk | contribs) |
SupportAdmin (talk | contribs) |
||
| Line 36: | Line 36: | ||
<gallery widths=200> | <gallery widths=200> | ||
File: | File:SQL15.png|Windows Explorer | ||
File:SQL16.png|C: Drive | File:SQL16.png|C: Drive | ||
File:SQL17.png|SQL Backup | File:SQL17.png|SQL Backup | ||
Revision as of 21:47, 26 November 2018
Overview
Use this method to update a VersaCall database using SQL Server. This may be needed if the update through the VT3000 Core software is not working properly or if you are storing the VersaCall databases on a separate computer/server. For this method to work properly, you must physically access the VersaCall computer or the Server that is storing the databases. The backup files must be on the VersaCall computer or the Server storing the databases.
Find the database(s) SQL Server location:
1. Open the VT3000 web-interface - select VT3000 - select Administration - select System Settings, select Global.
2. Under the Database Locations heading, expand the details for one of the databases.
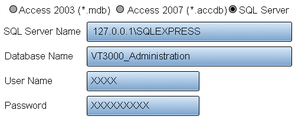
3. If the SQL Server Name field looks like the image below, you will need to access the VersaCall computer. User Name & Password will differ, we are representing it with (X).
4. If the SQL Server Name field has anything different from the image in # 3, you will need to access the Server that is storing the databases. You may need to contact your IT department for assistance.
Restoring the Database(s) SQL Server 2008 R2:
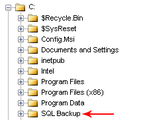
1. Create a folder on the VersaCall Computer and/or SQL Server Computer (C) Drive called SQL Backup. Select Windows Explorer - select C Drive - right click - select New Folder - name the folder SQL Backup.
2. Select the Windows Start button - select all programs - find the Microsoft SQL Server 2008 R2 folder - select the folder to expand it.
3. Find the SQL Server Management Studio icon - select it.
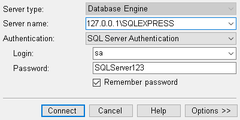
4. On the Log In page enter the following for the Default VersacCall Computer/System (Enter your Login & Password if different) - click on the Connect button. If you are accessing another server, please contact your IT department for the sign in information.
    a. Server Name - 127.0.0.1\SQLEXPRESS
    b. Login - sa
    c. Password - SQLServer123
5. Click on the Databases folder so that it is highlighted - right click on the folder - select Restore Database...
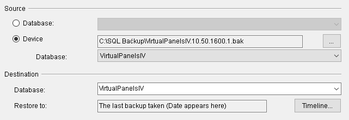
6. Under Source select Device - select the "..." button on the right.
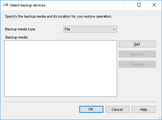
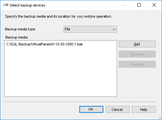
7. Select the Add button.
8. Use the file tree to navigate to C:\SQL Backup - expand the folder.
9. Select a database file (double click on file).
10. Click on the OK button at the bottom of the window - all the file information will be generated in the fields.
11. Click on the OK button on the backup devices menu.
12. Restore database page will load.
    a. Source - shows the database file location that was selected.
    b. Destination - ensure the correct Database is selected in the Database field.
13. Under the Restore Plan heading ensure the Restore box is checked next to the file selected in step 9.
14. Select OK button at the bottom of the window.
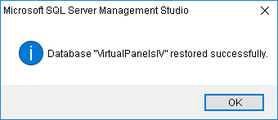
15. A successfully restored window will appear, select the OK button.
16. Repeat steps 5 to 15.
Step by Step Guides
Backup Databases - VT3000 Core Software


