Difference between revisions of "VT3000 Shifts/Schedules"
Jump to navigation
Jump to search
SupportAdmin (talk | contribs) |
SupportAdmin (talk | contribs) |
||
| Line 1: | Line 1: | ||
= | {|style="margin:auto; width: 800px; background:#eaf3ff; padding:5px; border:2px solid #000000;" | ||
Schedules are used to setup the shift times for the plant or facility. Schedules are necessary for selecting when a specific output is to be activated as well as running reports or viewing specific panel data. | |- | ||
|<big>'''Overview'''</big> | |||
=Basic Functionality - Schedule= | {|style="margin:left; width: 800px; background:#F0F0F0; padding:5px; border:2px solid #000000;" | ||
|valign="top" | | |||
|- | |||
File:Shift1.png|'''Add Schedule''' – select to Add a Schedule. | |Schedules are used to setup the shift times for the plant or facility. Schedules are necessary for selecting when a specific output is to be activated as well as running reports or viewing specific panel data. | ||
|} | |||
File:Shift3.png|'''Delete Schedule''' - select to Remove a selected Schedule. | |} | ||
<br> | |||
< | ---- | ||
<br> | |||
{|style="margin:left; width: 800px; background:#eaf3ff; padding:5px; border:2px solid #000000;" | |||
= | |- | ||
After selecting to Add or Edit a Schedule, the Schedule Properties page will load. | |<big>'''Basic Functionality'''</big> | ||
{|style="margin:left; width: 800px; background:#F0F0F0; padding:5px; border:2px solid #000000;" | |||
|valign="top" | | |||
File:Shifts5.png | |- | ||
|Overview of how to Add, Edit, Delete or Augment a Schedule. | |||
{|style="margin:left;" | |||
|valign="top" | | |||
''' | {|class="wikitable" style="background:white; align:center; width:775px;" | ||
|- | |||
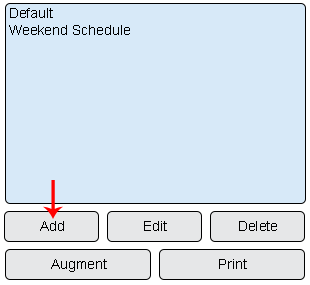
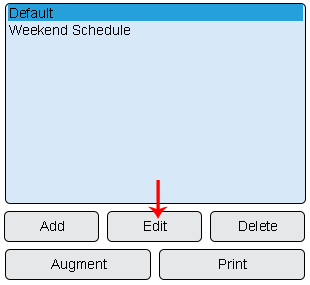
''' | |[[File:Shift1.png|center|310px]] || [[File:Shift2.png|center|310px]] | ||
|- | |||
''' | |'''Add Schedule''' – select to Add a Schedule. || '''Edit Schedule''' – select to Edit a selected Schedule. | ||
|} | |||
''' | {|class="wikitable" style="background:white; align:center; width:775px;" | ||
|- | |||
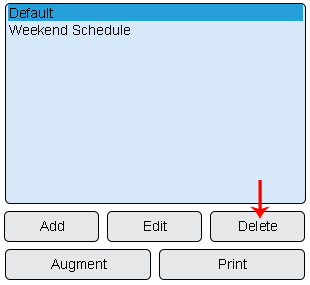
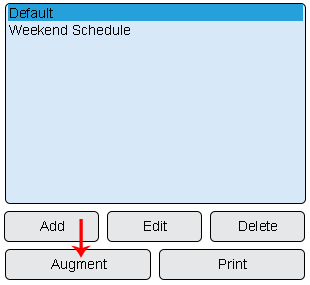
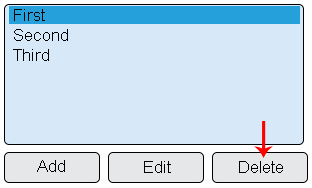
''' | |[[File:Shift3.png|center|310px]] || [[File:Shift4.png|center|310px]] | ||
|- | |||
|'''Delete Schedule''' - select to Remove a selected Schedule. || '''Augment Schedule''' - select to Change a selected Schedule for a specific day(s). | |||
= | |} | ||
Once a Schedule has been created the individual shifts that make it up | |} | ||
|} | |||
=== | |} | ||
<br> | |||
---- | |||
File:Shift6.png|'''Shifts''' | <br> | ||
{|style="margin:left; width: 800px; background:#eaf3ff; padding:5px; border:2px solid #000000;" | |||
|- | |||
File:Shift7.png|'''Add Shift''' – select to | |<big>'''Schedule Properties'''</big> | ||
{|style="margin:left; width: 800px; background:#F0F0F0; padding:5px; border:2px solid #000000;" | |||
|valign="top" | | |||
|- | |||
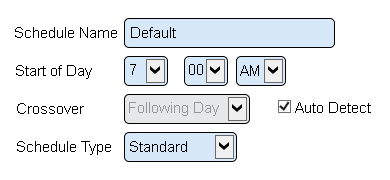
|After selecting to Add or Edit a Schedule, the Schedule Properties page will load. | |||
{|style="margin:left;" | |||
== | |valign="top" | | ||
{|class="wikitable" style="background:white; align:center; width:775px;" | |||
|- | |||
|[[File:Shifts5.png|center|390px]] | |||
File: | |- | ||
|'''Schedule Name''' – enter a name for the schedule. | |||
|- | |||
|'''Start of Day''' – use the down arrow to set the time the day begins. | |||
''' | |- | ||
|'''Crossover''' – refers to shifts that cross midnight into another day. | |||
|- | |||
|'''Auto Detect''' – VT3000 will handle crossover – suggested method. | |||
|- | |||
|'''Schedule Type''' – Standard is one schedule for all days. Rotating is a schedule for each day of the year. | |||
|} | |||
|} | |||
|} | |||
|} | |||
<br> | |||
---- | |||
<br> | |||
{|style="margin:left; width: 800px; background:#eaf3ff; padding:5px; border:2px solid #000000;" | |||
|- | |||
|<big>'''Shift List Properties'''</big> | |||
{|style="margin:left; width: 800px; background:#F0F0F0; padding:5px; border:2px solid #000000;" | |||
|valign="top" | | |||
''' | |- | ||
|Once a Schedule has been created the individual shifts that make it up need to be setup. | |||
{|style="margin:left;" | |||
|valign="top" | | |||
Schedule/Shift Augmentation is used when a specific day differs from all other days. Example - Monday is a holiday, the shifts would need to be disabled for that day. | {|class="wikitable" style="background:white; align:center; width:775px;" | ||
|- | |||
|[[File:Shift6.png|center|201px]] | |||
File:Shift10.png | |- | ||
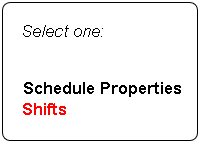
|'''Shifts''' - select the Shifts option under the Schedule Properties to access Shift setup | |||
|} | |||
{|class="wikitable" style="background:white; align:center; width:775px;" | |||
Select the | |- | ||
|[[File:Shift7.png|center|310px]] || [[File:Shift8.png|center|312px]] | |||
|- | |||
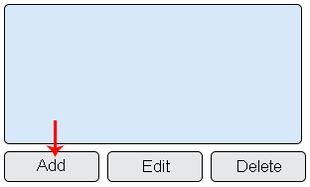
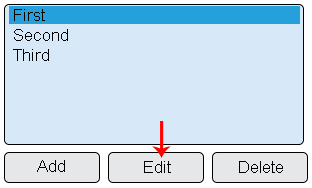
File:Shift11.png | |'''Add Shift''' – select the Add button to add a Shift to the Schedule. || '''Edit Shift''' - select the shift that you want to edit - select the Edit button. | ||
|} | |||
{|class="wikitable" style="background:white; align:center; width:775px;" | |||
|- | |||
''' | |[[File:Shift9A.png|center|312px]] | ||
|- | |||
''' | |'''Delete Shift''' - select the Shift that you want to remove - select the Delete button. | ||
|} | |||
''' | |} | ||
|} | |||
|} | |||
<br> | |||
---- | |||
<br> | |||
{|style="margin:left; width: 800px; background:#eaf3ff; padding:5px; border:2px solid #000000;" | |||
|- | |||
|<big>'''Augmentation Properties'''</big> | |||
{|style="margin:left; width: 800px; background:#F0F0F0; padding:5px; border:2px solid #000000;" | |||
|valign="top" | | |||
|- | |||
|Schedule/Shift Augmentation is used when a specific day differs from all other days. Example - Monday is a holiday, the shifts would need to be disabled for that day. | |||
{|style="margin:left;" | |||
|valign="top" | | |||
{|class="wikitable" style="background:white; align:center; width:775px;" | |||
|- | |||
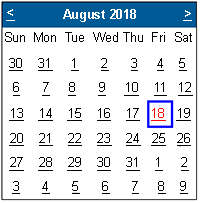
|[[File:Shift10.png|center|200px]] | |||
|- | |||
|Select the day on the calendar that you need to alter/change. | |||
|} | |||
{|class="wikitable" style="background:white; align:center; width:775px;" | |||
|- | |||
|[[File:Shift11.png|center|300px]] | |||
|- | |||
|'''Select Shift''' - select the shift that needs to be changed. If all shifts need to be changed you will need to select them individually. | |||
|- | |||
|'''Default''' – this options means that you want the system to use the shift/schedule that is currently setup (not changes). | |||
|- | |||
|'''Disabled''' - this option means that you are not working this shift(s). Generally used for a holiday. | |||
|- | |||
|'''Custom''' – this option allows you to change the shift start & end time and the break start & end time. | |||
|} | |||
|} | |||
|} | |||
|} | |||
<br> | <br> | ||
---- | ---- | ||
Revision as of 21:58, 16 March 2022
Overview
|
Basic Functionality
|
Schedule Properties
|
Shift List Properties
|
Augmentation Properties
|
|
|
|
|
|
| ||
