Difference between revisions of "VT3000 - Install MP3 Audio Module"
Jump to navigation
Jump to search
SupportAdmin (talk | contribs) |
SupportAdmin (talk | contribs) |
||
| Line 15: | Line 15: | ||
==Instructions== | ==Instructions== | ||
<span style="color:#0000FF">'''Select <u>EXPAND</u> to view an Animated Graphic for the step.'''</span> | |||
{| role="presentation" class="wikitable mw-collapsible mw-collapsed" | |||
File:InstallMP31.gif | |<big>'''Step 1:''' Mount Module within 6 feet of electrical outlet.</big> | ||
</ | |- | ||
| <em>[[File:InstallMP31.gif|border|400px]]</em> | |||
|} | |||
{| role="presentation" class="wikitable mw-collapsible mw-collapsed" | |||
|<big>'''Step 2:''' Mount speaker mount within 6 feet of an electrical outlet and within 6 feet of the IO Module.</big> | |||
|- | |||
| <em>[[File:InstallMP37.gif|border|400px]]</em> | |||
|} | |||
{| role="presentation" class="wikitable mw-collapsible mw-collapsed" | |||
|<big>'''Step 3:''' On the backside of the Speaker, plug in the female end of the power cord.</big> | |||
|- | |||
| <em>[[File:InstallMP33.gif|border|400px]]</em> | |||
|} | |||
{| role="presentation" class="wikitable mw-collapsible mw-collapsed" | |||
File: | |<big>'''Step 4:''' On the backside of the Speaker, plug in the audio connector from the IO Module.</big> | ||
</ | |- | ||
| <em>[[File:InstallMP34.gif|border|400px]]</em> | |||
|} | |||
{| role="presentation" class="wikitable mw-collapsible mw-collapsed" | |||
|<big>'''Step 5:''' Plug the 3 prong connector (Speaker Power Cord) into the female connection on the IO Module. Plug the 3 prong connector on the IO module into an electrical outlet.</big> | |||
|- | |||
| <em>[[File:InstallMP38.gif|border|400px]]</em> | |||
|} | |||
{| role="presentation" class="wikitable mw-collapsible mw-collapsed" | |||
|<big>'''Step 6:''' Plug the power cord from the IO module into an electrical outlet.</big> | |||
|- | |||
| <em>[[File:InstallMP36.gif|border|400px]]</em> | |||
|} | |||
{| role="presentation" class="wikitable mw-collapsible mw-collapsed" | |||
File: | |<big>'''Step 7:''' Note the Mesh Address on the IO Module.</big> | ||
</ | |- | ||
| <em>[[File:Install_Tone2.gif|border|400px]]</em> | |||
|} | |||
{| role="presentation" class="wikitable mw-collapsible mw-collapsed" | |||
File: | |<big>'''Step 8:''' Open VT3000 Core Software go to Diagnostics - Device Status.</big> | ||
</ | |- | ||
| <em>[[File:Install_PSM7.gif|border|400px]]</em> | |||
|} | |||
{| role="presentation" class="wikitable mw-collapsible mw-collapsed" | |||
|<big>'''Step 9:''' Find the Audio Device Mesh Address in the Address field - select Options link on the right.</big> | |||
|- | |||
| <em>[[File:Install_PSM8.gif|border|400px]]</em> | |||
|} | |||
{| role="presentation" class="wikitable mw-collapsible mw-collapsed" | |||
|<big>'''Step 10:''' Select a Device Configuration from the New Configuration field - select Update Configuration button.</big> | |||
|- | |||
| <em>[[File:ConfigMaster1.gif|border|400px]]</em> | |||
|} | |||
< | |||
< | |||
File: | |||
</ | |||
Revision as of 21:57, 7 November 2018
Overview
If you have purchased a new MP3 Audio Module for your existing system please follow the steps below. If this is a new system, please ensure that you have the control unit installed with the coordinator operating normally.
Unpack
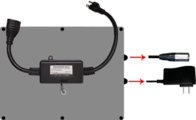
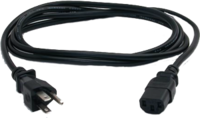
You will have the following components after unpacking:
Instructions
Select EXPAND to view an Animated Graphic for the step.
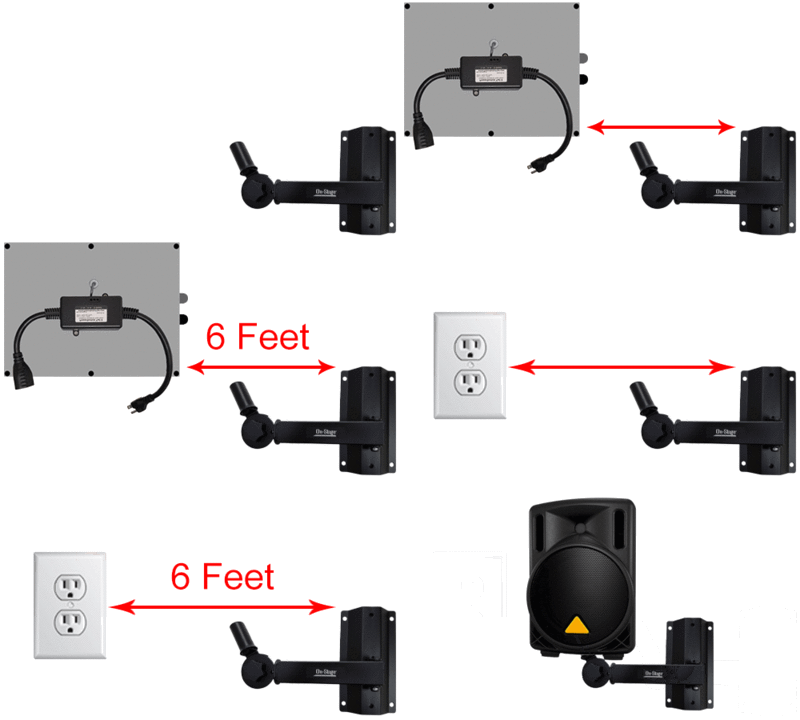
| Step 1: Mount Module within 6 feet of electrical outlet. |

|
| Step 2: Mount speaker mount within 6 feet of an electrical outlet and within 6 feet of the IO Module. |
|
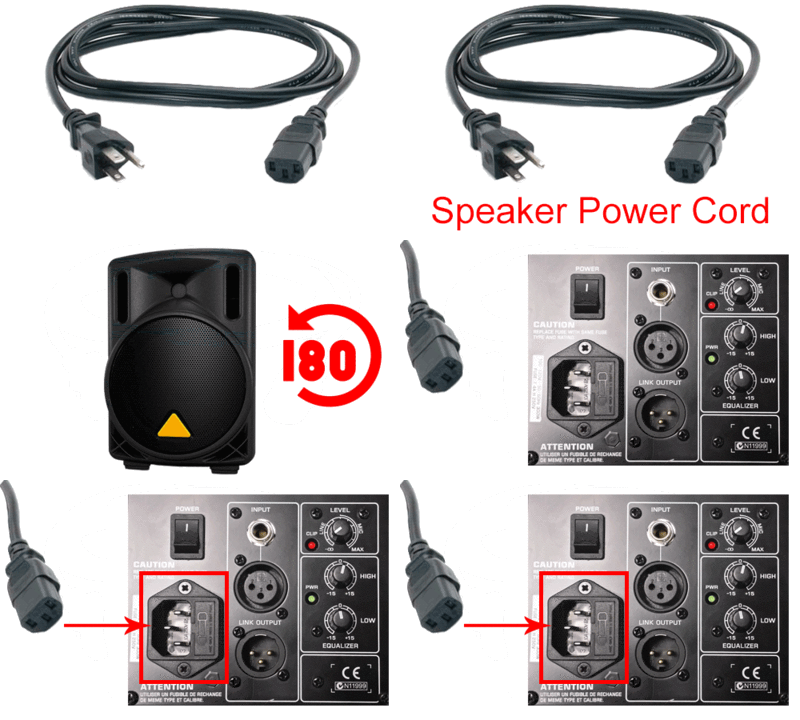
| Step 3: On the backside of the Speaker, plug in the female end of the power cord. |
|
| Step 4: On the backside of the Speaker, plug in the audio connector from the IO Module. |
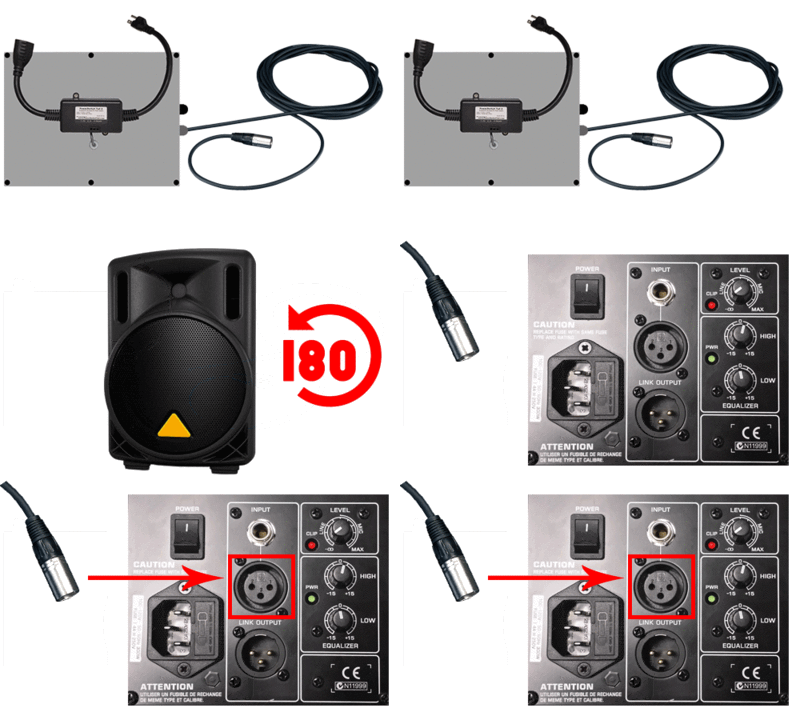
|
| Step 5: Plug the 3 prong connector (Speaker Power Cord) into the female connection on the IO Module. Plug the 3 prong connector on the IO module into an electrical outlet. |
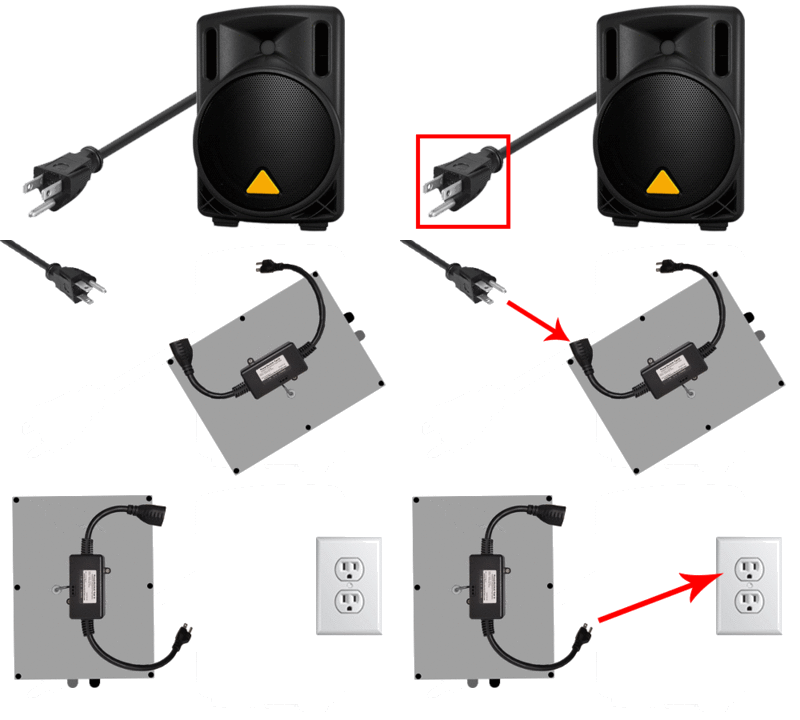
|
| Step 6: Plug the power cord from the IO module into an electrical outlet. |
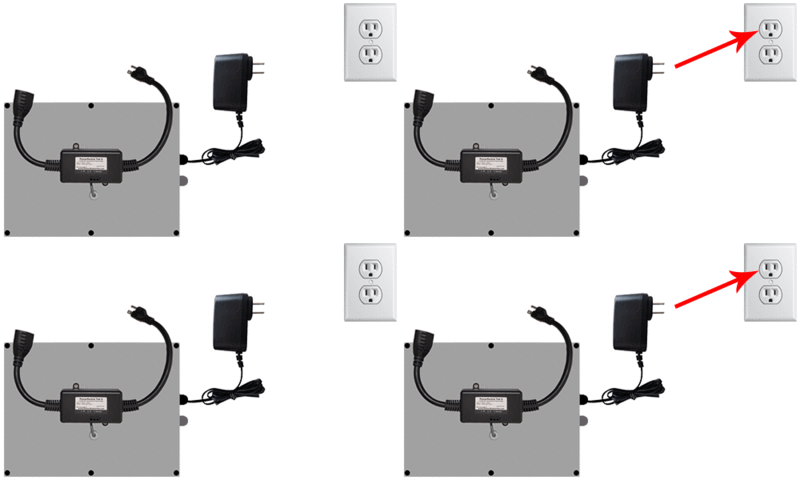
|
| Step 7: Note the Mesh Address on the IO Module. |
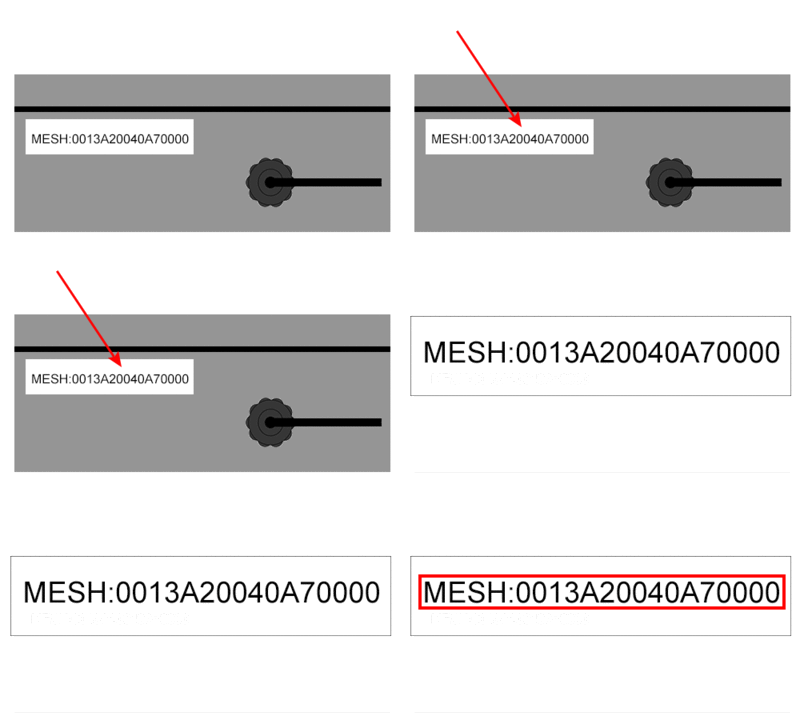
|
| Step 8: Open VT3000 Core Software go to Diagnostics - Device Status. |

|
| Step 9: Find the Audio Device Mesh Address in the Address field - select Options link on the right. |
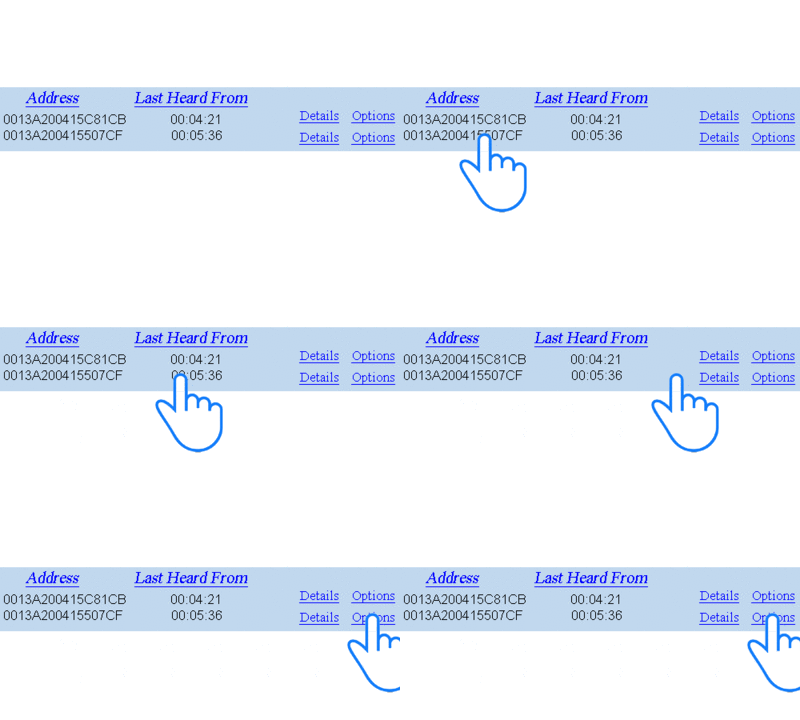
|
| Step 10: Select a Device Configuration from the New Configuration field - select Update Configuration button. |
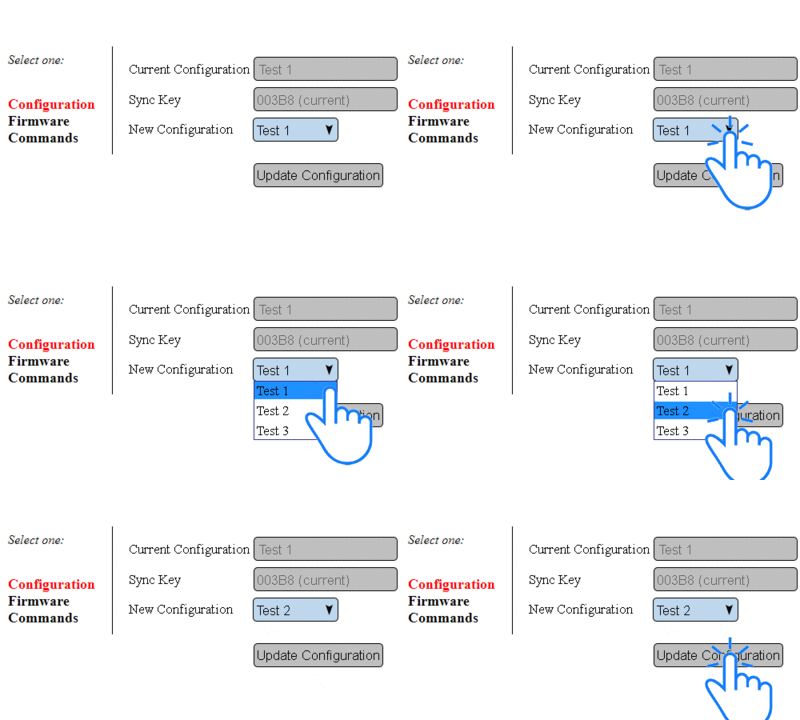
|
Step by Step Guides
Click Here for a guide on adding and updating a configuration for an MP3 Audio Module.
