VT3000 - Install Paging Transmitter - Remote - Different Subnet
This guide will show how to configure a remote paging transmitter that is on a different subnet than the VersaCall computer/server. For this method, you must have the IP address of the port that the RS232 device is plugged into – consult your IT department for this information. They may need to trace the device using the MAC address, this is printed on a label attached to the bottom of the RS-232 device. You will also need an IP address that you can use as a Static IP address for this device.
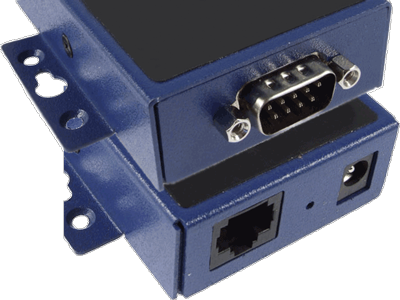
1. First connect the RS232-Over-Ethernet device (VESP211-232) by plugging it in to the Ethernet port, setup by IT, and connecting the power.
2. Open a web browser (IE, Firefox or Chrome) – in a new tab type in the IP address for the port the RS232 device in plugged into or the IP address that was obtained by tracing the MAC address.
3. A login page will show – leave the Password field blank – click on the Login button.
4. The first option will be to enter a name for the device – enter any name that will help you identify it in the future – click on the Next button.
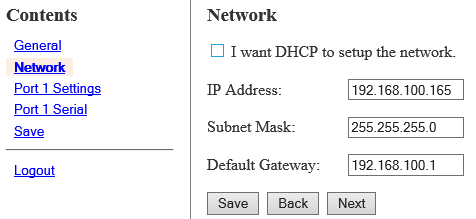
5. The next option allows you to setup a static IP address for the RS232 device. Enter in the information provided by your IT department – click on the Next button.
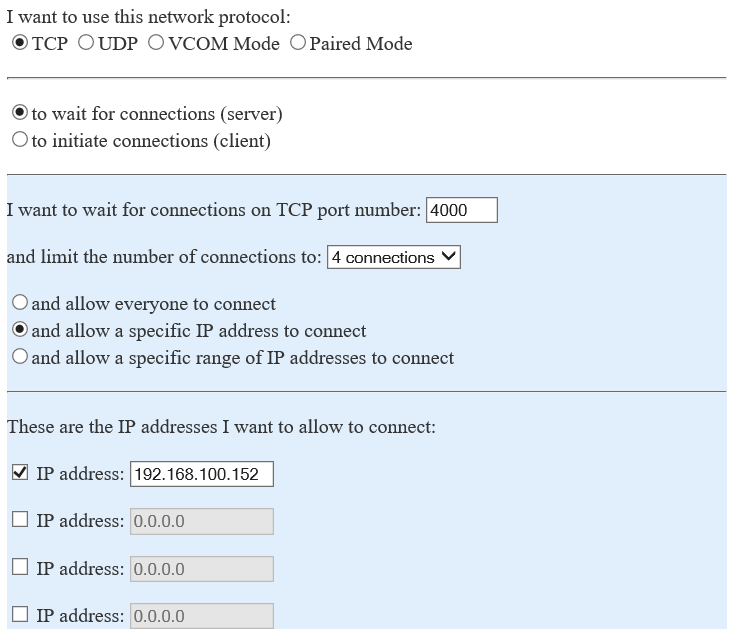
6. The next option is for setting up the type of Port connection that will be used.
    a. Network Protocol – select TCP – select “to wait for connections”.
    b. Port Number – enter 4000.
    c. Limit – select 4 connections from the drop down list.
    d. IP Address – enter the IP address of the VersaCall computer.
Click on the Advanced button when all settings have been entered.
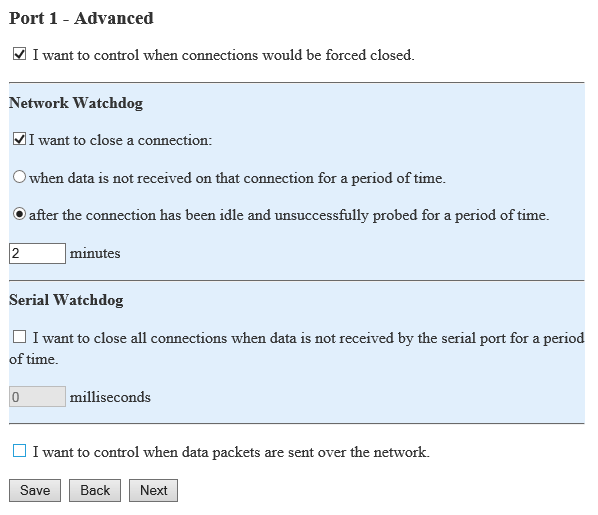
7. The Advanced Port settings page will load.
    a. Advanced – click in the box next to “I want to control when connections would be forced to close” to place a check mark in it.
    b. Network – click in the box next to “I want to close a connection” to place a check mark in it.
         i. Select “after the connection ……” and enter 2 in the field for minutes.
    c. Serial – uncheck the box and leave the milliseconds field blank.
    d. Data Packets – do not select the option to control data packets.
Once all the settings have been entered click on the Next button.
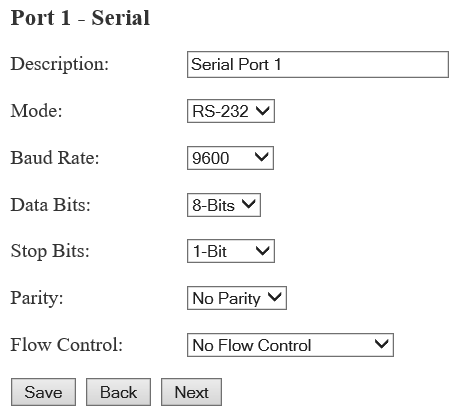
8. The Port 1 – Serial option will load:
    a. Description – enter Serial Port 1
    b. Mode – select RS-232
    c. Baud Rate – select 9600
    d. Data Bits – select 8-Bits
    e. Stop Bits – select 1-Bit
    f. Parity – select No Parity
    g. Flow Control – select No Flow Control
Once all fields have been addressed click on the Next button.
9. The final option is to Save the changes that have been made – click on the Save button.
10. The paging transmitter cable will have two different connectors. One is an RJ 12 connector (looks like an analog phone connector), this one gets plugged into the port on the paging transmitter. The other connector is a serial connection; this gets plugged into the RS232 device. Once all the connections have been made plug in the power cable and connect it to a power outlet.
11. Go to the VersaCall home page – click on the VT3000 Core Software button – sign in with your user name and password.
12. From the home page select Administration – System Settings – Service.
13. On the Service Settings page select the Paging Transmitter tab – click on the add or “+” icon.
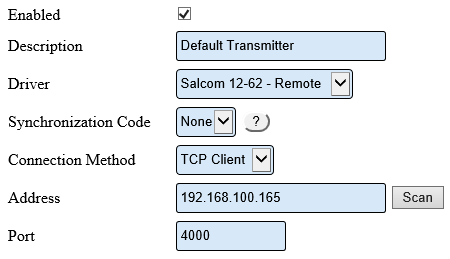
14. A settings window will show for the new paging transmitter.
    a. Enabled – click on the box to place a check mark – this will enable the device.
    b. Description – enter any name for the transmitter.
    c. Driver – select the Salcom 12-62 - Remote driver from the list.
    d. Synchronization Code – if installing multiple transmitters, use the different codes.
    e. Connection Method – select TCP Client from the list.
    f. Address – enter the Static IP address that you entered in Step 5.
    g. Port – enter 4000.
15. Click on the Save & Exit button in the top right corner of the screen.
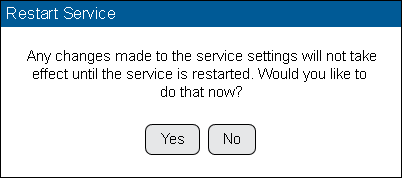
16. A screen will appear telling the user they need to restart the VersaCall service in order to commit the changes that were made – click on the Yes button. If this is not done, the system will not communicate with the device.
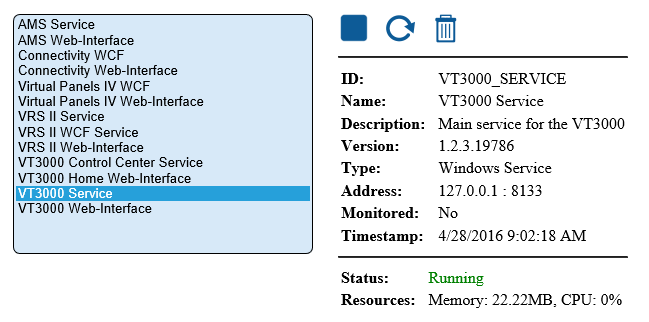
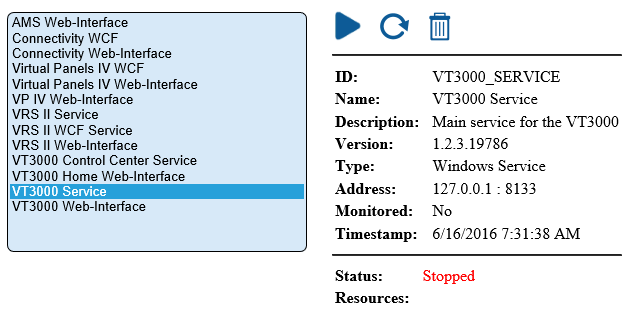
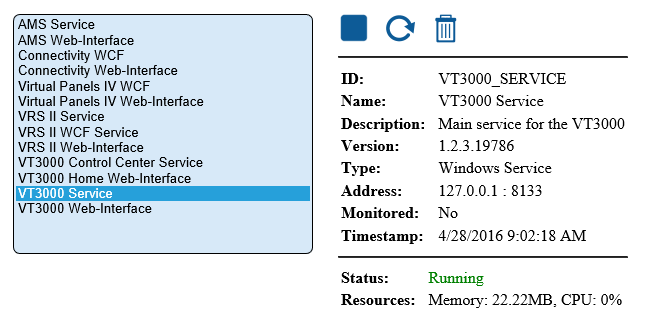
17. The Control Center page will load – the VT3000 Service will already be highlighted in the list – click on the Stop button (blue square icon).
18. The page will refresh and show the Status as Stopped – the Stop button will be replaced by the Start button (blue triangle icon). Click on the Start button.
19. The page will refresh show the Status as Started along with the Stop button replacing the Start button.
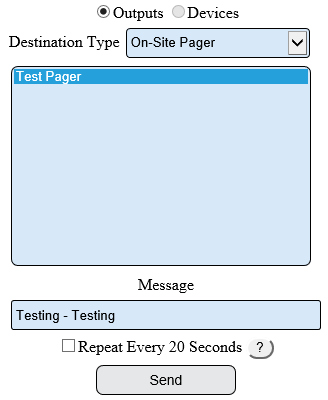
20. Now you will need to test the paging transmitter – ensure you have a pager to test with that has been added to the VT3000 software in Outputs. From the home page select Communications.
21. On the communications page select the following:
    a. Type – Outputs
    b. Destination Type – On-Site Pager
    c. Pager List – select the pager that you have to test with on the list.
    d. Message – enter a test message to go out to the pager.
    e. Repeat – leave the box unchecked for testing the initial setup.
Once all options have been entered click on the Send button.
22. The process of sending and receiving the text over a remote transmitter can take up to 10 seconds. After that time period you should get the test message on the pager.
This concludes the How To – if you are experiencing any difficulties or if the paging transmitter is not working please contact VersaCall service.
