VT3000 - Install Mini PC
Revision as of 21:35, 31 October 2018 by SupportAdmin (talk | contribs)
Overview
All New Systems come with a computer or control unit that contains the VersaCall software. The instructions below are for a Mini Control Unit, if this is the type of system you have purchased please proceed with the steps below.
Unpack
You will have the following components after unpacking:
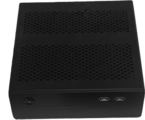
Mini Computer
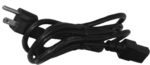
Power Cord (Part 1)

Power Cord (Part 2)


Instructions
Select Expand to view the video for the step.
| 1. Attach a Monitor (not included) to the Control Unit using the DVI or HDMI port. |

|
| 2. Attach a Keyboard & Mouse (not included) to the Control Unit using the USB or PS/2 ports. |

|
| 3. If the unit is going on your network, attach an ethernet cable to the ethernet port. |

|
| 4. Plug the Power Adapter into the power port. Connect the Power Adapter to Power Cord. |

|
| 5. Press the Power Button (front). |

|
| 6. After the computer boots - select "Your Company Name" as the user - select the Chrome icon from Windows Desktop. |

|
| 7. Type "localhost" in the address bar - select VT3000 button on welcome page. |

|
| 8. Enter "admin" for User Name & Password - select Login button.. |

|
Step by Step Guides
Click Here for a guide on IT Considerations.
Click Here for a guide on Pre-Requisites for software installation.
Click Here for a guide on setting a Static IP Address on a control unit.
Click Here for a guide on setting up Remote Desktop before logging into the VC server.
Having Trouble?

Submit a Service Ticket