VT3000 - Install - Pre-Requisites
Overview
Before installing the VersaCall software, there are some settings that need to be changed/configured in Windows. The VersaCall software uses SQL Databases so you will need to install SQL Server. Our software is compatible with any version of SQL Server 2008 R2 and above. You will need to update your Windows operating system completely before proceeding with the steps below.
Requirements
1. Permissions on the computer/server to edit Windows Components.
Instructions - Enabling Windows Features
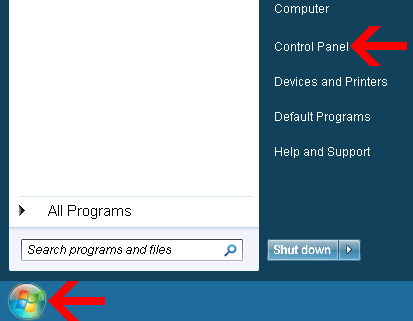
1. Select the Windows Start button – select Control Panel from the menu.
2. Select the Programs & Features icon.
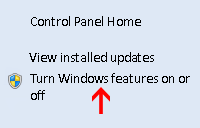
3. Select the “Turn Windows Features On or Off” link.
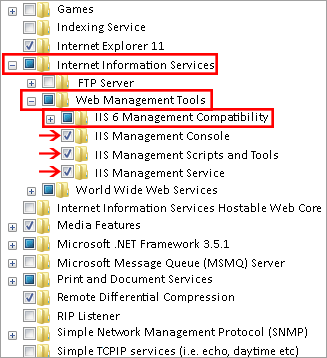
4. Select the plus sign for Internet Information Services – select the plus sign for Web Management Tools – select the plus sign for IIS 6 Management Compatibility – check all boxes shown in the image below. Collapse the section by selecting the minus sign for Web Management Tools.
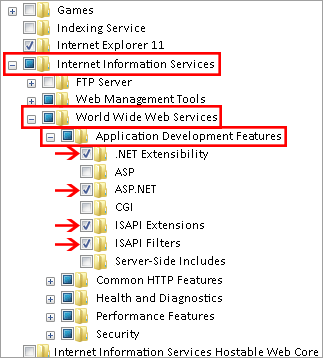
5. Select the plus sign for World Wide Web Services – select the plus sign for Application Development Features – check all boxes shown in the image below.
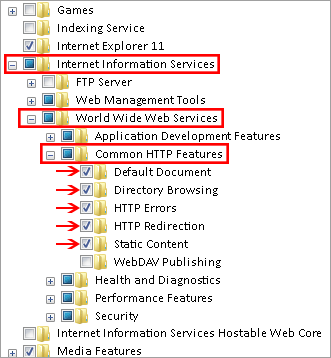
6. Select the plus sign for World Wide Web Services – select the plus sign for Common HTTP Features – check all boxes shown in the image below.
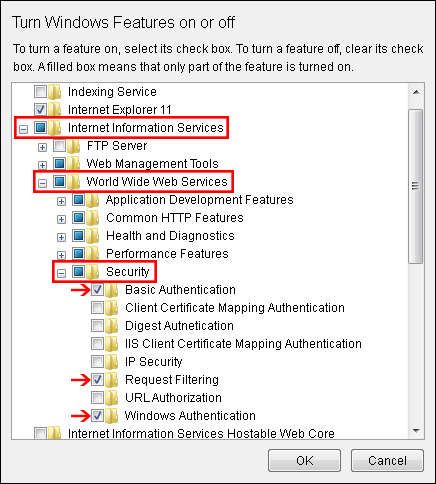
7. Select the plus sign for World Wide Web Services – select the plus sign for Security – check all boxes shown in the image below.
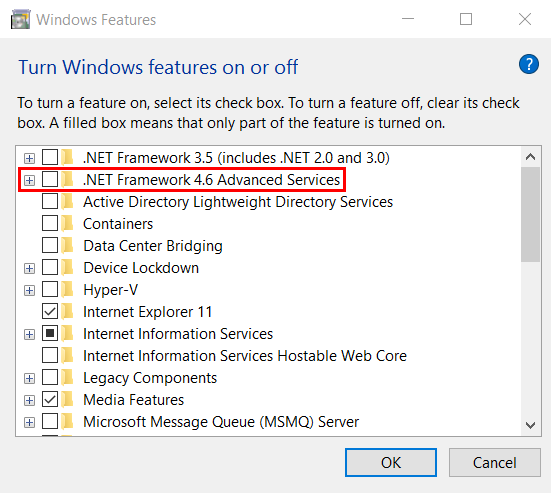
8. Select the plus sign for the .NET Framework 4.0 (or above) Advanced Services option
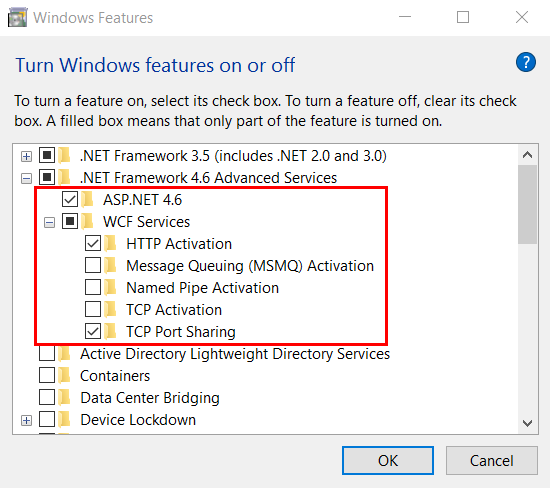
9. Select the plus sign for WCF Services, check all the boxes show in the the example below.
10. Select the OK button at the bottom of the page. A confirmation screen, may appear, stating the same changes will be made to earlier versions of .NET - select to Allow this. A window will show displaying the progress of the services - allow this to complete then close all open windows.
Instructions - IIS Configuration
The steps below are shown on a Windows 7 operating system, but the steps are the same for Windows 8, Windows 10 & Server 2012 or above.
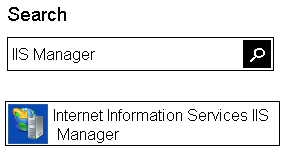
1. Select the Windows Start button – type IIS in the search field (use Cortana on Windows 10) – select Internet Information Services IIS Manager.
2. Expand computer (generally the name of the computer) – select Application Pools.
3. In the middle of the page a list of applications will generate – select DefaultAppPool so that it is highlighted.
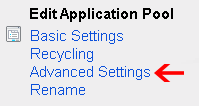
4. On the right side of the page select Advanced Settings under the Edit Application Pool heading.
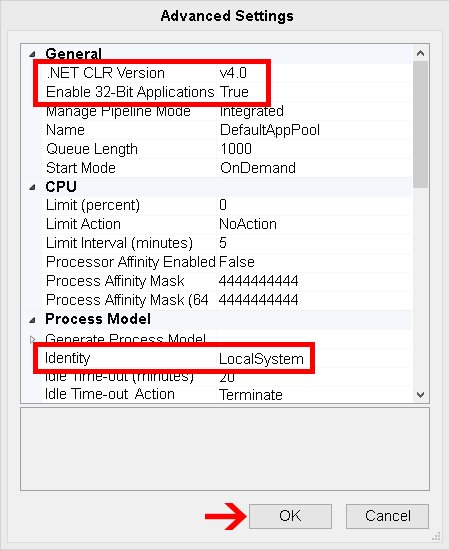
5. On the Advanced Settings window make changes as shown in the image below:
    General Section
         A. .NET Framework Version – set to v4.0
         B. Enable 32-Bit Applications – set to True
    Process Model Section
         C. Identity – set to LocalSystem
6. Select the OK button at the bottom of the Advanced Settings window - close all open window.
7. Next you will need to either install SQL Server or Add databases and a login to an existing SQL Server Instance. Please use one of the links in Step by Step Guides below for the situation that fits your needs.
