VRS - Edit a Saved Report

From Versacall Support
Jump to navigation Jump to search
Call Now 858-677-6766 SubmitTckBtn.png EmailUsBtn.png


GeneralHeader.png

Overview
A Saved Report is created to reduce the number of Steps a user has to go through to create a report. All Saved Reports will show as icons on the VRS II home page. Once a Saved Report has been created it can be edited or updated.


Requirements
See Requirements Here
1. The VT3000 Core Software installed and running on your system.
2. The VersaCall Reporting Software II (VRSII) installed and running on your system.
3. At least 1 Saved Report created and saved in the system.


InstructionHeader.png

Step 1.
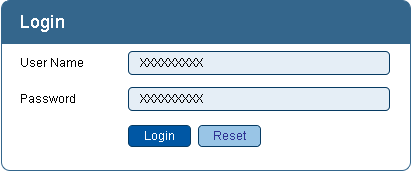
Open the VT3000 web interface – select VRS II – log in with your username and password.
UpTemp3.png
UpTemp4.png


Step 2.
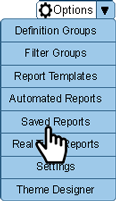
On the VRS II home page select the down arrow on the Options field in the top right corner of the screen - select Saved Reports from the list.
EditSave1.png


Step 3.
When the Saved Reports page loads, you will see a list of all the reports on the system. Each column provides a piece of information about the Saved report.
EditSave2.png
Report Name - the name assigned to the Saved report when it was created.
Template/Variant - report template selected and the variant selected for the template.
Owner - if permission to the report is limited, the group allowed to run the report will show here. Unavailable will show as default when NO Group has been assigned.
Date Offset - the offset selected when the Saved report was created.
Actions - the Edit and Delete icons will show here.


Step 4.
Select the Pencil icon button in the Actions section inline with the Saved Report you want to edit.
EditSave3.png


Step 5.
IMPORTANT: After changing any Step or Property you MUST select the Next button on each proceeding step or property, even if you do not make any changes, until you reach the Properties page.
Once you are on the Properties page select the Save & Exit button to save your change(s). Failure to follow the process can result in changes not being saved.
EditReal8.png
Use the Prev button to go back through all the steps or properties.
Use the Next button to go forward through all the steps until you reach the Properties page.
EditReal9.png
Use the Save & Exit button to save any changes you made to the Steps or Properties.
Use the Discard & Exit button to NOT save any changes you made to the Steps or Properties.


Step 6.
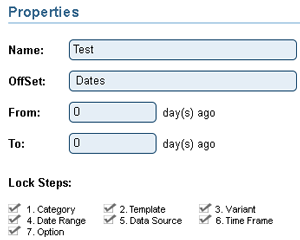
After selecting the Edit icon, the Properties page will load automatically. This will be your starting point to editing the Saved Report.
EditSave4.png


Step 7.
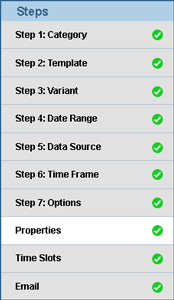
To easily access a specific Step you need to change, click on the step in the list on the left. This can only be used for selecting the First/Initial Step that needs to be changed.
EditAuto5.png


Step. 8
After you make changes to the First/Initial Step, use the Next or Prev button to navigate through the remaining Steps & Properties.
EditReal8.png


Step. 9
Once you reach the Properties Slots page, make any changes that need to be made to the Properties.
EditSave4.png


Step. 10
Select the Save & Exit button to save your changes. If you do not want to save your changes, select the Discard & Exit button.
EditReal9.png


Step. 11
You will be returned to the Saved Reports page. Any changes that were made on the report in regards to the Name, Template, Variant, or Date Offset will be reflected.
In our example we changed the Offset to run the report going back 2 days.
EditSave6.png


RelatedHowTos.png
Select a Guide Here
Create/Add a Saved Report
Remove/Delete a Saved Report


SearchHeader.png


VC Footer.png
Follow Us On LinkedIn View our Blog