Difference between revisions of "VT3000 - Add User"
Jump to navigation
Jump to search
SupportAdmin (talk | contribs) |
SupportAdmin (talk | contribs) |
||
| Line 7: | Line 7: | ||
'''1.''' Open the VT3000 web interface – log in – select Administration – select Users. | '''1.''' Open the VT3000 web interface – log in – select Administration – select Users. | ||
<gallery widths=93 heights=93> | |||
File:3114_1.png|Administration | |||
File:3114_2.png|Users | |||
</gallery> | |||
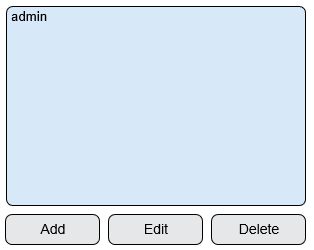
'''2.''' Select the Add button below the Users list. | '''2.''' Select the Add button below the Users list. | ||
<gallery widths=314 heights=250> | |||
File:3114_3.png | |||
</gallery> | |||
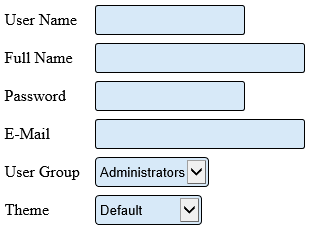
'''3.''' User - Properties: | '''3.''' User - Properties: | ||
<gallery widths=311 heights=229> | |||
File:3114_4.png | |||
</gallery> | |||
'''a. User Name''' – enter the name for the username for the user. | '''a. User Name''' – enter the name for the username for the user. | ||
| Line 30: | Line 36: | ||
'''4.''' After all the information has been filled in click on the Save & Exit button to save the user or the Discard & Exit button to remove all changes. | '''4.''' After all the information has been filled in click on the Save & Exit button to save the user or the Discard & Exit button to remove all changes. | ||
<gallery widths=238 heights=41> | |||
File:3114_5.png | |||
</gallery> | |||
Revision as of 14:59, 22 August 2018
Overview
New Users for the VT3000 software will require a username and password. The user will also need to be assigned to a group, ensure all user groups have been setup. See VT3000 - Add User Group
Instructions
1. Open the VT3000 web interface – log in – select Administration – select Users.
2. Select the Add button below the Users list.
3. User - Properties:
    a. User Name – enter the name for the username for the user.
    b. Full Name – enter the full name of the user.
    c. Password – enter a password for the user.
    d. Email – enter an email address for the user (optional).
    e. User Group – select the group this user should belong to.
    f. Theme – select Default or High Contrast.
4. After all the information has been filled in click on the Save & Exit button to save the user or the Discard & Exit button to remove all changes.
Step by Step Guides


