Difference between revisions of "VRS - Create an Equipment Timeline Report"
SupportAdmin (talk | contribs) |
SupportAdmin (talk | contribs) |
||
| Line 6: | Line 6: | ||
---- | ---- | ||
{|style="margin:left;" | |||
=Overview | |valign="top" | | ||
This report gives you the production, in minutes of events, along production run. For this template, a definition group for Downtime, Idle, Production, and Setup, must be created prior to running this report. [[VRS Definition Groups|Click Here]] for information regarding definition groups. | {|class="wikitable" style="background:#eaf3ff;" | ||
|- | |||
!style="text-align: left;"|<big>'''Overview'''</big> | |||
=Requirements | |- | ||
|This report gives you the production, in minutes of events, along production run. For this template, a definition group for Downtime, Idle, Production, and Setup, must be created prior to running this report. [[VRS Definition Groups|Click Here]] for information regarding definition groups. | |||
'''1.''' | |} | ||
|} | |||
''' | {|style="margin:left;" | ||
|valign="top" | | |||
''' | {|class="wikitable mw-collapsible mw-collapsed" style="background:#eaf3ff; width: 800px;" | ||
!style="text-align: left;"|<big>'''Requirements'''</big> | |||
|- | |||
|'''1.''' The VT3000 Core Software installed and running on your system. | |||
|- | |||
|'''2.''' The VersaCall Reporting Software II installed and running on your system. | |||
|- | |||
|'''3.''' The Equipment Timeline Report template loaded in the VRS II Software. | |||
|- | |||
|'''4.''' Correct Definition Group setup for your devices. | |||
|} | |||
|} | |||
=Instructions= | =Instructions= | ||
| Line 71: | Line 81: | ||
'''8. Summary''' - A selected options will show from the previous steps. Select the Run button if all selections are correct. | '''8. Summary''' - A selected options will show from the previous steps. Select the Run button if all selections are correct. | ||
---- | |||
---- | |||
{|style="margin: auto; background:#eaf3ff; border:1px solid #2a4b8d" | |||
=Step by Step Guides | |valign="top" | | ||
{| class="article-table mw-collapsible mw-collapsed" width="400px" data-expandtext="▼" data-collapsetext="▲" | |||
[[VRS | !<span style="font-size:150%; color:#0645ad;">Related - Step by Step Guides</span> | ||
|- | |||
[[VRS - | |[[VRS - Create an Availability Report|Run an Availability Report]] | ||
|- | |||
[[VRS - Create a | |[[VRS - Create an OEE Report|Run an OEE Report]] | ||
|- | |||
[[VRS - Create an | |[[VRS - Create a Performance Cycle Time Report|Run a Performance Cycle Time Report]] | ||
|- | |||
[[VRS - Create | |[[VRS - Create a Performance Rate Report|Run a Performance Rate Report]] | ||
|- | |||
[[ | |[[VRS - Create a Quality Report|Run a Quality Report]] | ||
|- | |||
[[ | |[[VRS - Create an Output Bar Chart Report|Run an Output Bar Chart Report]] | ||
|- | |||
|[[VRS - Create an Output Trend Report|Run an Output Trend Report]] | |||
|- | |||
= | |[[VRS - Create a Performance Output Report|Run a Performance Output Report]] | ||
|- | |||
< | |[[VRS - Create a Scrap by Reason Code Report|Run a Scrap by Reason Code Report]] | ||
|} | |||
</ | |valign="top" | | ||
{| class="article-table mw-collapsible mw-collapsed" width="400px" data-expandtext="▼" data-collapsetext="▲" | |||
!<span style="font-size:150%; color:#0645ad">Additional Help</span> | |||
|- | |||
|'''Submit a Ticket''' - https://www.versacall.com/customer-support/service-ticket | |||
|- | |||
|'''Training Videos''' - https://www.versacall.com/training | |||
|} | |||
|- | |||
|colspan="2"|<inputbox> | |||
type=search | |||
default=Search VersaCall Support | |||
</inputbox> | |||
|} | |||
Revision as of 13:58, 8 September 2021
|
|
Instructions
Below are the options shown when creating an Equipment Timeline report. Visit the New Report page Click Here for more information on any individual step.
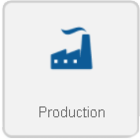
1. Select Category - Production. Click on the thumbnail for more information.
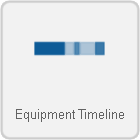
2. Select a Template - Equipment Timeline. Click on the thumbnail for more information.
3. Select a Variant - There are multiple variants and each template has a specific number of variants. Click on the thumbnail for more information.
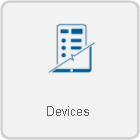
Show Data by Device
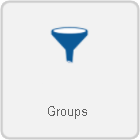
Show Data by Group
4. Select the Date Range - Choose which date(s) you want the report to cover.
Dates - Only supports a range of 1 day.
5. Select a Data Source(s) - Select the definition group that was created for this report.
Definition Groups - Select a definition group to be applied.
6. Time Frame - Select what time(s) to include.
    Full Day - Provides information for a specific schedule (start time to end time).
    Shifts - Provides information of a specific shift(s) as defined by the schedule.
    Specified - Provides information for a specific time frame defined in the fields provided.
7. Options - The following will be available.
    Report Title - Title on top of the generated report.
    Zoom On Action - Yes will remove large blocks on non-allocated time at the beginning and end of the day .
    Minimum Duration - Exclude events with a duration (minutes) shorter than the time specified.
    Template Theme -  Select a color theme for chart series if you have saved one.
8. Summary - A selected options will show from the previous steps. Select the Run button if all selections are correct.
| ||||