VT3000 - Add Indicators (PSM)
Overview
Indicators are small icons that display on the top row of a PSM touch screen. These indicators can be configured in a number of different ways. This guide will show how to turn an indicator on based on the state of an alarm. To complete this guide you must have a PSM along with AMS software installed and licensed.
Instructions
Indicator Setup
1. Open the VT3000 web interface – log in - select Configuration – select Devices.
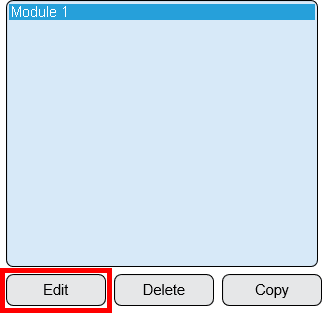
2. Existing PSM - select the PSM from the list - select the Edit button.
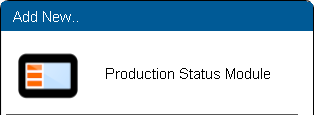
3. New PSM - select the Product Status Module icon under the Add New menu.
4. Select the Virtual Indicators tab.
5. Icons in the Indicator Tool Box.
6. Select to Add an Indicator.
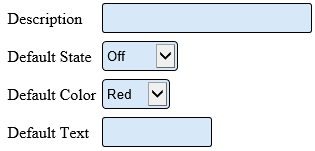
7. Indicator Properties:
    a. Description – text will show below the indicator icon on the PSM.
    b. Default State – select what the indicator will do when nothing has occurred.
         i. Off – indicator will show with no color.
         ii. On – indicator will show with the color selected.
         iii. Blinking – indicator will blink.
         iv. Hidden – indicator will not show on the PSM.
    c. Default Color – select the colort the indicator will be on the PSM.
    d. Default Text – text will show inside the indicator icon when it is not hidden.
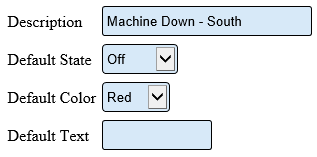
8. For our example, we will be showing a machine down alarm from another device. The indicator will be off when the alarm is cleared snd will show as Red when the alarm is set.
9. Select the Save & Exit button.
Indicator Conditions
A trigger in AMS must be created to turn the indicator on or off.
1. Open the AMS web interface – select Triggers.
2. Select Monitor button.
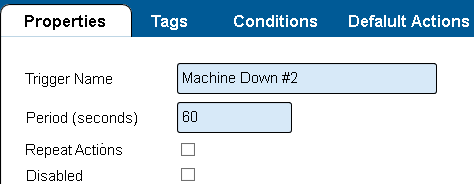
3. Trigger Properties:
    a. Trigger Name - enter a name for the tigger.
    b. Period (seconds) - enter a time, in seconds, before the trigger repeats - 60 for this example.
    c. Repeat Actions - leave box unmarked.
    d. Disabled - leave box unmarked.
13. Select the Tags tab.
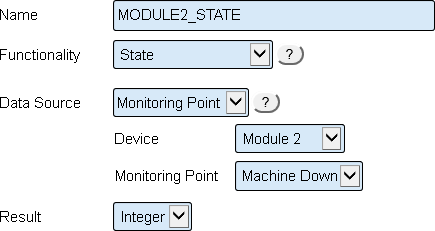
14. Trigger - Tags:
    a. Name - enter a name for the tag.
    b. Functionality - select State.
    c. Data Source - select Monitoring Point.
    d. Device - select the device with the machine down alarm.
    e. Monitoring Point - select the Machine Down alarm.
    d. Result - select Integer.
15. Select the Conditions tab - select the Plus icon from the conditions tool box.
16. Trigger - Conditions
    a. Field 1 - enter the name of the tag created using a tilde symbol first.
    b. Operator - select the less greater than symbol.
    c. Field 2 - enter the number zero.
    d. Action - click on the Add Action button.
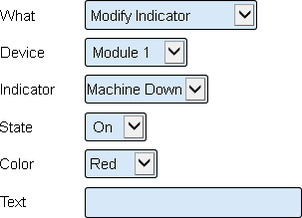
17. Trigger - Action
    a. What -  select Modify Indicator.
    b. Device - select the device that the indicators were added to in Step 6.
    c. Indicator - select the indicator.
    d. State - select On.
    e. Color - select Red.
    f. Text - leave the field blank.
18. Click on the Plus button in the Conditions tool box.
19. Trigger - Conditions
    a. Field 1 - enter the name of the tag created using a tilde symbol first.
    b. Operator - select the equals symbol.
    c. Field 2 - enter the number zero.
    d. Action - click on the Add Action button.
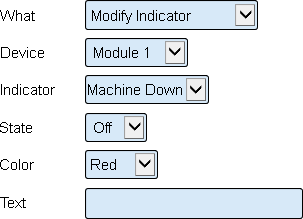
20. Trigger - Action
    a. What -  select Modify Indicator.
    b. Device - select the device that the indicators were added to in Step 6.
    c. Indicator - select the indicator.
    d. State - select Off.
    e. Color - select Red.
    f. Text - leave the field blank.
21. Click on the Save & Exit button.
NOTE: The triggers that have been setup look at the state of the Machine Down alarm on Module 2 and show the results of that state on Module 1 indicators. If the alarm is active the indicator is red. If the alarm is not active the indicator is greyed out.
Update The Device
1. Click Here for instructions.
2. Once the update is complete, the indicator(s) will appear on the touch screen.
Testing the Setup
1. Activate the Machine Down alarm on Module 2 (for this example). The indicator light on Module 1 (PSM) will now show as red.
2. Deactivate the Machine Down alarm on Module 2 – the indicator light on Module 1 will now be unlit.
Step by Step Guides


