VT3000 - Attach/Wire a Light Stack to a Call Station
Wiring a Light Stack
A light stack can be added to certain devices after the original purchase/installation. Specific wires must be attached to specific outputs on the circuit board. There are 2 types of boards installed in VersaCall devices.
Call Station, Assembly Call Station & Takt Time Module
All of these devices use the same circuit board. The directions below will work of any of those devices.
1. Unplug the power source of the device.
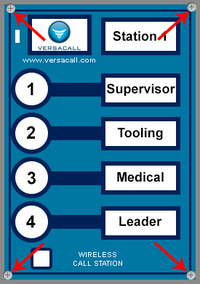
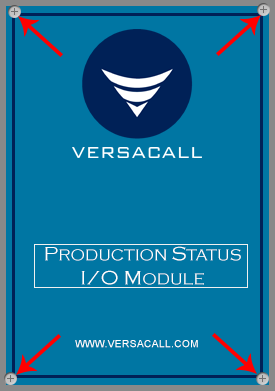
2. Loosen the 4 screws on each corner of the device.
3. Remove the front cover from the back. The circuit board is attached to the front cover.
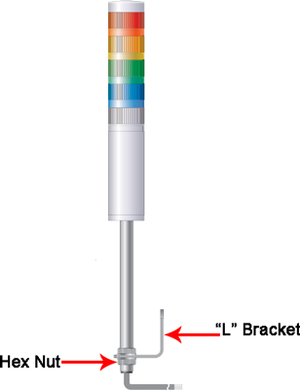
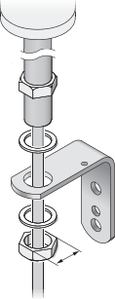
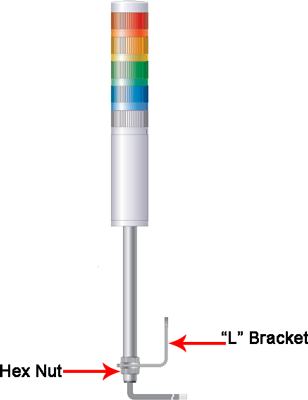
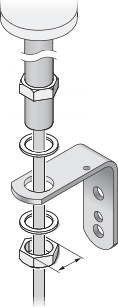
4. You will need to drill a hole in the box if the boxes were not sent to VersaCall for drilling. Remove the hex nut from the light stack pole and insert the end into the box/hole. Attach and tighten the hex nut onto the pole.
5. The wires coming out of the pole an into the box are different colors. Below is a list of colors and what the wire represents to the light stack.
    a. Yellow - Power wire to the light stack.
    b. Red - Connected to the Red light.
    c. Orange - Connected to the Amber light.
    d. Blue - Connected to the Blue light.
    e. White - Connected to the White light.
    f. Green - Connected to the Green light.
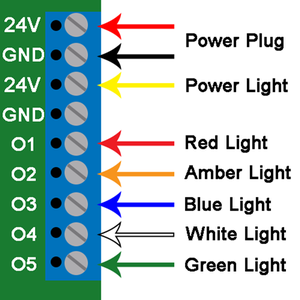
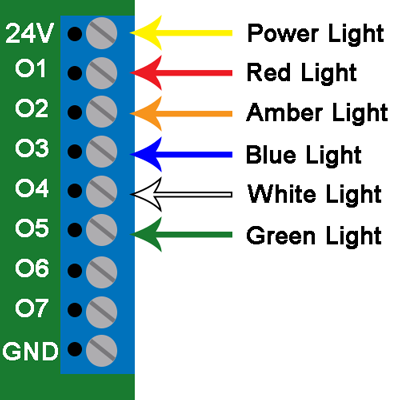
6. Each wire will need to be connected to the output bar at the top of the circuit board. To connect the wire, insert it into the hole on the from of the output bar and tighten the screw on top of the bar. Below is a chart on where each wire should be inserted. If your light stack has a different order than the standard (Red, Amber, Blue, White, Green) feel free to arrange the wires on any output you wish except Yellow, it must be connected to 24V.
    a. Yellow Wire - connect to the 24V output.
    b. Red Wire - connect to the O1 output.
    c. Amber Wire - connect to the O2 output.
    d. Blue Wire - connect to the O3 output.
    e. White Wire - connect to the O4 output.
    f. Green Wire - connect to the O5 output.
7. Wrap the excess light stack wire to fit inside the Call Station box. Attach the front plate to the back plate and tighten the 4 screws from Step 2.
8. Plug in power to the device and test the module.
BSC I/O, TIM I/O, PSM I/O & Wireless Controls Module
The I/O module for all touch screen modules, the wireless controls module and the switch contact module all have the same circuit board. The instructions below will explain how to wire a stack light to this type of circuit board.
1. Unplug the power source of the device.
2. Loosen the 4 screws on each corner of the device.
3. Remove the front cover from the back. The circuit board is attached to the back cover.
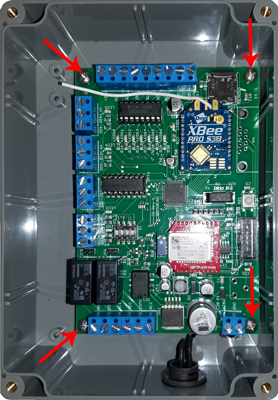
4. You will need to drill a hole in the box if the boxes were not sent to VersaCall for drilling. Remove the circuit board from the box before you begin drilling holes in the box. Remove the 4 screws from each corner of the circuit board.
5. Remove the hex nut from the light stack pole and insert the end into the box/hole. Attach and tighten the hex nut onto the pole.
6. The wires coming out of the pole an into the box are different colors. Below is a list of colors and what the wire represents to the light stack.
    a. Yellow - Power wire to the light stack.
    b. Red - Connected to the Red light.
    c. Orange - Connected to the Amber light.
    d. Blue - Connected to the Blue light.
    e. White - Connected to the White light.
    f. Green - Connected to the Green light.
6. Each wire will need to be connected to the output bar at the top of the circuit board. To connect the wire, insert it into the hole on the from of the output bar and tighten the screw on top of the bar. Below is a chart on where each wire should be inserted. If your light stack has a different order than the standard (Red, Amber, Blue, White, Green) feel free to arrange the wires on any output you wish except Yellow, it must be connected to 24V.
    a. Yellow Wire - connect to the 24V output.
    b. Red Wire - connect to the O1 output.
    c. Amber Wire - connect to the O2 output.
    d. Blue Wire - connect to the O3 output.
    e. White Wire - connect to the O4 output.
    f. Green Wire - connect to the O5 output.
7. Wrap the excess light stack wire to fit inside the I/O box. Attach the front plate to the back plate and tighten the 4 screws from Step 2.
8. Plug in power to the device and test the module.
Step by Step Guides
Install a Wireless Lights Module
Setup Using Lights on a Wireless Device(s)
Add/Setup an Add-On Stack Light
