VPIV - Create an Informative Grid Panel

From Versacall Support
Jump to navigation Jump to search
Call Now 858-677-6766 SubmitTckBtn.png EmailUsBtn.png


GeneralHeader.png

Overview
An Informative Grid Panel/Widget will allow the user to show an image(s) or text. These panels/widgets are most commonly used to display information on the plant floor. Examples would be Safety Message, Holiday Message or Company Photo. There are many different uses for the Informative Panel/Widget, this is one example.
NOTE - The instructions below apply to both a Panel & a Widget. Both are created exactly the same.


Requirements
See Requirements Here
1. The VT3000 Core Software installed and running on your system.
2. VPIV - Virtual Panels IV software installed and running on your system.
3. If you plan on showing an image on the panel, ensure you have uploaded to VPIV.


Panel Capabilities
See Requirements Here
1. Tags - Not Available.
2. Widgets - Not Available.
3. URL - Not Available
4. Real-Time Reports - Not Available


Example
Inform51.png


InstructionHeader.png

Step 1.
Open the VT3000 web interface - select VPIV button from the welcome page.
VPImage1.png


Step 2.
Select either the Panels or Widgets icon depending on which type you want to create.
VPIV Panels.png
VPIV Widgets.png


Step 3.
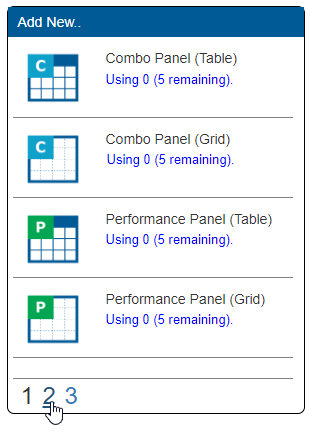
Select page 2 on the Add New menu.
Inform5.png


Step 4.
Select the Informative Grid Panel/Widget icon in the list.
Inform30.png


Step 5.
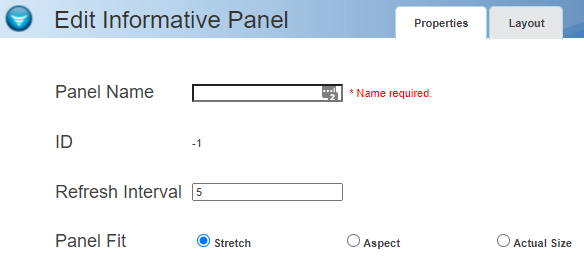
Select the Properties tab at the top of the screen.
Inform7.png


Step 6.
Enter a name for the panel/widget in the Panel/Widget Name field under the Properties tab. Leave the Refresh Interval at 5. For this example, we are not using the Panel Fit selections. If you want to know more information about the Panel fit Click Here.
Inform31.png


Step 7.
After entering a name for the Panel/Widget, select the Layout Tab at the top of the page.
Inform9.png


Step 8.
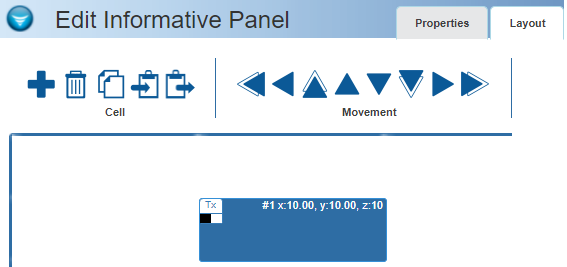
On the layout page you will see a Cell already created and selected on the Grid.
Inform32.png


Step 9.
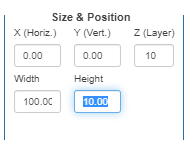
For this example we want the cell to be at the top of the screen and to extend all the way across like a title or banner. In order to do this we need to tell the cell where to position and the dimensions. At the bottom of the Grid, find the Size & Position heading. Use the settings below for this cell.
Inform33.png
X (Horiz.) - this is the left postion - set this to 0.00 to place the cell at the left edge of the panel.
Y (Vert.) - this is the top position - set this to 0.00 to place the cell at the top of the panel.
Z (Layer) - this is the layer position - leave this set to 10 as we are not using layered cells in this example.
Width - this is the width of the cell - set this to 100.00 to have the cell extend fully across the panel.
Height - this is the heighth of the cell - set this to 10.00 to have the banner take up 10% of the panel.


Step 10.
After these settings are made, the Cell will show at the top of the grid and extend across the entire grid..
Inform34.png


Step 11.
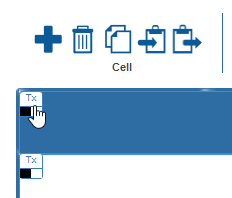
Next we will be adding an additional cell for an image to be below the banner at the top. Click on the Add (Plus) icon at the top right corner of the page.
Inform35.png


Step 12.
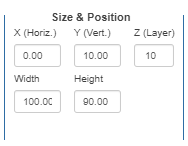
Next we need to define the size and postion of the image cell. For this example we want the image to take up the remainder of the panel below the banner. At the bottom of the grid, go to the Size & Postion section and enter the following.
Inform36.png
X (Horiz.) - this is the left postion - set this to 0.00 to place the cell at the left edge of the panel.
Y (Vert.) - this is the top position - set this to 10.00 to place the cell at the bottom of the banner cell.
Z (Layer) - this is the layer position - leave this set to 10 as we are not using layered cells in this example.
Width - this is the width of the cell - set this to 100.00 to have the cell extend fully across the panel.
Height - this is the heighth of the cell - set this to 90.00 to have the image take up the remainin 90% of the panel.


Step 13.
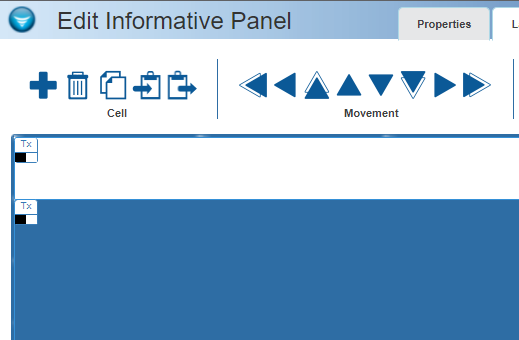
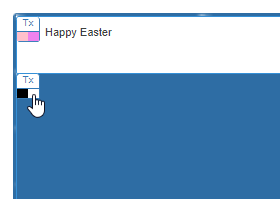
After entering the values your screen should look like the image below. Both cells extend full across the grid. The Image cell will extend to the bottom of the grid. The entire grid will be covered by Cell 1 (Banner) & Cell 2 (Image).
Inform37.png


Step 14.
Next we need to define the cells, one will be the Banner/Title and the other will be an Image. Select the Cell at the top of the grid so that it is highlighted.
Inform38.png


Step 15.
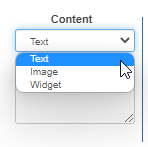
At the bottom right of the grid find the Content section. Click on the down arrow in the field - select Text.
Inform39.png


Step 16.
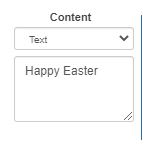
Click in the box below the Content menu. This is where you type the Message/Title for the cell. For our example we entered Happy Easter.
Inform40.png


Step 17.
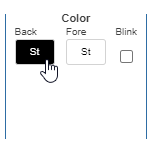
To change the colors of the banner, find the Color section next to the Content section. First we will change the Background color of the cell, click on the Back color swatch. This will be set to Black by default.
Inform41.png


Step 18.
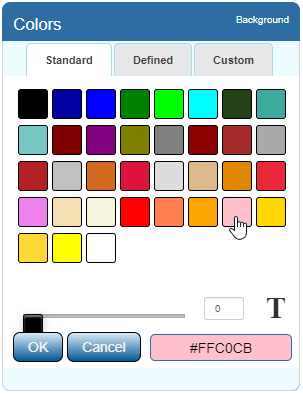
The Colors menu will pop up. Click on the Pink color swatch in the 4th row - click on the OK button once the color is selected.
Inform42.png


Step 19.
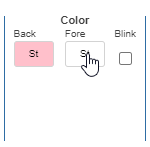
Click on the Fore color swatch. This will allow us to set the color of the Text in the Message/Title.
Inform43.png


Step 20.
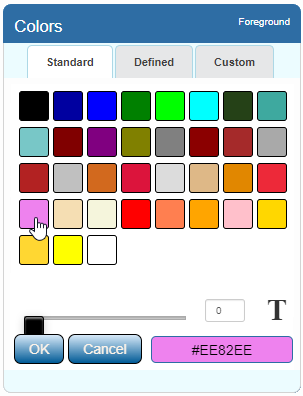
The Color menu will pop up on the screen. Select the Purple swatch in the 4th row.
Inform44.png


Step 21.
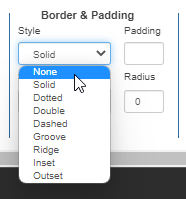
For our example, we do not want any borders on the Message/Title. Find the Border & Padding section to the right of the Color section. Click on the down arrow in the Style field. Select None from the list.
Inform45.png


Step 22.
Next we will setup Cell to to be the image for the panel. Click on Cell 2 so that it is highlighted in the Grid.
Inform46.png


Step 23.
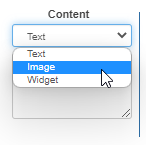
At the bottom left of the grid, find the Content section. Click on the down arrow in the Content field - select Image from the menu.
Inform47.png


Step 24.
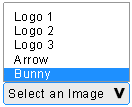
Click on the down arrow in the Select an Image field under the Content field. Select an image from the menu. For our example we will select the Bunny image.
Inform48.png


Step 25.
The background of the image we are using is White. We need to change the back ground color of the cell to match. Click on the Back color swatch under the Colors section.
Inform41.png


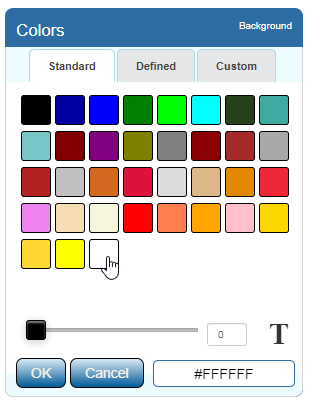
Step 26.
The Colors menu will pop up. Select the White color swatch in the last row - select the OK button once it is selected.
Inform49.png


Step 27.
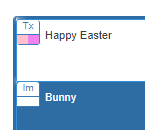
Your 2 Cells should look like the image below.
Inform50.png


Step 28.
Once you have made all the changes/edits - click on the Save & Exit button in the top right corner of the screen.
VPSaveButton1.png


RelatedHowTos.png
Select a Guide Here
Create a Rotating Panel
Create a Messaging Panel
Create an Andon (Table) Panel
Create an Andon (Grid) Panel
Create a Performance (Table) Panel


SearchHeader.png


VC Footer.png
Follow Us On LinkedIn View our Blog