VRS - Create an Automated Report

From Versacall Support
Jump to navigation Jump to search
Call Now 858-677-6766 SubmitTckBtn.png EmailUsBtn.png


GeneralHeader.png

Overview
An Automated Report is created so that it can run without any user interaction. The report will run and email the results to users. This type of report can only be setup if your system currently sends emails to users. Automated reports are delivered as either an Excel File, PDF File or JPEG File.


Requirements
See Requirements Here
1. The VT3000 Core Software installed and running on your system.
2. The VersaCall Reporting Software II (VRSII) installed and running on your system.
3. One or more Report Templates loaded in the VRS II Software.
4. Email must be enabled in the VT3000 Core Software in order to send the Automated Report out.


InstructionHeader.png

Step 1.
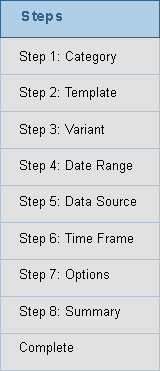
Run a report as you normally would - complete all 8 steps.
Saved22.png


Step 2.
After the report has run and it is presented in your web browser on a new browser tab. The title of the tab will be the name of the report that you selected to run.
There will be a VRS II tab immediately next to your report tab. Click on this VRS II browser tab to access the Automated report setup.
Real1.png


Step 3.
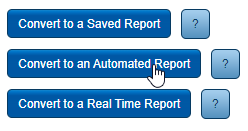
Select the Convert to an Automated Report button.
AutoReport1.png


Step 4.
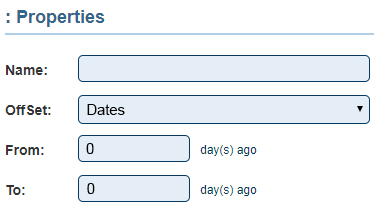
The following options are available on the Properties page:
AutoReport8.png
Name - field to enter a name for the Automated Report - this will show on the Automated Reports page.
Offset Options
Offset is used to tell the system how far to go back in time when the report is run. If the fields are left blank, the data will be current (only run for the current day & time) not historical.
Dates - allows you to setup a day range - enter the number of days to go back in the From & To field.
Weeks - allows you to setup a week range - enter the number of weeks to go back in the From & To field.
Months - allows you to setup a month range - enter the number of months to go back in the From & To field.
Years - allows you to setup a year range - enter the number of years to go back in the From & To field.


Step 5.
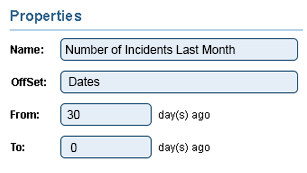
In our example below, we entered a name for the Report and setup an offset of 30 days.
AutoReport7.png


Step 6.
Once you have setup the options you require, click on the Next button in the right corner of the window.
Real3.png


Step 7.
Click on the Add Time Slots button. This will allow you to tell the system when you want the report to run. Add additional Time Slots by clicking on the Add Time Slots button after you have configured a time slot.
Real4.png


Step 8.
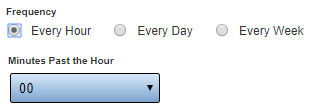
The example below shows how to setup the report to run every Hour.
Real5.png
Frequency - select Every Hour.
Minutes Past the Hour - click on the down arrow - select the minute (within the hour) to run the report.


Step 9.
The example below shows how to setup the report to run Every Day at a specific time.
Real6.png
Frequency - select Every Day.
Time - click on the Clock icon and select the time you want to run the report. Time will show in 30 minute intervals.
Days - select the day(s) you want the report to run.


Step 10.
Once all the time slots needed have been added to the report - click on the Next button in the right corner.
Real3.png


Step 11.
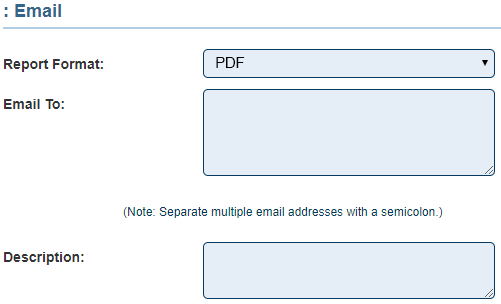
The following options are available on the Email page.
AutoReport10.png
Report Format - by default this will be set to PDF. Use the down arrow in this field to select PDF, JPEG or Excel format.
Email To - enter the email addresses of the people you want to send the report to. Separate multiple email addresses with a semicolon.
Description - enter a description for the report if needed. Not a required field.


Step 12.
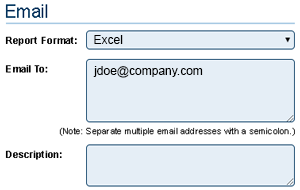
In our example, we selected Excel as the format and entered in one email recipient.
AutoReport6.png


Step 13.
Click on the Save & Exit button after completion.
Real8.png


Step 13.
The Automated Reports page will load. You will see the report that was created shown in the list.
Our example was Number of Incidents Last Month
AutoReport3.png


RelatedHowTos.png
Select a Guide Here
Edit an Automated Report
Manually Run an Automated Report
Remove/Delete an Automated Report


SearchHeader.png


VC Footer.png
Follow Us On LinkedIn View our Blog