Difference between revisions of "VT3000 - Add Email"
Jump to navigation
Jump to search
SupportAdmin (talk | contribs) |
SupportAdmin (talk | contribs) |
||
| Line 3: | Line 3: | ||
=Instructions= | |||
'''1.''' Open the VT3000 web interface – log in - select Configuration – select Outputs. | '''1.''' Open the VT3000 web interface – log in - select Configuration – select Outputs. | ||
<gallery widths=93 heights=93> | |||
File:3107_1.png | |||
File:3107_2.png | |||
</gallery> | |||
'''2.''' Select the Email icon on the Add New list. | '''2.''' Select the Email icon on the Add New list. | ||
<gallery widths=310 heights=119> | |||
File:3107_3.png | |||
</gallery> | |||
'''3.''' Email Address Properties: | '''3.''' Email Address Properties: | ||
<gallery widths=385 heights=193> | |||
File:3107_4.png | |||
</gallery> | |||
'''a. Output ID''' – assigned by VT3000 software. | '''a. Output ID''' – assigned by VT3000 software. | ||
| Line 27: | Line 33: | ||
'''4.''' Email Address Availability: | '''4.''' Email Address Availability: | ||
<gallery widths=313 heights=250> | |||
File:3107_5.png | |||
</gallery> | |||
'''a. Not Available''' – select if messages are not to be sent. | '''a. Not Available''' – select if messages are not to be sent. | ||
| Line 36: | Line 43: | ||
'''5.''' Example: | '''5.''' Example: | ||
<gallery widths=385 heights=193> | |||
File:3107_6.png | |||
</gallery> | |||
<gallery widths=313 heights=250> | |||
File:3107_7.png | |||
</gallery> | |||
'''6.''' Select Save & Exit, Save & Add New or Discard & Exit. | '''6.''' Select Save & Exit, Save & Add New or Discard & Exit. | ||
<gallery widths=543 heights=96> | |||
File:3107_8.png | |||
</gallery> | |||
Revision as of 21:00, 6 September 2018
Overview
An Email Address can be setup as an input VT3000. The SMTP server must be configured before messages can be sent. If the SMTP server has not been setup, see VT3000 - Setup - Email Server (SMTP).
Instructions
1. Open the VT3000 web interface – log in - select Configuration – select Outputs.
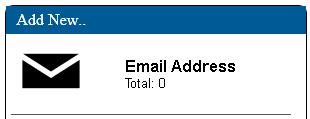
2. Select the Email icon on the Add New list.
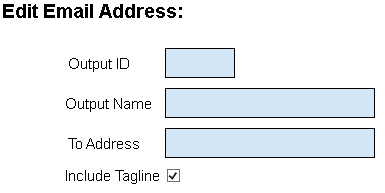
3. Email Address Properties:
    a. Output ID – assigned by VT3000 software.
    b. Output Name – enter a name.
    c. To Address – enter the email address.
    d. Include Tagline – mark to show the date and time on the message.
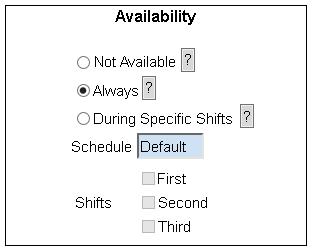
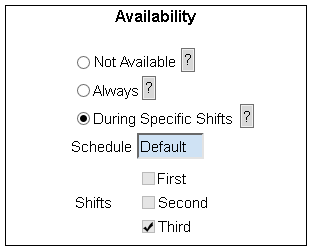
4. Email Address Availability:
    a. Not Available – select if messages are not to be sent.
    b. Always – select if messages are to be sent regardless of the day or time.
    c. During Specific Shifts – select the specific shift messages are to be sent.
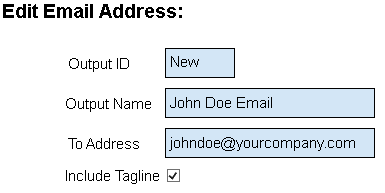
5. Example:
6. Select Save & Exit, Save & Add New or Discard & Exit.
Step by Step Guides


