Difference between revisions of "VT3000 - Install Device Plug In"
Jump to navigation
Jump to search
SupportAdmin (talk | contribs) |
SupportAdmin (talk | contribs) |
||
| Line 1: | Line 1: | ||
{|style="margin:left;" | {|style="margin:left;" | ||
|valign="top" | | |valign="top" | | ||
{|class="wikitable" style="background:#eaf3ff;" | {|class="wikitable" style="background:#eaf3ff; width:800px;" | ||
|- | |- | ||
!style="text-align: left;"|<big>'''Overview'''</big> | !style="text-align: left;"|<big>'''Overview'''</big> | ||
| Line 38: | Line 38: | ||
|'''4.''' A Product Key is needed for the PC Call Station, PC BSC & PC Input Modules. | |'''4.''' A Product Key is needed for the PC Call Station, PC BSC & PC Input Modules. | ||
|} | |} | ||
|} | |||
=Instructions= | <br> | ||
=<big>'''Instructions'''</big>= | |||
'''1.''' Open the VT3000 web interface | <br> | ||
{|style="margin:left; width: 100px; background:#eaf3ff; padding:5px; border:2px solid #000000;" | |||
|- | |||
File:icon_usergroups.png| | |<big>'''Step 1.'''</big> | ||
File:icon_plugins.png|Plug-Ins | {|style="margin:left; width: 800px; background:#F0F0F0; padding:5px; border:2px solid #000000;" | ||
< | |valign="top" | | ||
|- | |||
|Open the VT3000 web interface – select VT3000 Core Software - log in – select Administration – select Plug-Ins. | |||
'''2.''' Select the Choose Files button. | {|style="margin:left;" | ||
|valign="top" | | |||
{|class="wikitable" style="background:white; align:center;" | |||
File:plugin4.png | |- | ||
< | |[[File:icon_usergroups.png|center|100px]] || [[File:icon_plugins.png|center|100px]] | ||
|- | |||
|style="text-align:center" | '''Administration''' ||style="text-align:center" | '''Plug-Ins''' | |||
'''3.''' Navigate to the location of the Plug-In file - double click on the file. If you have a zip file, you will need to extract it first. | |} | ||
|} | |||
|} | |||
File:plugin2.png | |} | ||
< | <br> | ||
---- | |||
<br> | |||
'''4.''' Select the Upload button. | {|style="margin:left; width: 100px; background:#eaf3ff; padding:5px; border:2px solid #000000;" | ||
|- | |||
|<big>'''Step 2.'''</big> | |||
File:plugin5.png | {|style="margin:left; width: 800px; background:#F0F0F0; padding:5px; border:2px solid #000000;" | ||
< | |valign="top" | | ||
|- | |||
|Select the Choose Files button. | |||
'''5.''' New Plug-In shows in the list - the yellow icon means it is not licensed - select the gear icon. | {|style="margin:left;" | ||
|valign="top" | | |||
{|class="wikitable" style="background:white;" | |||
File:plugin6.png | |- | ||
< | |[[File:plugin4.png|center|400px]] | ||
|} | |||
|} | |||
'''6.''' Enter your Product Key in the provided field. If you do not have a Product Key please contact VersaCall. | |} | ||
|} | |||
<br> | |||
File:Plug7.png | ---- | ||
< | <br> | ||
{|style="margin:left; width: 100px; background:#eaf3ff; padding:5px; border:2px solid #000000;" | |||
|- | |||
'''7.''' Select the Save & Exit button. | |<big>'''Step 3.'''</big> | ||
{|style="margin:left; width: 800px; background:#F0F0F0; padding:5px; border:2px solid #000000;" | |||
|valign="top" | | |||
File:Plug8.png | |- | ||
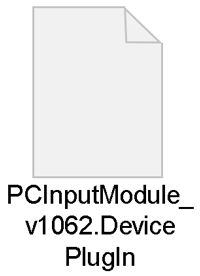
< | |Navigate to the location of the Plug-In file - double click on the file. If you have a zip file, you will need to extract it first. | ||
{|style="margin:left;" | |||
|valign="top" | | |||
'''8.''' The Plug-In will show without the yellow icon & the number of licenses purchased will be shown. | {|class="wikitable" style="background:white; align:center;" | ||
|- | |||
|[[File:plugin2.png|center|200px]] | |||
File:plugin7.png | |} | ||
< | |} | ||
|} | |||
|} | |||
<br> | |||
---- | |||
<br> | |||
{|style="margin:left; width: 100px; background:#eaf3ff; padding:5px; border:2px solid #000000;" | |||
|- | |||
|<big>'''Step 4.'''</big> | |||
{|style="margin:left; width: 800px; background:#F0F0F0; padding:5px; border:2px solid #000000;" | |||
|valign="top" | | |||
|- | |||
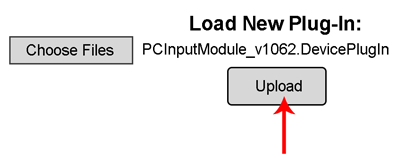
|Select the Upload button. | |||
{|style="margin:left;" | |||
|valign="top" | | |||
{|class="wikitable" style="background:white; align:center;" | |||
|- | |||
|[[File:plugin5.png|center|400px]] | |||
|} | |||
|} | |||
|} | |||
|} | |||
<br> | |||
---- | |||
<br> | |||
{|style="margin:left; width: 100px; background:#eaf3ff; padding:5px; border:2px solid #000000;" | |||
|- | |||
|<big>'''Step 5.'''</big> | |||
{|style="margin:left; width: 800px; background:#F0F0F0; padding:5px; border:2px solid #000000;" | |||
|valign="top" | | |||
|- | |||
|New Plug-In shows in the list - the yellow icon means it is not licensed - select the gear icon. | |||
{|style="margin:left;" | |||
|valign="top" | | |||
{|class="wikitable" style="background:white; align:center;" | |||
|- | |||
|[[File:plugin6.png|center|400px]] | |||
|} | |||
|} | |||
|} | |||
|} | |||
<br> | |||
---- | |||
<br> | |||
{|style="margin:left; width: 100px; background:#eaf3ff; padding:5px; border:2px solid #000000;" | |||
|- | |||
|<big>'''Step 6.'''</big> | |||
{|style="margin:left; width: 800px; background:#F0F0F0; padding:5px; border:2px solid #000000;" | |||
|valign="top" | | |||
|- | |||
|Enter your Product Key in the provided field. If you do not have a Product Key please contact VersaCall. | |||
{|style="margin:left;" | |||
|valign="top" | | |||
{|class="wikitable" style="background:white; align:center;" | |||
|- | |||
|[[File:Plug7.png|center|364px]] | |||
|} | |||
|} | |||
|} | |||
|} | |||
<br> | |||
---- | |||
<br> | |||
{|style="margin:left; width: 100px; background:#eaf3ff; padding:5px; border:2px solid #000000;" | |||
|- | |||
|<big>'''Step 7.'''</big> | |||
{|style="margin:left; width: 800px; background:#F0F0F0; padding:5px; border:2px solid #000000;" | |||
|valign="top" | | |||
|- | |||
|Select the Save & Exit button. | |||
{|style="margin:left;" | |||
|valign="top" | | |||
{|class="wikitable" style="background:white; align:center;" | |||
|- | |||
|[[File:Plug8.png|center|219px]] | |||
|} | |||
|} | |||
|} | |||
|} | |||
<br> | |||
---- | |||
<br> | |||
{|style="margin:left; width: 100px; background:#eaf3ff; padding:5px; border:2px solid #000000;" | |||
|- | |||
|<big>'''Step 8.'''</big> | |||
{|style="margin:left; width: 800px; background:#F0F0F0; padding:5px; border:2px solid #000000;" | |||
|valign="top" | | |||
|- | |||
|The Plug-In will show without the yellow icon & the number of licenses purchased will be shown. | |||
{|style="margin:left;" | |||
|valign="top" | | |||
{|class="wikitable" style="background:white; align:center;" | |||
|- | |||
|[[File:plugin7.png|center|400px]] | |||
|} | |||
|} | |||
|} | |||
|} | |||
<br> | |||
---- | ---- | ||
---- | ---- | ||
<br> | |||
{|style="margin: auto; background:#eaf3ff; border:1px solid #2a4b8d" | {|style="margin: auto; background:#eaf3ff; border:1px solid #2a4b8d" | ||
|valign="top" | | |valign="top" | | ||
| Line 133: | Line 230: | ||
</inputbox> | </inputbox> | ||
|} | |} | ||
<br> | |||
[[Category:VT3000 Core Software]] | [[Category:VT3000 Core Software]] | ||
[[Category:Administration]] | [[Category:Administration]] | ||
Revision as of 16:52, 16 December 2021
|
|
|
Instructions
Step 1.
|
Step 2.
|
Step 3.
|
Step 4.
|
Step 5.
|
Step 6.
|
Step 7.
|
Step 8.
|


