VT3000 - Add an Active Directory User (LDAP)

From Versacall Support
Jump to navigation Jump to search
Call Now 858-677-6766 SubmitTckBtn.png EmailUsBtn.png


GeneralHeader.png

Overview
The 2022 release of the VT3000 software has the added ability/function to integrate with your Active Directory. This will allow a user to log into any VersaCall application with the same credentials they use on your network. The advantage is that the user only needs 1 login as opposed to separate logins for VersaCall and your company network. Instructions below explain how to add an Active Directory User.


Requirements
See Requirements Here
1. The VT3000 Core Software installed and running on your system.
2. Active Directory User Name for any users that you want to add to VersaCall.
3. Permission to Add Users in VT3000 Core Software.


VideoHeader.png

Video


InstructionHeader.png

Step 1.
You will need to setup Users inside the VT3000 Core Software and assign those users permissions. Ensure that you have the EXACT User Name that is used in Active Directory.
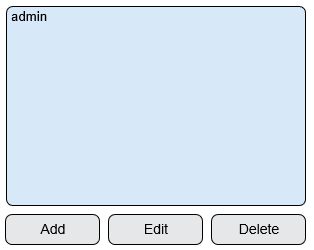
Open the VT3000 web interface – select VT3000 Core Software - log in – select Administration – select Users.
3114 1.png
3114 2.png
Administration Users


Step 2.
Select the Add button at the bottom of the Users list.
3114 3.png


Step 3.
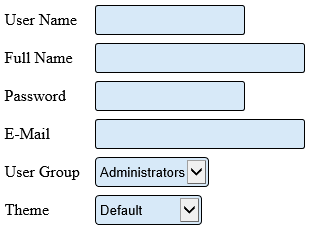
User Properties.
3114 4.png
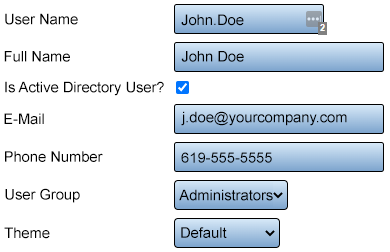
User Name - use this field to enter the EXACT same user name that appears in your Active Directory.
Full Name - this field is for reference purposes only, enter any name that fits with your configuration.
Is Active Directory User - select this box to enable the Active Directory log in credentials.
Password - this field will be removed once the Active Directory User option is selected.
E-Mail - enter the email address of the user.
Phone Number - enter the phone number of the user or you can use the main phone number for the facility
User Group - select the appropriate User Group/Permission.
Theme -


Step 4.
Below is an example of a user setup.
LDAP5.png


Step 5.
Select the Save & Exit button, in the top right corner of the page, once you have setup the user.
3180 6.png


Step 6.
The user that you setup is now able to sign into any VersaCall application using their Network/Active Directory credentials. Repeat the process to add other users.


RelatedHowTos.png
Select a Guide Here
Set up/Enable Active Directory Integration
Add a User
Add a User Group
Edit a User
Edit a User Group


SearchHeader.png


VC Footer.png
Follow Us On LinkedIn View our Blog