Difference between revisions of "VT3000 - Add a Shared List Data Field - BSC"
SupportAdmin (talk | contribs) |
SupportAdmin (talk | contribs) |
||
| Line 104: | Line 104: | ||
'''11.''' The BSC module will have to be updated before the Data Field will appear on the screen. [[VT3000_-_Update_Configuration_-_TIM,_PSM,_BSC|'''Click Here''']] for instructions on updating the module. | '''11.''' The BSC module will have to be updated before the Data Field will appear on the screen. [[VT3000_-_Update_Configuration_-_TIM,_PSM,_BSC|'''Click Here''']] for instructions on updating the module. | ||
---- | |||
=Step by Step Guides | {|style="margin:auto;" | ||
|valign="top" | | |||
[[VT3000 - Add | {| class="article-table mw-collapsible mw-collapsed" data-expandtext="▼" data-collapsetext="▲" | ||
!<span style="font-size:150%; color:#0645ad">Related - Step by Step Guides</span> | |||
[[VT3000 - Add a Key Input Data Field - BSC|Add a Data Field | |- | ||
|[[VT3000 - Add Data Field|Adding a Data Field (All Types)]] | |||
[[VT3000 - Add | |- | ||
|[[VT3000 - Add a Key Input Data Field - BSC|Add a Key Input Data Field - BSC]] | |||
|- | |||
|[[VT3000 - Add a Key Input Data Field - PSM, TIM|Add a Key Input Data Field - PSM, TIM]] | |||
[[VT3000 - Add a Static List Data Field - | |- | ||
|[[VT3000 - Add a Static List Data Field - BSC|Add a List Data Field (Static List) - BSC]] | |||
[[VT3000 - Add a | |- | ||
|[[VT3000 - Add a Static List Data Field - PSM, TIM|Add a List Data Field (Static List) - PSM, TIM]] | |||
[[VT3000 - Add a Shared List Data Field - PSM, TIM|Add a Data Field (Shared List) - PSM, TIM]] | |- | ||
|[[VT3000 - Add a Shared List Data Field - PSM, TIM|Add a List Data Field (Shared List) - PSM, TIM]] | |||
|- | |||
|[[VT3000 - Add Shared List|Create a Shared List]] | |||
= | |} | ||
|valign="top" | | |||
< | {| class="article-table mw-collapsible mw-collapsed" data-expandtext="▼" data-collapsetext="▲" | ||
!<span style="font-size:150%; color:#0645ad">Additional Help</span> | |||
</ | |- | ||
|'''Submit a Ticket''' - https://www.versacall.com/customer-support/service-ticket | |||
|- | |||
|'''Training Videos''' - https://www.versacall.com/training | |||
|} | |||
|} | |||
---- | |||
{|style="margin:auto;" | |||
|align="center" | | |||
{|class="wikitable" | |||
!<span style="font-size:150%; color:#0645ad">Search</span> | |||
|- | |||
|<inputbox>type=search</inputbox> | |||
|} | |||
---- | |||
[[Category:VT3000 Core Software]] | [[Category:VT3000 Core Software]] | ||
Revision as of 20:54, 8 June 2021
Overview
A BSC module can have Data Fields added to Alarms or Processes. This guide covers Shared Lists when selecting List as the Source Type. Shared Lists are setup in the Shared List section of Configuration in the VT3000 Core software. Using a Shared List allows multiple modules to use the same list. This helps in maintaining the system as you will only have to edit one list instead of an individual list on every device.
Requirements
1. You must have a physical BSC or PC BSC Module.
2. The BSC or PC BSC Module Plug In(s) must be loaded on the system.
3. The configuration must contain an Alarm or Process.
4. You must have a Shared List setup in the system.
Instructions
1. Open the VT3000 web interface - select VT3000 Core - log in with your username and password.
2. Select Configuration - select Devices.
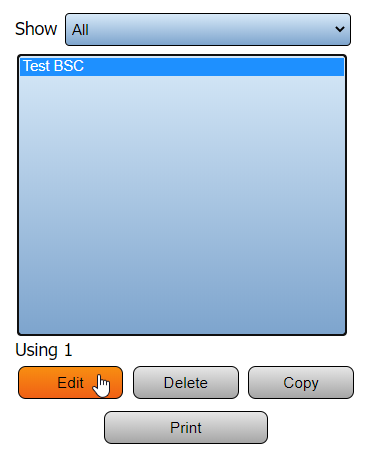
3. Select the BSC Device that you want to add the Data Field to from the list - select Edit.
4. Select the Monitoring Points tab.
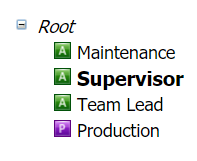
5. Select the Alarm or Process that you want to add a Data Field to from the Root Tree.
6. Select the Add Data Field icon.
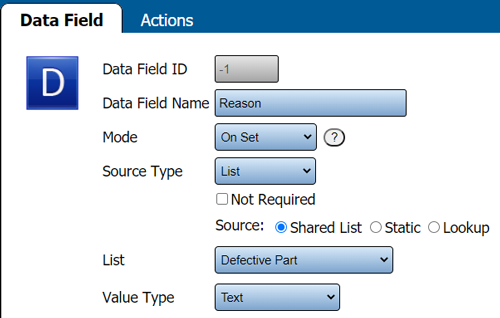
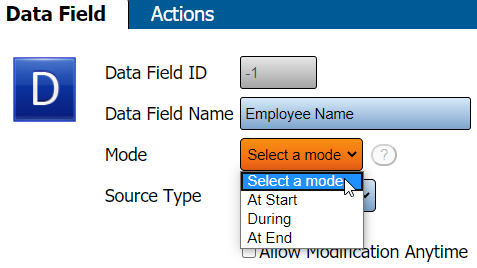
7. Each section of the setup is explained below the screen shot:
    a. Data Field Name - enter a name, this will show on the device when the field is active.
    b. Mode - select when the Data Field should be active for a selection.
         i. Processes - options will be At Start or At End.
         ii. Alarms - options will be Set, Acknowledge or Clear depending on the alarm type (Dual State or Tri State).
    c. Source Type - select List.
         i. Not Required - selecting this option means the user does not have to select anything from the list.
         i. Allow Modification Anytime - this option is not available on the BSC.
    d. Source - select Shared List.
    e. Select the Shard List from the List Field
    e. Value Type - there are two options available. Ensure the selection you make matches the items you setup for the Shared List.
         i. Text - the list items will be saved as text. Any Characters can be setup on the list items.
         ii. Numeric Integer - the list items will be saved as numbers. List items must be numbers.
         iii. Numeric Decimal - the list items will be saved as decimals. List items must be decimals.
         iv. True/False - this option is not available on a BSC.
8. When all changes are made, select Save.
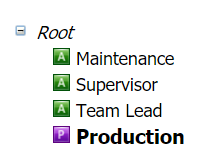
9. The steps to add a Data Field to a Process are the same. The difference is on Step 5 you will select the Process instead of an Alarm.
10. The other difference will be on the Mode. Processes have At Start, During or At End.
    a. At Start - the data field will appear when the Process is started.
    b. During - the user will have a link on the screen to access the data field at anytime after the Process is started and before it ends.
    c. At End - the data field will appear when the Process is stopped/ended.
11. The BSC module will have to be updated before the Data Field will appear on the screen. Click Here for instructions on updating the module.
|
|


