Difference between revisions of "VT3000 - Add a Data Field to a Process"
SupportAdmin (talk | contribs) |
SupportAdmin (talk | contribs) |
||
| Line 5: | Line 5: | ||
=Requirements= | =Requirements= | ||
'''1.''' VT3000 Core installed and running on the system. | '''1.''' VT3000 Core installed and running on the system. | ||
'''2.''' If you are configuring a PC BSC or PC Input Module, the Plug In must be loaded & licensed in the VT3000 Core software. | |||
'''2.''' If you are configuring a PC BSC or PC Input Module, the Plug In must be loaded & licensed in the VT3000 Core software. | '''3.''' If you are configuring a BSC or TIM, the Plug In must be loaded in the VT3000 Core software. | ||
'''3.''' If you are configuring a BSC or TIM, the Plug In must be loaded in the VT3000 Core software. | |||
| Line 131: | Line 129: | ||
File:3138_9.png | File:3138_9.png | ||
</gallery> | </gallery> | ||
---- | |||
---- | |||
{|style="margin: auto; background:#eaf3ff; border:1px solid #2a4b8d" | |||
{|style="margin:auto;" | |||
|valign="top" | | |valign="top" | | ||
{| class="article-table mw-collapsible mw-collapsed" data-expandtext="▼" data-collapsetext="▲" | {| class="article-table mw-collapsible mw-collapsed" width="400px" data-expandtext="▼" data-collapsetext="▲" | ||
!<span style="font-size:150%; color:#0645ad">Related - Step by Step Guides</span> | !<span style="font-size:150%; color:#0645ad;">Related - Step by Step Guides</span> | ||
|- | |- | ||
|[[VT3000 - Add Process|Add a Process to a Device]] | |[[VT3000 - Add Process|Add a Process to a Device]] | ||
| Line 149: | Line 149: | ||
|} | |} | ||
|valign="top" | | |valign="top" | | ||
{| class="article-table mw-collapsible mw-collapsed" data-expandtext="▼" data-collapsetext="▲" | {| class="article-table mw-collapsible mw-collapsed" width="400px" data-expandtext="▼" data-collapsetext="▲" | ||
!<span style="font-size:150%; color:#0645ad">Additional Help</span> | !<span style="font-size:150%; color:#0645ad">Additional Help</span> | ||
|- | |- | ||
| Line 156: | Line 156: | ||
|'''Training Videos''' - https://www.versacall.com/training | |'''Training Videos''' - https://www.versacall.com/training | ||
|} | |} | ||
|- | |- | ||
|<inputbox>type=search</inputbox> | |colspan="2"|<inputbox> | ||
type=search | |||
default=Search VersaCall Support | |||
</inputbox> | |||
|} | |} | ||
[[Category:VT3000 Core Software]] | [[Category:VT3000 Core Software]] | ||
Revision as of 21:53, 2 September 2021
Overview
A Process is used to record a Start and Stop time. Generally this is used to record when a station/worker is in Production or running a Job/Job Order. This guide will cover how to add a Process with a Data Field as a subordinate monitoring points. This would be used when you want to capture an additional piece of information before, during or after a Process is Started. A Process can be added to the following device types BSC, TIM, PSM, PC BSC, & PC Input Module.
Requirements
    1.  VT3000 Core installed and running on the system.
    2.  If you are configuring a PC BSC or PC Input Module, the Plug In must be loaded & licensed in the VT3000 Core software.
    3.  If you are configuring a BSC or TIM, the Plug In must be loaded in the VT3000 Core software.
Instructions
1. Open the VT3000 web interface – log in – select Configuration – select Devices.
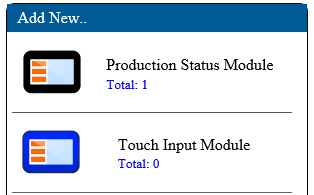
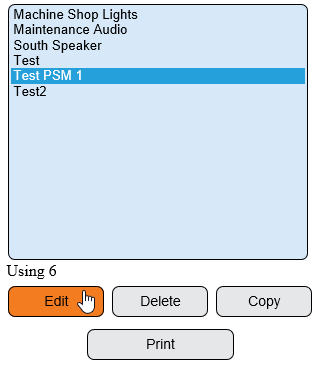
2. New - select the PSM, TIM or BSC icon under the Add New list. Existing - select a PSM, TIM or BSC from the list - select Edit.
3. Select Monitoring Points tab.
4. Select Process icon from Monitoring Points Tool box.
5. Process Properties:
    a. Process ID - assigned by VT3000 software.
    b. Process Name - enter a name for the Process.
    c. Mode - select Process.
6. Click on Root on the Monitoring Point tree.
7. You will see that the name of the Process will now show - Production is the example we are using.
8. Click on the Process that you added so that it is showing in bold type.
9. Click on the Add Data Field icon in the Monitoring Points toolbox.
10. The New Data Field will populate under the Production Process in the Monitoring Points tree.
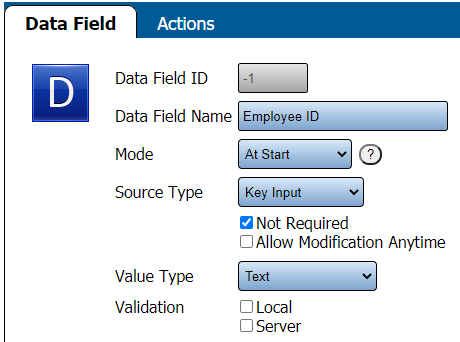
11. To the right side of the Moniroing Points tree you will see the Data Field Properties.
12. For this example we will use a Key Input to capture an Employee ID at the Start of Production. You can setup this data field in the best fit for your configuration. For assistance with other Data Field types,.
    a. Data Field Name - name of the information that you want to gather on the Process.
    b. Mode - when do you want to get the information from the user:
         i.' At Start - user will be asked to enter the information when they select to Start the Process.
         ii. During - user will be able to enter the information at any time after the Process is started & before it is ended.
         iii. At End - user will be able to enter the information when they select to Stop the Process.
    c. Source Type - type of Data Field you will be providing to the user.
    d. Options - depending on the Source Type, you can have multiple other options available. Please use the link above to get more information on Source Type and Options available.
13. Once you have setup the Data Field, click on the Root on the Monitoring Points tree.
14. You will see that the name of the Data Field will now show - Employee ID is the example we are using.
15. Select Save & Exit button to save unit/changes.
|
| |||||||||


