Difference between revisions of "VT3000 - Add Email"
Jump to navigation
Jump to search
SupportAdmin (talk | contribs) |
SupportAdmin (talk | contribs) |
||
| Line 20: | Line 20: | ||
|} | |} | ||
|} | |} | ||
<br> | |||
=Instructions= | =<big>'''Instructions'''</big>= | ||
<br> | |||
'''1.''' Open the VT3000 web interface – log in | {|style="margin:left; width: 100px; background:#eaf3ff; padding:5px; border:2px solid #000000;" | ||
|- | |||
|<big>'''Step 1.'''</big> | |||
File: | {|style="margin:left; width: 800px; background:#F0F0F0; padding:5px; border:2px solid #000000;" | ||
File:3107_2.png | |valign="top" | | ||
< | |- | ||
|Open the VT3000 web interface – log in – select Configuration – select Outputs. | |||
{|style="margin:left;" | |||
'''2.''' Select the Email icon on the Add New list. | |valign="top" | | ||
{|class="wikitable" style=" align="center; " background:white;" | |||
|- | |||
File:3107_3.png | |[[File:3110_1.png|center|93px]] || [[File:3107_2.png|center|93px]] | ||
< | |- | ||
|style="text-align:center" | '''Configuration''' ||style="text-align:center" | '''Outputs''' | |||
|} | |||
'''3.''' Email Address Properties: | |} | ||
|} | |||
|} | |||
File:3107_4.png | <br> | ||
---- | |||
<br> | |||
{|style="margin:left; width: 100px; background:#eaf3ff; padding:5px; border:2px solid #000000;" | |||
|- | |||
|<big>'''Step 2.'''</big> | |||
{|style="margin:left; width: 800px; background:#F0F0F0; padding:5px; border:2px solid #000000;" | |||
|valign="top" | | |||
'''4.''' Email Address Availability: | |- | ||
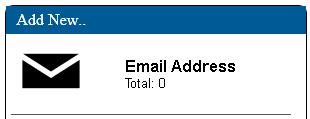
|Select the Email icon on the Add New list. | |||
{|style="margin:left;" | |||
File: | |valign="top" | | ||
{|class="wikitable" style=" align="center; " background:white;" | |||
|- | |||
|[[File:3107_3.png|center|310px]] | |||
|} | |||
|} | |||
|} | |||
'''5.''' Example: | |} | ||
<br> | |||
---- | |||
File:3107_6.png | <br> | ||
{|style="margin:left; width: 100px; background:#eaf3ff; padding:5px; border:2px solid #000000;" | |||
|- | |||
File:3107_7.png | |<big>'''Step 3.'''</big> | ||
< | {|style="margin:left; width: 800px; background:#F0F0F0; padding:5px; border:2px solid #000000;" | ||
|valign="top" | | |||
|- | |||
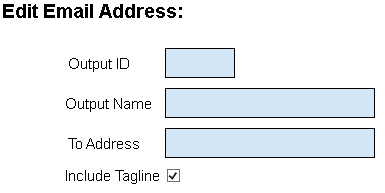
'''6.''' | |Email Address Properties: | ||
{|style="margin:left;" | |||
|valign="top" | | |||
File: | {|class="wikitable" style="background:white; width: 775px;" | ||
< | |- | ||
|[[File:3107_4.png|center|385px]] | |||
|} | |||
{|class="wikitable" style="background:white; width: 775px;" | |||
|- | |||
|'''Output ID''' – assigned by the VT3000 software. | |||
|- | |||
|'''Output Name''' – enter a name for the email address. | |||
|- | |||
|'''To Address''' – enter the email address | |||
|- | |||
|'''Include Tagline''' - mark to show the date and time on the message. | |||
|} | |||
|} | |||
|} | |||
|} | |||
<br> | |||
---- | |||
<br> | |||
{|style="margin:left; width: 100px; background:#eaf3ff; padding:5px; border:2px solid #000000;" | |||
|- | |||
|<big>'''Step 4.'''</big> | |||
{|style="margin:left; width: 800px; background:#F0F0F0; padding:5px; border:2px solid #000000;" | |||
|valign="top" | | |||
|- | |||
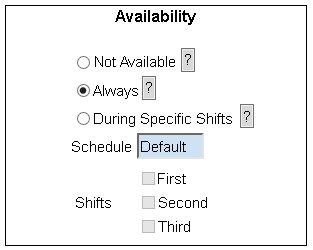
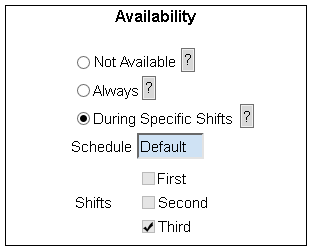
|Email Address Availability. | |||
{|style="margin:left;" | |||
|valign="top" | | |||
{|class="wikitable" style="background:white; width: 775px;" | |||
|- | |||
|[[File:3108_5.png|center|313px]] | |||
|} | |||
{|class="wikitable" style="background:white; width: 775px;" | |||
|- | |||
|'''Not Available''' – no messages will be sent to the output. | |||
|- | |||
|'''Always''' - messages will be sent 24 hours a day 7 days a week. | |||
|- | |||
|'''During Specific Shifts''' - select the Schedule to be used - select the Shift(s) (check the box) the output is to receive messages during. | |||
|} | |||
|} | |||
|} | |||
|} | |||
<br> | |||
---- | |||
<br> | |||
{|style="margin:left; width: 100px; background:#eaf3ff; padding:5px; border:2px solid #000000;" | |||
|- | |||
|<big>'''Step 5.'''</big> | |||
{|style="margin:left; width: 800px; background:#F0F0F0; padding:5px; border:2px solid #000000;" | |||
|valign="top" | | |||
|- | |||
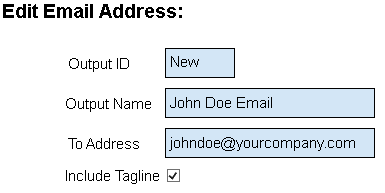
|Example - email address available for 3rd shift. | |||
{|style="margin:left;" | |||
|valign="top" | | |||
{|class="wikitable" style="background:white;" | |||
|- | |||
|[[File:3107_6.png|center|385px]] | |||
|} | |||
{|class="wikitable" style="background:white;" | |||
|- | |||
|[[File:3107_7.png|center|313px]] | |||
|} | |||
|} | |||
|} | |||
|} | |||
<br> | |||
---- | |||
<br> | |||
{|style="margin:left; width: 100px; background:#eaf3ff; padding:5px; border:2px solid #000000;" | |||
|- | |||
|<big>'''Step 6.'''</big> | |||
{|style="margin:left; width: 800px; background:#F0F0F0; padding:5px; border:2px solid #000000;" | |||
|valign="top" | | |||
|- | |||
|Click on the Save & Exit button to return to the Outputs page. When adding multiple email's, select Save & Add New. Select Discard & Exit to delete the email entered and return to the Outputs page. | |||
{|style="margin:left;" | |||
|valign="top" | | |||
{|class="wikitable" style="background:white;" | |||
|- | |||
|[[File:3108_8.png|center|543px]] | |||
|} | |||
|} | |||
|} | |||
|} | |||
<br> | |||
---- | ---- | ||
---- | ---- | ||
<br> | |||
{|style="margin: auto; background:#eaf3ff; border:1px solid #2a4b8d" | {|style="margin: auto; background:#eaf3ff; border:1px solid #2a4b8d" | ||
|valign="top" | | |valign="top" | | ||
| Line 103: | Line 187: | ||
</inputbox> | </inputbox> | ||
|} | |} | ||
<br> | |||
[[Category:VT3000 Core Software]] | [[Category:VT3000 Core Software]] | ||
[[Category:Configuration]] | [[Category:Configuration]] | ||
[[Category:Outputs]] | [[Category:Outputs]] | ||
[[Category:Routes]] | [[Category:Routes]] | ||
Revision as of 16:44, 9 November 2021
|
|
Instructions
Step 1.
|
Step 2.
|
Step 3.
|
Step 4.
|
Step 5.
|
Step 6.
|
|
| |||||||


