Difference between revisions of "VT3000 - Add Shared List"

From Versacall Support
Jump to navigation Jump to search
m (Text replacement - "https://www.linkedin.com/company/versacall-technologies-inc-/mycompany/" to "https://www.linkedin.com/company/versacall/")
Line 254: Line 254:
|-align="center"
|-align="center"
|
|
|[[File:LinkedIn.png|Follow Us On LinkedIn|link=https://www.linkedin.com/company/versacall-technologies-inc-/mycompany/]]
|[[File:LinkedIn.png|Follow Us On LinkedIn|link=https://www.linkedin.com/company/versacall/]]
|
|
|[[File:BlogIcon.png|View our Blog|link=https://www.versacall.com/blog/]]
|[[File:BlogIcon.png|View our Blog|link=https://www.versacall.com/blog/]]

Revision as of 19:24, 20 April 2023

Call Now 858-677-6766 SubmitTckBtn.png EmailUsBtn.png


GeneralHeader.png

Overview
A Shared List is created when there is a requirement of one list to be used over multiple devices. This will allow the user to easily edit one list instead of multiple individual lists.


Requirements
See Requirements Here
1. The VT3000 Core Software installed and running on your system.
2. A Data Field will need to be added to an Alarm or Process as a List to access the Shared List on the Device.


VideoHeader.png

Video


InstructionHeader.png

Step 1.
Open the VT3000 web interface – select VT3000 Core Software - log in – select Configuration – select Shared Lists.
3110 1.png
3112 2.png
Configuration Shared Lists


Step 2.
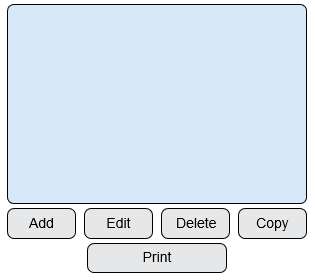
Select the Add button.
3112 3.png


Step 3.
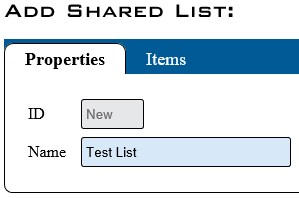
Properties Tab:
3112 4.png
ID - created by the VT3000 software.
Name - enter a name for the list that you can recognize when setting up a device.


Step 4.
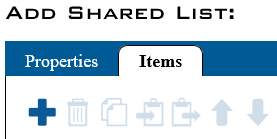
Items tab - select the Add/Plus icon to create a new item.
3112 5.png


Step 5.
An item list field is generated below the items tool box. To the right of the list is the item fields.
3112 6.png
Name - enter a name for the list item.
Value - if the box is unchecked, the value will be a duplicate of the name. To record a different value than the name in the database, check the value box and enter a name/value. The information entered into Value will show on all reports, but the Name will be shown on any device that uses this list.


Step 6.
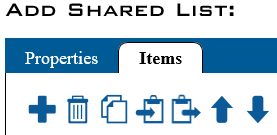
The Add/Plus icon to adds items. The Trash Can deletes items.
3112 7.png


Step 7.
When the list is completed select Save & Exit.
3112 8.png


RelatedHowTos.png
Select a Guide Here
Add a Data Field
Add a Data Field (Static List) - BSC
Add a Data Field (Shared List) - BSC
Update BSC, TIM or PSM
Add a Data Field (Static List) - PSM, TIM
Add a Data Field (Static List) - BSC
Add a Data Field (Key Input) - PSM, TIM
Add a Data Field (Shared List) - PSM, TIM
Print Out for Shared Lists


SearchHeader.png


VC Footer.png
Follow Us On LinkedIn View our Blog