VT3000 - Add a Continuous Count
Overview
The PSM and TIM have an I/O module that can accept a wired input from a machine. This input can be setup as a Continuous Count. A Continuous Count means that the count will always be active, you can use schedules in Panels and Reports to filter the data. This guide explains how to setup the count on the module. Before using this guide, a wired input must be pulled from the machine and wired into the I/O module.
Completion Cycle
Requirements
1. VT3000 Core Software installed and running you your system.
2. The Contact wire from your machine must be wired into one of the Inputs on the I/O Module (Part 1). If you have not completed this step, CLICK HERE for instructions.
3. The Input for the wired contact must be setup in Discrete Inputs (Part 2). If you have not completed this step, CLICK HERE for instructions.
4. The TIM, PSM or Switch Contact Module, with the wired contact, must be powered and communicating with the VersaCall software.
Instructions
1. Open the VT3000 web interface – select Configuration – select Devices.
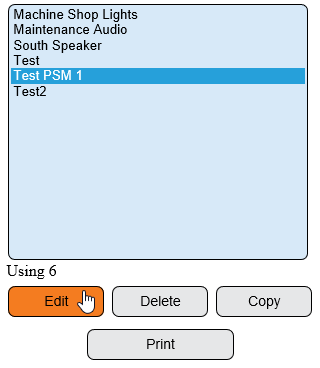
2. Select the PSM or TIM that has the wired input and has had the Discrete Input configured - select the Edit button.
3. Select the Monitoring Points tab.
4. Select the Add Sampler icon from the Monitoring Points tool box.
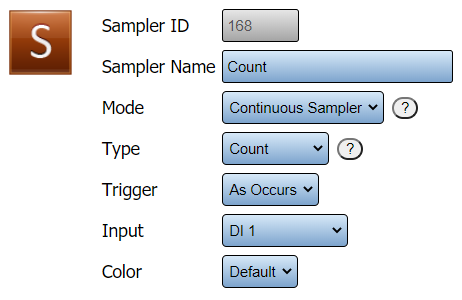
5. Sampler Properties:
    a. Sampler ID – assigned by the VT3000 system.
    b. Sampler Name – enter a name for the Count.
    c. Mode – select Continuous Sampler.
    d. Type – select Count.
    e. Trigger – select when the count is synced with the VersaCall system.
         i. Periodic – creates a field titled Period (s).
              1. Period(s) – enter the number of seconds to elapse before the count is updated.
         ii. As Occurs – count will update when a count occurs.
    f. Input – select the down arrow - select the Discrete Input you setup for the Count.
    g. Don’t Send Zeros – only available for Periodic counts - if there is no count nothing will be recorded.
    h. Color – does not apply to Continuous Count.
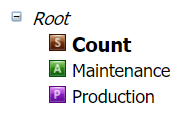
6. The Count will show in the Root.
7. Select Save & Exit.
8. You will have to update the configuration on the module before the count can be used. Click Here for instructions on updating the module.
Step by Step Guides
Setup a Wired Input as a Count
Add a Wired Count to a Process
How to Turn an Input On/Off with a Process
Having Trouble?


