Difference between revisions of "Installation"
SupportAdmin (talk | contribs) |
SupportAdmin (talk | contribs) |
||
| Line 99: | Line 99: | ||
==='''BSC Module'''=== | ==='''BSC Module'''=== | ||
There are 2 types of BSC, Touch Screen with an IO Module and Touch Screeen without an IO Module | There are 2 types of BSC, Touch Screen with an IO Module and Touch Screeen without an IO Module. | ||
<gallery widths=300> | <gallery widths=300> | ||
| Line 110: | Line 110: | ||
'''2.''' [[VT3000_-_Install_BSC_with_IO|'''Click Here''']] to view the step by step guide on installing a '''BSC with an IO Module'''. | '''2.''' [[VT3000_-_Install_BSC_with_IO|'''Click Here''']] to view the step by step guide on installing a '''BSC with an IO Module'''. | ||
==='''TIM Module'''=== | |||
A Touch Input Module has 2 pieces a Touch Screeen and an IO Module. | |||
<gallery widths=300> | |||
File:InstallTIM1.png|IO Module | |||
File:bscin18.png|Touch Screen | |||
</gallery> | |||
'''1.''' [[VT3000_-_Install_TIM_with_IO|'''Click Here''']] to view the step by step guide on installing a '''Touch Input Module'''. | |||
==='''PSM Module'''=== | |||
A Production Status Module has 2 pieces a Touch Screeen and an IO Module. | |||
<gallery widths=300> | |||
File:InstallPSM1.png|IO Module | |||
File:bscin18.png|Touch Screen | |||
</gallery> | |||
'''1.''' [[VT3000_-_Install_PSM_with_IO|'''Click Here''']] to view the step by step guide on installing a '''Production Status Module'''. | |||
==='''Repeater'''=== | |||
A Repeater is used to extend the mesh signal range. | |||
<gallery widths=300> | |||
File:InstallRep1.png | |||
</gallery> | |||
'''1.''' [[VT3000_-_Install_PSM_with_IO|'''Click Here''']] to view the step by step guide on installing a '''Production Status Module'''. | |||
==='''Wireless Audio Module'''=== | |||
There are 2 types of Audio Module, Tone Only and MP3. | |||
<gallery widths=300> | |||
File:InstallAudio1.png|Tone Only | |||
File:InstallAudio2.png|MP3 IO | |||
File:mpin3.png|MP3 Speaker | |||
</gallery> | |||
'''1.''' [[VT3000_-_Install_Wireless_Tone_Audio_Module|'''Click Here''']] to view the step by step guide on installing a '''Tone Only Audio Module'''. | |||
'''2.''' [[VT3000_-_Install_MP3_Audio_Module|'''Click Here''']] to view the step by step guide on installing an '''MP3 Audio Module'''. | |||
==='''Wireless Lights Module'''=== | |||
Wireless Light Modules come with light stack containing 1 to 5 lights. | |||
<gallery widths=300> | |||
File:ltsin1.png|5 Color Light | |||
</gallery> | |||
'''1.''' [[VT3000_-_Install_Wireless_Light_Module|'''Click Here''']] to view the step by step guide on installing a '''Wireless Lights Module'''. | |||
Revision as of 16:17, 25 May 2018
Hardware Installation
This page will provide direction and links to hardware components that you need to install. Please start with section one and move down according to your set up.
Core Unit Installation
Step 1
If you have just received a new VersaCall system, you will want to start with installing the VersaCall Computer or Control Unit.
There are 3 types of Control Units:
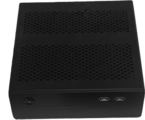
Mini Control Unit

Standard Control Unit

Rack Mount Control Unit


1. Click Here to view the step by step guide on installing a Mini Control Unit.
2. Click Here to view the step by step guide on installing a Standard Control Unit.
3. Click Here to view the step by step guide on installing a Rack Mount Control Unit.
Step 2
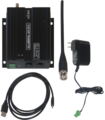
If you control unit is up and running, the next item to install is the Mesh Coordinator.
There are 2 types of Coordinator:

USB Coordinator

Remote Coordinator


1. Click Here to view the step by step guide on installing a USB Coordinator.
2. Click Here to view the step by step guide on installing a Remote Coordinator on the Same Subnet.
3. Click Here to view the step by step guide on installing a Remote Coordinator on a Different Subnet.
Step 3
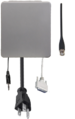
If you purchased a paging transmitter, please use one of the guides below. If you did not purchase a paging transmitter, proceed to Step 4.
There are 2 types of Paging Transmitters:
USB Transmitter

Remote Transmitter


1. Click Here to view the step by step guide on installing a USB Paging Transmitter.
2. Click Here to view the step by step guide on installing a Remote Paging Transmitter on the Same Subnet.
3. Click Here to view the step by step guide on installing a Remote Paging Transmitter on a Different Subnet.
Step 4
If you purchased a phone modem, please use the guide below. If you did not purchase a phone modem, proceed to Step 5.

USB Transmitter

1. Click Here to view the step by step guide on installing a Phone Modem.
Step 5
If you purchased a 2-way radio, please use the guide below. If you did not 2-way radio, proceed to Module Installation.
USB Transmitter

1. Click Here to view the step by step guide on installing a 2-Way Radio.
Module Installation
Call Station
There are 2 types of Call Stations, Battery and Powered.
Battery

Powered


1. Click Here to view the step by step guide on installing a Battery Powered Call Station.
2. Click Here to view the step by step guide on installing a Powered Call Station.
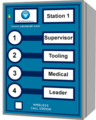
BSC Module
There are 2 types of BSC, Touch Screen with an IO Module and Touch Screeen without an IO Module.

IO Module

Touch Screen


1. Click Here to view the step by step guide on installing a BSC without an IO Module.
2. Click Here to view the step by step guide on installing a BSC with an IO Module.
TIM Module
A Touch Input Module has 2 pieces a Touch Screeen and an IO Module.

IO Module
Touch Screen

1. Click Here to view the step by step guide on installing a Touch Input Module.
PSM Module
A Production Status Module has 2 pieces a Touch Screeen and an IO Module.

IO Module
Touch Screen

1. Click Here to view the step by step guide on installing a Production Status Module.
Repeater
A Repeater is used to extend the mesh signal range.

1. Click Here to view the step by step guide on installing a Production Status Module.
Wireless Audio Module
There are 2 types of Audio Module, Tone Only and MP3.
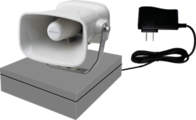
Tone Only

MP3 IO
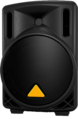
MP3 Speaker


1. Click Here to view the step by step guide on installing a Tone Only Audio Module.
2. Click Here to view the step by step guide on installing an MP3 Audio Module.
Wireless Lights Module
Wireless Light Modules come with light stack containing 1 to 5 lights.
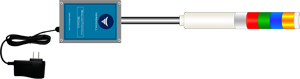
5 Color Light

1. Click Here to view the step by step guide on installing a Wireless Lights Module.