VT3000 - Add an Alarm to PSM
Overview
Adding an alarm button to a BSC, TIM or PSM are identical. These instructions do not cover communications for the alarm.
Quick Links
Add Communications to an Alarm
Instructions
1. Open VT3000 web interface - log in - select Configuration - select Devices.
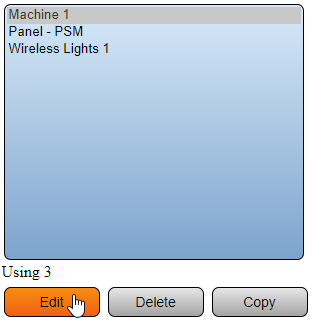
2. Select an existing BSC, TIM or PSM - select Edit.
3. Select Monitoring Points tab.
Add Alarm(s) to a Process
If you do not want the alarm/call button(s) to show on the tablet until after a Process (Production, Job, etc.) has been started, follow the steps below.
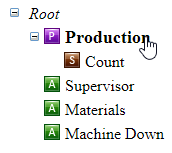
1. Select Process from the Root.
2. Select Add Alarm icon.
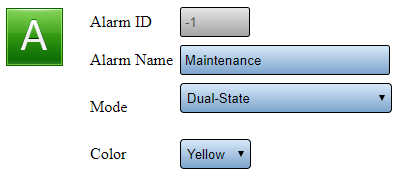
3. Alarm Properties:
    a. Alarm Name - enter name for alarm/call.
    b. Mode - 7 options are available - select the best option to fit your requirements:
         i. Dual-State - press to set - press to clear.
         ii. Dual-State w/Reason on Clear - press to set - press to clear - select a reason.
         iii. Tri-State - press to set - press to acknowledge - press to clear.
         iv. Tri-State w/Reason on Acknowledge - press to set - press to acknowledge - select a reason - press to clear.
         v. Tri-State w/Reason on Clear - press to set - press to acknowledge - press to clear - select a reason.
         vi. Mono-State - press to set & clear at the same time.
         vii. Label - allows you to place multiple alarms under one label/heading.
4. After the alarm is setup - select the Process - alarm will show under/within the Process.
5. Select Save & Exit.
Add Alarm(s) to the Root
If you want the alarm/call button(s) to show on the tablet regardless of the Process, or if there are no Process(s) in your configuration, follow the steps below.
1. Select the Root.
2. Select Add Alarm icon.
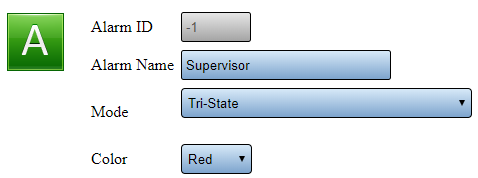
3. Alarm Properties:
    a. Alarm Name - enter a name for the alarm/call.
    b. Mode - 10 options are available - select the best option to fit your requirements:
         i. Dual-State - press to set - press to clear.
         ii. Dual-State w/Reason on Clear - press to set - press to clear - select a reason.
         iii. Tri-State - press to set - press to acknowledge - press to clear.
         iv. Tri-State w/Reason on Acknowledge - press to set - press to acknowledge - select a reason - press to clear.
         v. Tri-State w/Reason on Clear - press to set - press to acknowledge - press to clear - select a reason.
         vi. Mono-State - press to set & clear at the same time.
         vii. Label - allows you to place multiple alarms under one label/heading.
         viii. Switch Contact - Dual State - used with wired input - input on (set) input off (clear).
         ix. Switch Contact - Tri-State - used with wired input - input on (set) - select Acknowledge - input off (clear)
         x. Switch Contact - Tri-State w/Reason on Ack - used wired input - input on (set) - select Acknowledge/Reason - input off (clear)
NOTE: Switch Contact Alarms are not available on the BSC module.
4. After alarm is setup - select Root. Alarm will show in the Root.
5. Select Save & Exit.
6. After the alarm(s) are setup the device will need to be updated. CLICK HERE for instructions


