VT3000 - Update Touch Screen HMI - USB

From Versacall Support
Jump to navigation Jump to search
Call Now 858-677-6766 SubmitTckBtn.png EmailUsBtn.png


GeneralHeader.png

Overview
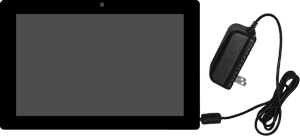
If you have one of the newer style Touch Screens with a USB port (see image below), you can use the instructions below to update the firmware/HMI app. If you have the older style touch screen you will need to CLICK HERE to return to the main update page and select the instructions for No USB.


Requirements
See Requirements Here
1. 0001_00.apk file or a VHMI_(version).apk file from VersaCall Support.
2. USB Drive that can be used for the process.
3. An available computer that can accept the USB Drive.
4. At least one New Style Touch Screen.


Touch Screen Types
Bscin18.png


InstructionHeader.png

Step 1.
If you received a zip file, please unzip it. There will be either a 0001_00.apk file or a VHMI_(version).apk file inside the zip folder. If you did not receive a zip file, verify you received one of the .apk files shown below.
3143 1.png
3143 3.png
VHMIapk.png


Step 2.
Copy the .apk file to your Documents folder.
HMI2.png


Step 3.
Insert your USB Drive into an open USB port on your computer.
USBDrive.png


Step 4.
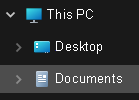
The USB drive will show in Windows Explorer under This PC. Open the USB Drive and delete any files.
HMI1.png


Step 5.
Open your documents folder where you saved the .apk file.
HMI2.png


Step 6.
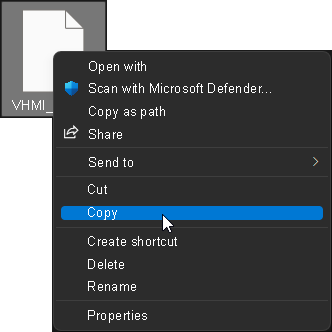
Right click on the .apk file and select Copy.
HMI3.png


Step 7.
Open the USB Drive.
HMI1.png


Step 8.
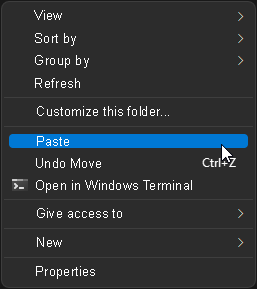
Right click in the open files space and select Paste.
HMI4.png


Step 9.
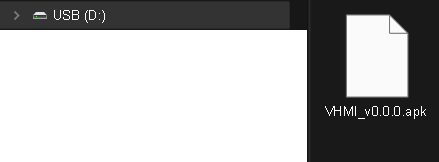
The .apk file should now show inside the USB Drive.
HMI5.png


Step 10.
Remove the USB drive from your computer. Stop all Processes, Counts and Alarms on the device - you want nothing active on the station while updating the firmware.
CLICK HERE for instructions on how to clear active Processes, Counts and Alarms.


Step 11.
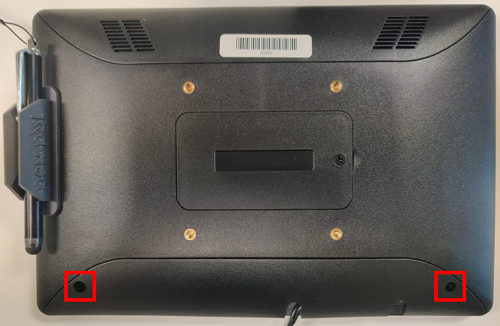
Go to the Touch Screen and remove it from its mount. Remove the back cover of the Touch Screen where the power cord goes in. There are only 2 screws on each side that need to be removed. Ensure the you leave it plugged in as you will need the touch screen powered in order to update the firmware.
HMI6.png


Step 12.
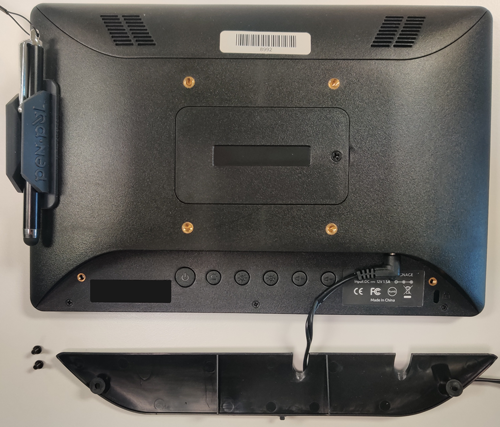
Completely remove the cover from the touch screen. Ensure you save the cover and 2 screws that were removed.
HMI7.png


Step 13.
Turn the touch screen on its side so that you are looking at the area under the cover that was removed. Plug your USB drive into one of the ports labeled USB.
HMI8.png


Step 14.
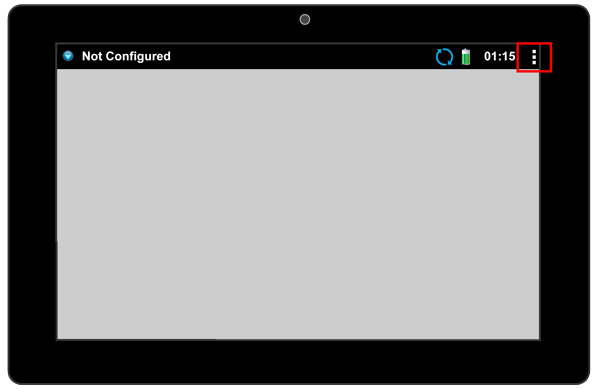
Select the 3 squares in the top right corner of the screen.
Connect2.png


Step 15.
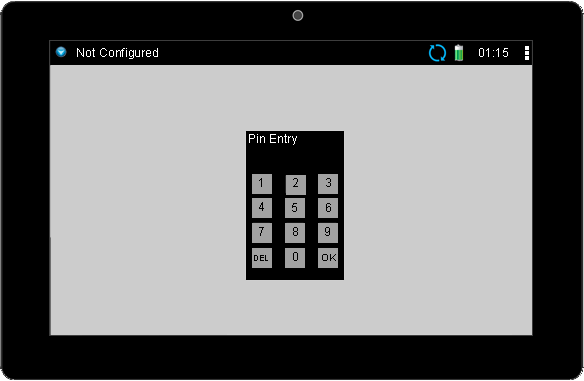
Enter the PIN - by default this is 7047 - select OK.
Connect3.png


Step 16.
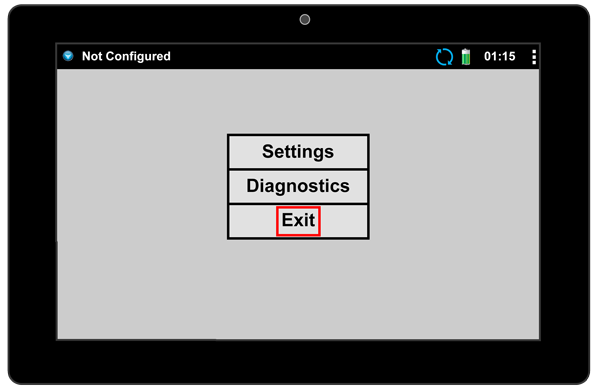
Select Exit on the menu that appears.
Connect4.png


Step 17.
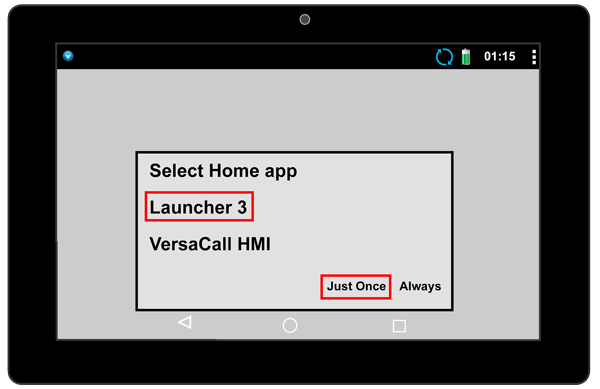
Select Launcher 3 from the menu that appears - select Just Once.
Connect5.png


Step 18.
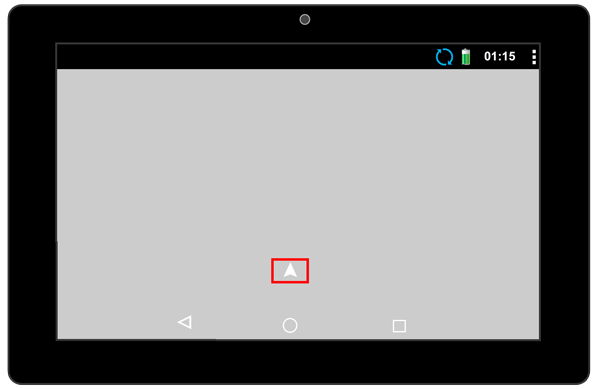
You will be sent to the Android home screen. Select the Up facing arrow in the middle of the screen.
Connect6.png


Step 19.
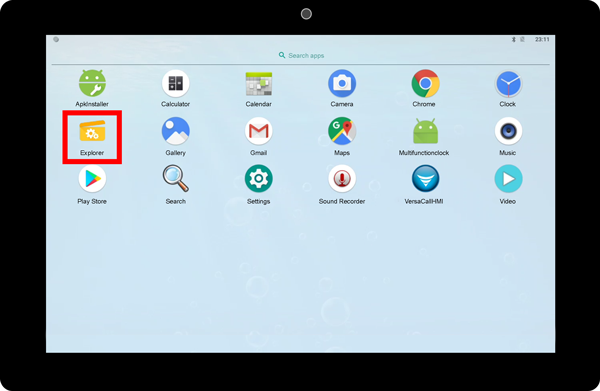
On the Apps screen select Explorer - it could be named Files as well.
HMI9.png


Step 20.
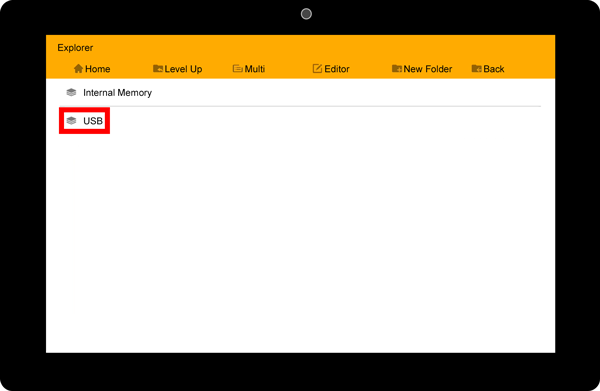
Inside the Explorer App select USB.
HMI10.png


Step 21.
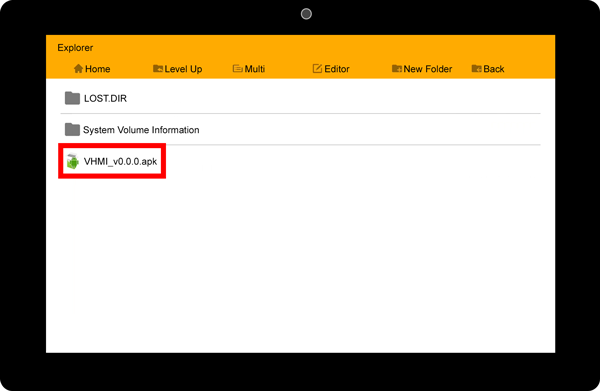
Inside the USB Drive select the .apk file that you loaded.
HMI11.png


Step 22.
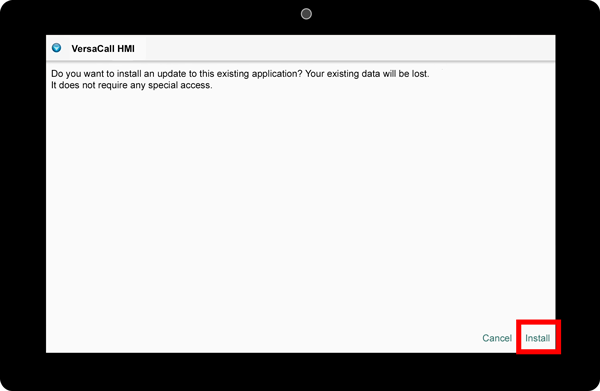
An installer app will open - select the Install option in the bottom right corner.
HMI12.png


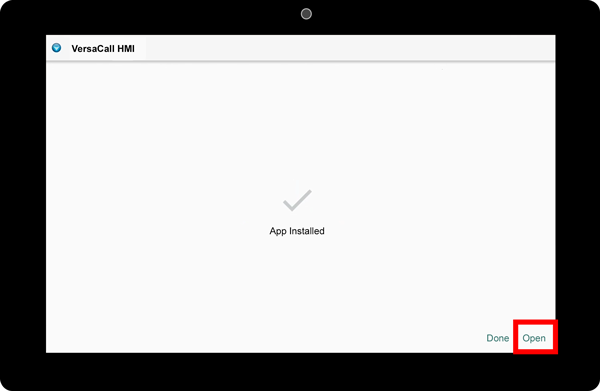
Step 23.
When the app is updated you will see an App Installed screen - click on the Open option in the bottom right corner.
HMI13.png


Step 24.
The App/HMI is now updated and you will be returned to your BSC, TIM or PSM configuration. You may need to update the configuration on the module. You can remove the USB Drive from the touch screen, attach the back cover and remount the device.
CLICK HERE for instructions on updated the Configuration on a BSC, TIM or PSM.


RelatedHowTos.png
Select a Guide Here
Manually Update Firmware/HMI - Non-USB Touch Screen
Manually Update Firmware - I/O Module
Manually Update Firmware on a BSC, TIM or PSM
Wirelessly Update Firmware on a BSC, TIM or PSM
Manually Update Firmware on a Call Station
Wirelessly Update Firmware on a Battery Powered Call Station
Wirelessly Update Firmware on a Powered Call Station


SearchHeader.png


VC Footer.png
Follow Us On LinkedIn View our Blog