VT3000 - Change ISO Code - Call Station - Use Micro SD Card

From Versacall Support
Jump to navigation Jump to search
Call Now 858-677-6766 SubmitTckBtn.png EmailUsBtn.png


GeneralHeader.png

Overview
An Isolation Code is the specific channel used with a coordinator. Different Isolation Codes are required for facilities with multiple coordinators. New devices are shipped with a default Isolation Code of 1. Below is a guide on programming the ISO Code using the Micro SD Card inside the Call Station.


Requirements
See Requirements Here
1. The VT3000 Core Software installed and running on your system.
2. At least one Coordinator setup, powered and communicating with the VT3000 Core Software.
3. At least one Call Station (Powered or Battery Powered) communicating with the system.
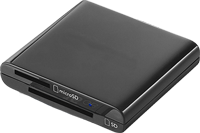
4. A Micro SD Card reader or Card Adaptor attached to a computer that can be used for this guide.


VideoHeader.png

Video


InstructionHeader.png

Step 1.
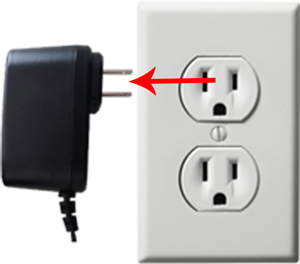
Unplug power on the Call Station.
Trans13.png


Step 2.
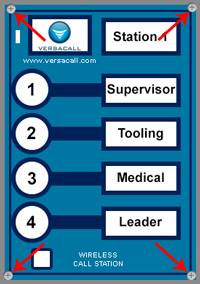
Loosen the screws on the front of the module until they spin freely.
ISO100.png


Step 3.
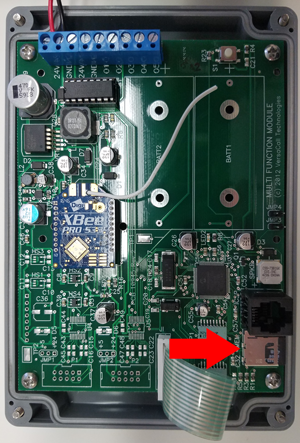
On the I/O board – locate the Micro SD card holder in the bottom right corner.
3215 14.png


Step 4.
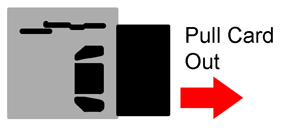
The SD Card holder is spring loaded - push in to release - push in to lock. Push the SD card in and release - the card will pop out of the holder - pull the card out of the holder.
CSCard1.png
CSCard2.png


Step 5.
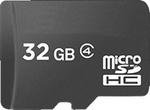
Insert the Micro SD card into a reader attached to the computer.
SD-Reader.png


Step 6.
Open Windows Notepad on your computer.
3215 16.png


Step 7.
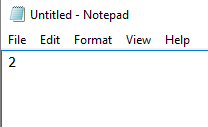
Notepad will automatically open to a new untitled file. Type the Isolation Code number in the first space on the document - DO NOT type anything else.
3215 19.png


Step 8.
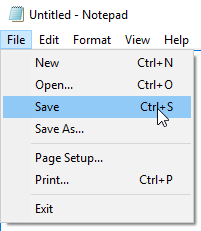
Select File - select Save - enter ISOCODE.txt in File Name field.
3215 20.png
3215 21.png


Step 9.
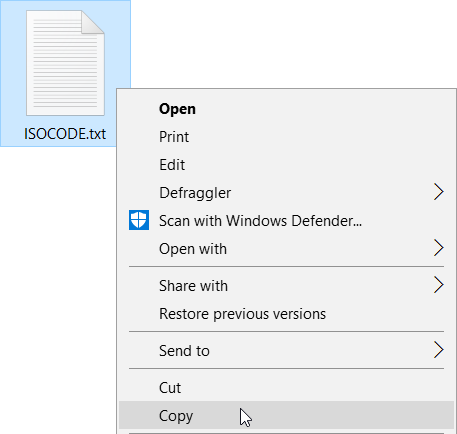
Navigate to the ISOCODE.txt file location - right click on the file - select Copy.
3215 26.png


Step 10.
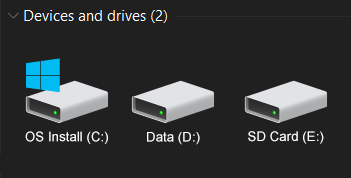
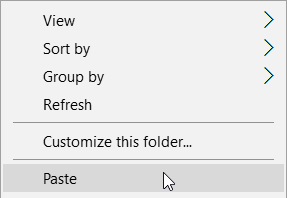
Navigate to the SD Card via the reader attached to your computer - generally shows as a drive on your computer - double click on the drive to open - right click in the open file - select Paste.
SDCard.png
3215 27.png


Step 11.
The ISOCODE.txt file will now show as a file on the SD Card - remove the SD Card from the reader.
ISOTextFile.png
3143 6.png


Step 12.
Place the SD Card back into the holder - once it is aligned push in until you hear/feel a click.
CSCard1.png


Step 13.
Replace the cover - tighten the 4 screws to secure the cover.
ISO100.png


Step 14.
Plug in the power for the module
Bscin25.png


Step 15.
Open the VT3000 web interface – select VT3000 Core Software - log in – select Diagnostics – select Device Status.
3215 2.png
3215 3.png
Diagnostics Device Status


Step 16.
Find the device that you switched the ISO Code on - under the Network Name, ensure it is showing the correct name of the Coordinator.
CS3.gif


RelatedHowTos.png
Select a Guide Here
Add a Call Station Configuration
Installation Instructions for a Battery Call Station
Installation Instructions for a Powered Call Station
Update the Configuration on a Battery Call Station
Update the Configuration on a Powered Call Station
Update the Firmware on a Battery Call Station - Wireless
Update the Firmware on a Powered Call Station - Wireless
Update the Firmware on a Call Station - Manually
Install/Attach a Stack Light to a Call Station
Configure/Setup Light Stack on the Call Station Configuration
Setup the Use of the Light(s) on the Call Station Configuration
Add Communications to an Alarm
Adding a Route
Install a Device Plug In (PC Call Station)
Change ISO Code on a Call Station using the # 1 - # 4 Buttons
Change ISO Code on a Call Station using VT3000 Core Software Wirelessly
Perform a Coverage Test on a Powered Call Station
Perform a Coverage Test on a Battery Powered Call Station
Perform a Coverage Test on a Powered Call Station
Perform a Coverage Test on a Battery Powered Call Station


SearchHeader.png


VC Footer.png
Follow Us On LinkedIn View our Blog