VT3000 - Change ISO Code - Call Station - Use Buttons

From Versacall Support
Jump to navigation Jump to search
Call Now 858-677-6766 SubmitTckBtn.png EmailUsBtn.png


GeneralHeader.png

Overview
An Isolation Code is the specific channel used with a coordinator. Different Isolation Codes are required for facilities with multiple coordinators. New devices are shipped with a default Isolation Code of 1. Below is a guide on programming the ISO Code using the buttons on the Call Station.


Requirements
See Requirements Here
1. The VT3000 Core Software installed and running on your system.
2. At least one Coordinator setup, powered and communicating with the VT3000 Core Software.
3. At least one Call Station (Powered or Battery Powered) communicating with the system.


InstructionHeader.png

Step 1.
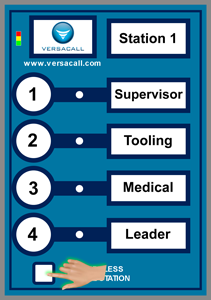
Go to the Call Station you want to change the ISO Code on. Ensure it is powered On - Green or Red LED will be blinking in top left corner of the device.
CSButtonIso1.png


Step 2.
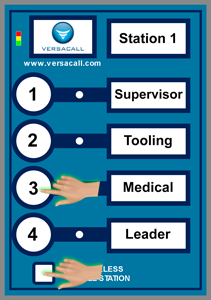
Press & Hold down the White Square button - press down the # 3 button.
CSButtonIso2.png


Step 3.
All of the LED's in the top left corner of the Call Station will turn on - release both buttons when this happens.
CSButtonIso3.png


Step 4.
You will need to understand what buttons represent what numbers before proceeding - this is explained below:
Button 1 - represents a value of 1.
Button 2 - represents a value of 10.
Button 3 - represents a value of 100.


Step 5.
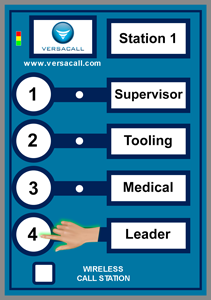
Press & Release the # 4 button.
CSButtonIso4.png


Step 6.
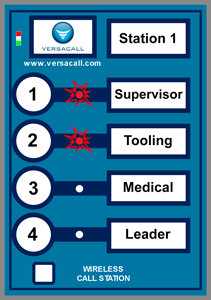
The Red LED light next to either the #1, #2 or #3 buttons will blink.
CSButtonIso5.png


Step 7.
Using the button representation in step # 4, you can determine what ISO Code the Call Station is set to.
Example 1 - if the #1 button LED blinks 3 times, this would mean that the Call Station is programmed to Isolation Code 3.
Example 2 - if the #1 button LED blinks 1 time & the #2 button LED blinks 1 time, this would mean that the Call Station is programmed to Isolation Code 11.


Step 8.
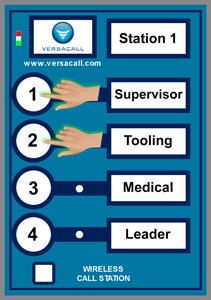
Using the #1, #2 and #3 buttons, press and release the proper sequence to get the ISO Code that you want to assign this Call Station.
CSButtonIso6.png


Step 9.
Once you have it programmed in, press and release the # 4 button. The Red LED light next to the buttons will blink the ISO Code that you entered.
CSButtonIso4.png
CSButtonIso5.png


Step 10.
If the LED's showed the correct ISO code - press the square button at the bottom of the Call Station. This will save the ISO Code and take the device out of program mode. If the ISO Code is incorrect, repeat steps 7 to 9.
CSButton6.png


Step 11.
Open the VT3000 web interface – select VT3000 Core Software - log in – select Diagnostics – select Devices.
3215 2.png
3215 3.png
Diagnostics Device Status


Step 12.
Find the device that you switched the ISO Code on - under the Network Name, ensure it is showing the correct name of the Coordinator.
CS3.gif


RelatedHowTos.png
Select a Guide Here
Add a Call Station Configuration
Installation Instructions for a Battery Call Station
Installation Instructions for a Powered Call Station
Update the Configuration on a Battery Call Station
Update the Configuration on a Powered Call Station
Update the Firmware on a Battery Call Station - Wireless
Update the Firmware on a Powered Call Station - Wireless
Update the Firmware on a Call Station - Manually
Install/Attach a Stack Light to a Call Station
Configure/Setup Light Stack on the Call Station Configuration
Setup the Use of the Light(s) on the Call Station Configuration
Add Communications to an Alarm
Adding a Route
Install a Device Plug In (PC Call Station)
Change ISO Code on a Call Station using the Micro SD Card
Change ISO Code on a Call Station using VT3000 Core Software - Wireless
Perform a Coverage Test on a Powered Call Station
Perform a Coverage Test on a Battery Powered Call Station


SearchHeader.png


VC Footer.png
Follow Us On LinkedIn View our Blog