VT3000 - Add Call Station Configuration

From Versacall Support
Jump to navigation Jump to search
Call Now 858-677-6766 SubmitTckBtn.png EmailUsBtn.png


GeneralHeader.png

Overview
Before you can begin using a Call Station, you will need to create a configuration for the device. This requires setting up what each button on the device will do. Before starting this guide, it is recommended that you setup all of your Outputs and Routes.


Requirements
See Requirements Here
1. The VT3000 Core Software installed and running on your system.
2. A Coordinator must be setup, powered and communicating with the VT3000 Core Software.
3. Software Call Station (PC) - the plug in must be loaded in the VT3000 Core software and there must be at least one license remaining.
3. Hardware Call Station - the device must be powered and communicating with the system.
4. When setting up Communication Paths, the Routes must be setup.
5. Names of what each button/alarm is to be called.


VideoHeader.png

Video


InstructionHeader.png

Step 1.
Open the VT3000 web interface – log in - select Configuration - select Devices.
3110 1.png
3104 2.png
Configuration Devices


Step 2.
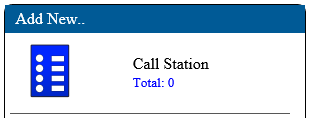
On the Devices page - select the Call Station icon in the Add New list.
3104 3.png


Step 3.
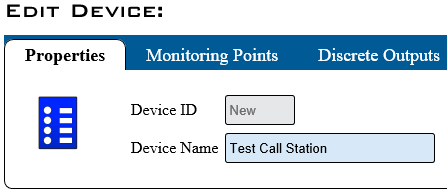
On the Properties tab - enter a name for the Call Station.
3104 4.png


Step 4.
Select the Monitoring Points tab.
3104 5.png


Step 5.
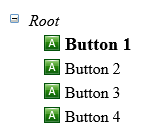
Select Button 1 under Root. Buttons 1 to 4 will already be created by default.
3104 6.png


Step 6.
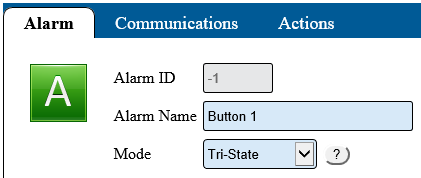
Select the Alarms tab from the Alarm properties window on the right.
3104 7.png
Alarm ID – created by the VT3000 software.
Alarm Name – enter a name for the Alarm/Button.
Mode - Disabled - the button will be disabled on the physical call station.
Mode - Dual State - select this option to press the button to set the alarm & press again to clear.
Mode - Tri-State - select this option to press the button to set the alarm - press the button again to acknowledge - press third time to clear.


Step 7.
Select the Communications tab.
3104 8.png


Step 8.
Click on the New Path icon in the Communications pallet.
3104 9.png


Step 9.
Enter a path name - select a route.
3104 10.png
Path Name - enter a name for the communications path.
Route - select the down arrow for a list of routes.
Lag Time - enter a time in seconds, to delay the message from going out initially.


Step 10.
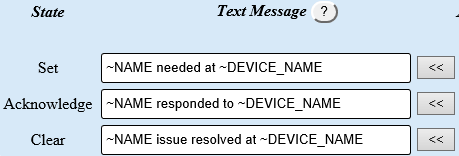
Depending on the type of alarm there will be 2 fields or 3 fields. Type in the message for each state field or use the arrow buttons next to the message field to insert a default message.
3104 11.png


Step 11.
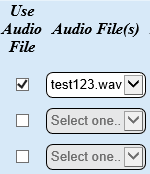
When using a recorded audio file for phones or radio channels, select the Use Audio File box. Use the down arrow to select the file to be played.
3104 12.png


Step 12.
Select the Escalate box if the message is to escalate through the route. Generally, set will be set to escalate through the route until someone acknowledges/clears then the escalation stops. By default, the Set state will always be set to Escalate.
3104 13.png


Step 13.
Repeat the steps for each button - select the Save & Exit button when configuration is completed.
3104 14.png


Step 14.
If you are using a Physical Call Station, you must send the new configuration to the device before it can be used.


Step 15.
If you are using a PC Call Station, the configuration will update in real time.


RelatedHowTos.png
Select a Guide Here
Installation Instructions for a Battery Call Station
Installation Instructions for a Powered Call Station
Update the Configuration on a Battery Call Station
Update the Configuration on a Powered Call Station
Update the Firmware on a Battery Call Station - Wireless
Update the Firmware on a Powered Call Station - Wireless
Update the Firmware on a Call Station - Manually
Install/Attach a Stack Light to a Call Station
Configure/Setup Light Stack on the Call Station Configuration
Setup the Use of the Light(s) on the Call Station Configuration
Add Communications to an Alarm
Adding a Route
Install a Device Plug In (PC Call Station)
Change ISO Code on a Call Station using the # 1 - # 4 Buttons
Change ISO Code on a Call Station using the Micro SD Card
Change ISO Code on a Call Station using VT3000 Core Software Wirelessly
Perform a Coverage Test on a Powered Call Station
Perform a Coverage Test on a Battery Powered Call Station


SearchHeader.png


VC Footer.png
Follow Us On LinkedIn View our Blog