Difference between revisions of "Installation"
SupportAdmin (talk | contribs) |
SupportAdmin (talk | contribs) |
||
| Line 20: | Line 20: | ||
'''1.''' [[VT3000 - Install Mini PC|<u>'''CLICK HERE'''</u>]] to view the step by step guide on | '''1.''' [[VT3000 - Install Mini PC|<u>'''CLICK HERE'''</u>]] to view the step by step guide on '''Installing a Mini Control Unit'''. | ||
'''2.''' [[VT3000 - Install Standard PC|<u>'''CLICK HERE'''</u>]] to view the step by step guide on | '''2.''' [[VT3000 - Install Standard PC|<u>'''CLICK HERE'''</u>]] to view the step by step guide on '''Installing a Standard Control Unit'''. | ||
'''3.''' [[VT3000 - Install Rack Mount PC|<u>'''CLICK HERE'''</u>]] to view the step by step guide on | '''3.''' [[VT3000 - Install Rack Mount PC|<u>'''CLICK HERE'''</u>]] to view the step by step guide on '''Installing a Rack Mount Control Unit'''. | ||
==='''Step 2'''=== | ==='''Step 2'''=== | ||
If you control unit is up and running, the next item to install is the Mesh Coordinator | If you control unit is up and running, the next item to install is the Mesh Coordinator - there are 2 types: | ||
<gallery widths=300> | <gallery widths=300> | ||
| Line 38: | Line 36: | ||
'''1.''' [[VT3000 - Install Coordinator - USB|<u>'''CLICK HERE'''</u>]] to view the step by step guide on | '''1.''' [[VT3000 - Install Coordinator - USB|<u>'''CLICK HERE'''</u>]] to view the step by step guide on '''Installing a USB Coordinator'''. | ||
'''2.''' [[VT3000 - Install Coordinator - Remote - Same Subnet|<u>'''CLICK HERE'''</u>]] to view the step by step guide on | '''2.''' [[VT3000 - Install Coordinator - Remote - Same Subnet|<u>'''CLICK HERE'''</u>]] to view the step by step guide on '''Installing a Remote Coordinator on the Same Subnet'''. | ||
'''3.''' [[VT3000 - Install Coordinator - Remote - Different Subnet|<u>'''CLICK HERE'''</u>]] to view the step by step guide on | '''3.''' [[VT3000 - Install Coordinator - Remote - Different Subnet|<u>'''CLICK HERE'''</u>]] to view the step by step guide on '''Installing a Remote Coordinator on a Different Subnet'''. | ||
'''4.''' [[VT3000 - Replace Coordinator - USB|<u>'''CLICK HERE'''</u>]] to view the step by step guide on Replacing an existing/malfunctioning | '''4.''' [[VT3000 - Replace Coordinator - USB|<u>'''CLICK HERE'''</u>]] to view the step by step guide on '''Replacing an existing/malfunctioning USB Coordinator'''. | ||
| Line 58: | Line 56: | ||
'''1.''' [[VT3000_-_Install_Paging_Transmitter_-_USB|<u>'''CLICK HERE'''</u>]] to view the step by step guide on | '''1.''' [[VT3000_-_Install_Paging_Transmitter_-_USB|<u>'''CLICK HERE'''</u>]] to view the step by step guide on '''Installing a USB Paging Transmitter'''. | ||
'''2.''' [[VT3000_-_Install_Paging_Transmitter_-_Remote_-_Same_Subnet|<u>'''CLICK HERE'''</u>]] to view the step by step guide on | '''2.''' [[VT3000_-_Install_Paging_Transmitter_-_Remote_-_Same_Subnet|<u>'''CLICK HERE'''</u>]] to view the step by step guide on '''Installing a Remote Paging Transmitter on the Same Subnet'''. | ||
'''3.''' [[VT3000_-_Install_Paging_Transmitter_-_Remote_-_Different_Subnet|<u>'''CLICK HERE'''</u>]] to view the step by step guide on | '''3.''' [[VT3000_-_Install_Paging_Transmitter_-_Remote_-_Different_Subnet|<u>'''CLICK HERE'''</u>]] to view the step by step guide on '''Installing a Remote Paging Transmitter on a Different Subnet'''. | ||
'''4.''' [[VT3000 - Replace Paging Transmitter - USB|<u>'''CLICK HERE'''</u>]] to view the step by step guide on | '''4.''' [[VT3000 - Replace Paging Transmitter - USB|<u>'''CLICK HERE'''</u>]] to view the step by step guide on '''Replacing an existing/malfunctioning USB Paging Transmitter'''. | ||
| Line 75: | Line 73: | ||
'''1.''' [[VT3000 - Install Phone Modem|<u>'''CLICK HERE'''</u>]] to view the step by step guide on | '''1.''' [[VT3000 - Install Phone Modem|<u>'''CLICK HERE'''</u>]] to view the step by step guide on '''Installing a Phone Modem on a new computer Not Provided by VersaCall'''. | ||
''' | '''2.''' [[VT3000 - Install Modem - NEW VersaCall Provided Computer|<u>'''CLICK HERE'''</u>]] to view the step by step guide on '''Installing a Phone Modem on a computer Provided by VersaCall'''. | ||
| Line 88: | Line 86: | ||
'''1.''' [[VT3000 - Install 2-Way Radio Module|<u>'''CLICK HERE'''</u>]] to view the step by step guide on | '''1.''' [[VT3000 - Install 2-Way Radio Module|<u>'''CLICK HERE'''</u>]] to view the step by step guide on '''Installing a 2-Way Radio'''. | ||
''' | '''2.''' [[VT3000 - Install 2-Way Radio Module|<u>'''CLICK HERE'''</u>]] to view the step by step guide on '''Troubleshooting an New 2-Way Radio installation'''. | ||
| Line 96: | Line 94: | ||
==='''Call Station'''=== | ==='''Call Station'''=== | ||
There are 2 types of Call Stations | There are 2 types of Call Stations - Battery Powered & 110VAC Powered. | ||
<gallery widths=300> | <gallery widths=300> | ||
| Line 104: | Line 102: | ||
'''1.''' [[VT3000_-_Install_Call_Station_-_Battery|<u>'''CLICK HERE'''</u>]] to view the step by step guide on | '''1.''' [[VT3000_-_Install_Call_Station_-_Battery|<u>'''CLICK HERE'''</u>]] to view the step by step guide on '''Installing a Battery Powered Call Station'''. | ||
'''2.''' [[VT3000_-_Install_Call_Station_-_Powered|<u>'''CLICK HERE'''</u>]] to view the step by step guide on | '''2.''' [[VT3000_-_Install_Call_Station_-_Powered|<u>'''CLICK HERE'''</u>]] to view the step by step guide on '''Installing a Powered Call Station'''. | ||
==='''BSC Module'''=== | ==='''BSC Module'''=== | ||
The BSC Module has 2 pieces - a Touch Screen & an I/O Module. | |||
<gallery widths=300> | <gallery widths=300> | ||
| Line 118: | Line 116: | ||
'''1.''' [[VT3000_-_Install_BSC_with_IO|<u>'''CLICK HERE'''</u>]] to view the step by step guide on | '''1.''' [[VT3000_-_Install_BSC_with_IO|<u>'''CLICK HERE'''</u>]] to view the step by step guide on '''Installing a BSC Module'''. | ||
==='''PSM Module'''=== | ==='''PSM Module'''=== | ||
A Production Status Module has 2 pieces a Touch | A Production Status Module has 2 pieces - a Touch Screen & an I/O Module. | ||
<gallery widths=300> | <gallery widths=300> | ||
| Line 142: | Line 128: | ||
'''1.''' [[VT3000_-_Install_PSM_with_IO|<u>'''CLICK HERE'''</u>]] to view the step by step guide on | '''1.''' [[VT3000_-_Install_PSM_with_IO|<u>'''CLICK HERE'''</u>]] to view the step by step guide on '''Installing a Production Status Module'''. | ||
| Line 153: | Line 139: | ||
'''1.''' [[VT3000_-_Install_a_Repeater|<u>'''CLICK HERE'''</u>]] to view the step by step guide on | '''1.''' [[VT3000_-_Install_a_Repeater|<u>'''CLICK HERE'''</u>]] to view the step by step guide on '''Installing a Repeater'''. | ||
| Line 166: | Line 152: | ||
'''1.''' [[VT3000_-_Install_Wireless_Tone_Audio_Module|<u>'''CLICK HERE'''</u>]] to view the step by step guide on | '''1.''' [[VT3000_-_Install_Wireless_Tone_Audio_Module|<u>'''CLICK HERE'''</u>]] to view the step by step guide on '''Installing a Tone Only Audio Module'''. | ||
| Line 179: | Line 163: | ||
'''1.''' [[VT3000_-_Install_Wireless_Light_Module|<u>'''CLICK HERE'''</u>]] to view the step by step guide on | '''1.''' [[VT3000_-_Install_Wireless_Light_Module|<u>'''CLICK HERE'''</u>]] to view the step by step guide on '''Installing a Wireless Lights Module'''. | ||
| Line 189: | Line 173: | ||
All new systems come with the latest software & configuration pre-loaded on the system. | All new systems come with the latest software & configuration pre-loaded on the system. | ||
'''1.''' [[VT3000 - Upgrade VersaCall Software|<u>'''CLICK HERE'''</u>]] to view the step by step guide on '''Upgrading the VersaCall Software'''. | '''1.''' [[VT3000 - Upgrade VersaCall Software|<u>'''CLICK HERE'''</u>]] to view the step by step guide on '''Upgrading the VersaCall Software'''. | ||
=='''Customer Providing Computer/Server'''== | =='''Customer Providing Computer/Server'''== | ||
'''1.''' [[VT3000_-_Minimum_Requirements|<u>'''CLICK HERE'''</u>]] to view the System Minimum Requirements. | '''1.''' [[VT3000_-_Minimum_Requirements|<u>'''CLICK HERE'''</u>]] to view the '''System Minimum Requirements'''. | ||
'''2.''' Most systems will only need the 3 guides - the VersaCall Technician will inform you if a Device Plug-In Installation is required: | '''2.''' Most systems will only need the 3 guides - the VersaCall Technician will inform you if a Device Plug-In Installation is required: | ||
'''a.''' [[VT3000 - Install - Pre-Requisites|<u>'''CLICK HERE'''</u>]] to view the step by step guide on '''Pre-Installation''' | '''a.''' [[VT3000 - Install - Pre-Requisites|<u>'''CLICK HERE'''</u>]] to view the step by step guide on '''Pre-Installation Steps'''. | ||
'''b.''' SQL Server is required for VersaCall - please select the option below that fits your situation. | '''b.''' SQL Server is required for VersaCall - please select the option below that fits your situation. | ||
'''i.''' [[VT3000 - Install - SQL Server 2008 - 2016|<u>'''CLICK HERE'''</u>]] to view the step by step guide on '''Installing SQL Server Express 2008 - 2016''' Steps. | '''i.''' [[VT3000 - Install - SQL Server 2008 - 2016|<u>'''CLICK HERE'''</u>]] to view the step by step guide on '''Installing SQL Server Express 2008 - 2016''' Steps. | ||
'''ii.''' [[VT3000 - Install - SQL Server 2017|<u>'''CLICK HERE'''</u>]] to view the step by step guide on '''Installing SQL Server Express 2017 - 2019''' Steps. | '''ii.''' [[VT3000 - Install - SQL Server 2017|<u>'''CLICK HERE'''</u>]] to view the step by step guide on '''Installing SQL Server Express 2017 - 2019''' Steps. | ||
'''iii.''' [[VT3000 - Install - Existing SQL Server Instance|<u>'''CLICK HERE'''</u>]] to view the step by step guide on '''Adding Databases & Login to an Existing SQL Server Instance''' Steps | '''iii.''' [[VT3000 - Install - Existing SQL Server Instance|<u>'''CLICK HERE'''</u>]] to view the step by step guide on '''Adding Databases & Login to an Existing SQL Server Instance''' Steps. | ||
'''c.''' [[VT3000 - Install VersaCall Software|<u>'''CLICK HERE'''</u>]] to view the step by step guide on '''VersaCall Software Installation''' Steps. | |||
'''d.''' [[VT3000_-_Install_Device_Plug_In|<u>'''CLICK HERE'''</u>]] to view the step by step guide on installing a '''Device Plug-In'''. | |||
Revision as of 16:27, 16 September 2021
Hardware Installation
This section will provide direction and links to hardware components that you need to install. Please start with section one and move down according to your set up.
Click Here for an explanation of the System Architecture. Each component and connection is shown & explained. This page is especially helpful for your IT department.
Core Unit Installation
Step 1
If you have just received a new VersaCall system, you will want to start with installing the VersaCall Computer or Control Unit.
There are 3 types of Control Units:
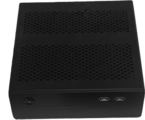
Mini Control Unit

Standard Control Unit

Rack Mount Control Unit


1. CLICK HERE to view the step by step guide on Installing a Mini Control Unit.
2. CLICK HERE to view the step by step guide on Installing a Standard Control Unit.
3. CLICK HERE to view the step by step guide on Installing a Rack Mount Control Unit.
Step 2
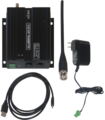
If you control unit is up and running, the next item to install is the Mesh Coordinator - there are 2 types:

USB Coordinator

Remote Coordinator


1. CLICK HERE to view the step by step guide on Installing a USB Coordinator.
2. CLICK HERE to view the step by step guide on Installing a Remote Coordinator on the Same Subnet.
3. CLICK HERE to view the step by step guide on Installing a Remote Coordinator on a Different Subnet.
4. CLICK HERE to view the step by step guide on Replacing an existing/malfunctioning USB Coordinator.
Step 3
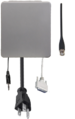
If you purchased a paging transmitter, please use one of the guides below. If you did not purchase a paging transmitter, proceed to Step 4.
There are 2 types of Paging Transmitters:
USB Transmitter

Remote Transmitter


1. CLICK HERE to view the step by step guide on Installing a USB Paging Transmitter.
2. CLICK HERE to view the step by step guide on Installing a Remote Paging Transmitter on the Same Subnet.
3. CLICK HERE to view the step by step guide on Installing a Remote Paging Transmitter on a Different Subnet.
4. CLICK HERE to view the step by step guide on Replacing an existing/malfunctioning USB Paging Transmitter.
Step 4
If you purchased a phone modem, please use the guide below. If you did not purchase a phone modem, proceed to Step 5.

Phone Modem

1. CLICK HERE to view the step by step guide on Installing a Phone Modem on a new computer Not Provided by VersaCall.
2. CLICK HERE to view the step by step guide on Installing a Phone Modem on a computer Provided by VersaCall.
Step 5
If you purchased a 2-way radio, please use the guide below. If you did not 2-way radio, proceed to Module Installation.
Radio Module

1. CLICK HERE to view the step by step guide on Installing a 2-Way Radio.
2. CLICK HERE to view the step by step guide on Troubleshooting an New 2-Way Radio installation.
Module Installation
Call Station
There are 2 types of Call Stations - Battery Powered & 110VAC Powered.
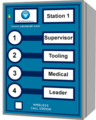
Battery

Powered


1. CLICK HERE to view the step by step guide on Installing a Battery Powered Call Station.
2. CLICK HERE to view the step by step guide on Installing a Powered Call Station.
BSC Module
The BSC Module has 2 pieces - a Touch Screen & an I/O Module.

IO Module

Touch Screen


1. CLICK HERE to view the step by step guide on Installing a BSC Module.
PSM Module
A Production Status Module has 2 pieces - a Touch Screen & an I/O Module.

IO Module
Touch Screen

1. CLICK HERE to view the step by step guide on Installing a Production Status Module.
Repeater
A Repeater is used to extend the mesh signal range.

1. CLICK HERE to view the step by step guide on Installing a Repeater.
Wireless Audio Module
There are 2 types of Audio Module, Tone Only and MP3.
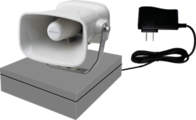
Tone Only

MP3 IO

MP3 Speaker


1. CLICK HERE to view the step by step guide on Installing a Tone Only Audio Module.
Wireless Lights Module
Wireless Light Modules come with light stack containing 1 to 5 lights.
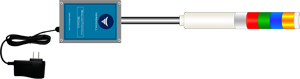
5 Color Light

1. CLICK HERE to view the step by step guide on Installing a Wireless Lights Module.
Software Installation
This section will provide instructions on how to install different types of software for the VT3000 system.
VersaCall Providing Computer/Server
All new systems come with the latest software & configuration pre-loaded on the system.
1. CLICK HERE to view the step by step guide on Upgrading the VersaCall Software.
Customer Providing Computer/Server
1. CLICK HERE to view the System Minimum Requirements.
2. Most systems will only need the 3 guides - the VersaCall Technician will inform you if a Device Plug-In Installation is required:
a. CLICK HERE to view the step by step guide on Pre-Installation Steps.
         b.  SQL Server is required for VersaCall - please select the option below that fits your situation.

              i.  CLICK HERE to view the step by step guide on Installing SQL Server Express 2008 - 2016 Steps.
              ii.  CLICK HERE to view the step by step guide on Installing SQL Server Express 2017 - 2019 Steps.
              iii.  CLICK HERE to view the step by step guide on Adding Databases & Login to an Existing SQL Server Instance Steps.
c. CLICK HERE to view the step by step guide on VersaCall Software Installation Steps.
d. CLICK HERE to view the step by step guide on installing a Device Plug-In.
Having Trouble?

Submit a Service Ticket