Difference between revisions of "Installation"

From Versacall Support
Jump to navigation Jump to search
Line 9: Line 9:
|[[Image:EmailUsBtn.png|link=mailto:[email protected]?Subject=Help%20Needed%20Wiki&body=Type%20Message%20Here]]
|[[Image:EmailUsBtn.png|link=mailto:[email protected]?Subject=Help%20Needed%20Wiki&body=Type%20Message%20Here]]
|}
|}
<br>
[[File:GenInfot-Head.png|300px|link=Installation]]
----
<div style="box-shadow:2px 2px 15px #90A4AE; border-radius:5px; padding:10px">
This page is designed to help you get your VersaCall system installed properly. There are 3 sections that will cover different aspects of the installation. You only need to open the guides that apply to the equipment you received/purchased.
</div>
<BR>
<BR>
[[File:ITInfo-Head.png|300px|link=Installation]]
<div style="box-shadow:2px 2px 15px #90A4AE; border-radius:5px; padding:10px">
:<span style="border:thin solid #90A4AE; border-radius:5px; padding:5px">[[VT3000_-_IT_Considerations|'''System Architecture Overview''']]</span>
<BR>
:<span style="border:thin solid #90A4AE; border-radius:5px; padding:5px">[[VT3000_-_Minimum_Requirements|'''Minimum Computer/Server Requirements''']]</span>
</div>
<BR>
<BR>
[[File:Computer-Head.png|300px|link=Installation]]
<div style="box-shadow:2px 2px 15px #90A4AE; border-radius:5px; padding:10px">
If you received a Computer or Server from VersaCall in your order, click on the appropriate link below for installation instructions.
<BR>
If your IT Department or Facility is providing the Computer or Server, skip to the bottom of this section for links related to Pre-Requisites and Software Installation.
<BR>
<BR>
<span style="font-family:Linux Libertine; color:#0072bc; font-size:170%">'''VersaCall Provided'''</span>
<BR>
[[File:Computer-All-Parts.png|500px|link=Installation]]
<BR>
:<span style="border:thin solid #90A4AE; border-radius:5px; padding:5px"> [[VT3000 - Install Standard PC|'''Installation Instructions''']]</span>
<BR>
<BR>
----
----
<br>
<BR>
{|style="margin:left; width: 100px; background:#eaf3ff; padding:5px; border:2px solid #000000;"
<span style="font-family:Linux Libertine; color:#0072bc; font-size:170%">'''IT or Facility Provided'''</span>
|-
<BR>
|<big>'''Overview'''</big>
:<span style="border:thin solid #90A4AE; border-radius:5px; padding:5px"> [[VT3000 - Install - Pre-Requisites|'''Step 1''' - Install/Setup all Pre Installation Settings & Features.]]</span>
{|style="margin:left; width: 800px; background:#F0F0F0; padding:5px; border:2px solid #000000;"
<BR>
|valign="top" |
:<span style="border:thin solid #90A4AE; border-radius:5px; padding:5px">[[VT3000 - Install - SQL Server 2017|'''Step 2A''' - Install SQL Server Express.]]</span>
|-
<BR>
|This page is designed to help you get your VersaCall system installed properly. There are 3 sections that will cover different aspects of the installation. You only need to open the guides that apply to the equipment you received/purchased.
:<span style="border:thin solid #90A4AE; border-radius:5px; padding:5px">[[VT3000 - Install - Existing SQL Server Instance|'''Step 2B''' - Use an existing SQL Server Instance.]]</span>
|}
<BR>
|}
:<span style="border:thin solid #90A4AE; border-radius:5px; padding:5px">[[VT3000 - Install VersaCall Software|'''Step 3''' - Install the VersaCall (VT3000) Software.]]</span>
<br>
</div>
=<big>'''General Information'''</big>=
<BR>
The links below are for documents that maybe useful to yourself or IT Department.
<BR>
<br>
[[File:Coordinator-HeadII.png|300px|link=Installation]]
<br>
<div style="box-shadow:2px 2px 15px #90A4AE; border-radius:5px; padding:10px">
{|style="margin:left; width: 100px; background:#eaf3ff; padding:5px; border:2px solid #000000;"
<BR>
|-
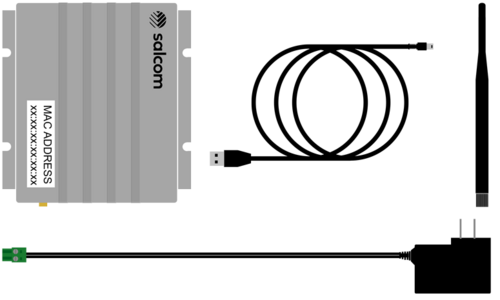
<span style="font-family:Linux Libertine; color:#0072bc; font-size:170%">'''USB Connected'''</span>
|<big>'''System Architecture'''</big>
<BR>
{|style="margin:left; width: 800px; background:#F0F0F0; padding:5px; border:2px solid #000000;"
[[File:USB-Coor-All-Parts.png|500px]]
|valign="top" |
<BR>
|-
<BR>
|[[VT3000_-_IT_Considerations|<u>'''Click Here'''</u>]] for an explanation of the VersaCall System Architecture.
:<span style="border:thin solid #90A4AE; border-radius:5px; padding:5px">[[VT3000 - Install Coordinator - USB|'''Installation Instructions''']]</span>
|}
<BR>
|}
:<span style="border:thin solid #90A4AE; border-radius:5px; padding:5px">[[VT3000 - Replace Coordinator - USB|'''Replacement Instructions''']]</span>
<br>
<BR>
----
<BR>
<br>
{|style="margin:left; width: 100px; background:#eaf3ff; padding:5px; border:2px solid #000000;"
|-
|<big>'''Minimum Requirements'''</big>
{|style="margin:left; width: 800px; background:#F0F0F0; padding:5px; border:2px solid #000000;"
|valign="top" |
|-
|[[VT3000_-_Minimum_Requirements|<u>'''Click Here'''</u>]] to view the '''Minimum Requirements''' for a computer or server that host the VersaCall Software.
|}
|}
<br>
=<big>'''Core Component Installation'''</big>=
<br>
{|style="margin:left; width: 100px; background:#eaf3ff; padding:5px; border:2px solid #000000;"
|-
|<big>'''VersaCall Provided Computer/Server'''</big>
{|style="margin:left; width: 800px; background:#F0F0F0; padding:5px; border:2px solid #000000;"
|valign="top" |
|-
|If you received a Computer/Server from VersaCall in your order, you will want to start with one of the guides below. Select the installation guide that matches the computer/server you received. Please skip this section if your company provided the computer/server as you need to install software first.
{|style="margin:left;"
|valign="top" |
{|class="wikitable" style="background:white; text-align:center; width: 780px;"
|-
|'''Mini Control Unit''' || '''Standard Control Unit'''
|-
|[[File:mini1.png|center|200px]] || [[File:tow1.png|center|100px]]
|-
|Installation Instructions - [[VT3000 - Install Mini PC|<u>'''CLICK HERE'''</u>]] || Installation Instructions - [[VT3000 - Install Standard PC|<u>'''CLICK HERE'''</u>]]
|}
|}
{|style="margin:auto;"
|valign="top" |
{|class="wikitable" style="background:white; text-align: center; width: 500px;"
|-
|'''Rack Mount Control Unit
|-
|[[File:ser5.png|center|200px]]
|-
|Installation Instructions - [[VT3000 - Install Rack Mount PC|<u>'''CLICK HERE'''</u>]].
|}
|}
|}
|}
<br>
----
<br>
{|style="margin:left; width: 100px; background:#eaf3ff; padding:5px; border:2px solid #000000;"
|-
|<big>'''Your Company Provided Computer/Server'''</big>
{|style="margin:left; width: 800px; background:#F0F0F0; padding:5px; border:2px solid #000000;"
|valign="top" |
|-
|If your company/plant supplied the computer/server for the VersaCall software installation, please follow the guides below in order.
{|style="margin:left;"
|valign="top" |
{|class="wikitable" style="background:white; width: 780px;"
|-
|'''Step # 1''' || Complete all Pre-Installation steps - [[VT3000 - Install - Pre-Requisites|<u>'''CLICK HERE'''</u>]]
|}
|}
{|style="margin:left;"
|valign="top" |
{|class="wikitable" style="background:white; width: 780px;"
|-
|'''Step # 2''' || Install SQL Server or use an Instance that you already have.
|}
|}
{|style="margin:auto;"
|valign="top" |
{|class="wikitable" style="background:white; width: 500px;"
|-
|Install SQL Server Express 2008 - 2016 - [[VT3000 - Install - SQL Server 2008 - 2016|<u>'''CLICK HERE'''</u>]]
|-
|Install SQL Server Express 2017 - 2019 - [[VT3000 - Install - SQL Server 2017|<u>'''CLICK HERE'''</u>]]
|-
|Add Databases to an Existing SQL Server Instance - [[VT3000 - Install - Existing SQL Server Instance|<u>'''CLICK HERE'''</u>]]
|}
|}
{|style="margin:left;"
|valign="top" |
{|class="wikitable" style="background:white; width: 780px;"
|'''Step # 3''' || Install the VersaCall Software - [[VT3000 - Install VersaCall Software|<u>'''CLICK HERE'''</u>]]
|}
|}
|}
|}
<br>
----
<br>
{|style="margin:left; width: 100px; background:#eaf3ff; padding:5px; border:2px solid #000000;"
|-
|<big>'''Coordinator'''</big>
{|style="margin:left; width: 800px; background:#F0F0F0; padding:5px; border:2px solid #000000;"
|valign="top" |
|-
|Once the computer/server with the VersaCall software is running, you will need to install the Coordinator. This device is what will communicate with the hardware devices on the plant floor. If purchased a Software only system, please move down to the PC Module section of the page.
{|style="margin:auto;"
|valign="top" |
{|class="wikitable" style="background:white; text-align:center; width: 500px;"
|-
|'''USB Coordinator'''
|-
|[[File:InstallCoor2.png|center|300px]]
|-
|Installation Instructions - [[VT3000 - Install Coordinator - USB|<u>'''CLICK HERE'''</u>]]
|-
|Replace an Existing Coordinator - [[VT3000 - Replace Coordinator - USB|<u>'''CLICK HERE'''</u>]]
|}
|}
{|style="margin:auto;"
|valign="top" |
{|class="wikitable" style="background:white; text-align:center; width: 500px;"
|-
|'''Remote Coordinator'''
|-
|[[File:InstallCoor1.png|center|300px]]
|-
|Same Subnet Installation Instructions - [[VT3000 - Install Coordinator - Remote - Same Subnet|<u>'''CLICK HERE'''</u>]]
|-
|Different Subnet Installation Instructions - [[VT3000 - Install Coordinator - Remote - Different Subnet|<u>'''CLICK HERE'''</u>]]
|}
|}
|}
|}
<br>
----
<br>
{|style="margin:left; width: 100px; background:#eaf3ff; padding:5px; border:2px solid #000000;"
|-
|<big>'''Paging Transmitter'''</big>
{|style="margin:left; width: 800px; background:#F0F0F0; padding:5px; border:2px solid #000000;"
|valign="top" |
|-
|The Paging Transmitter will only be on your order if you purchased it. This device sends text messages to individual pagers.
{|style="margin:auto;"
|valign="top" |
{|class="wikitable" style="background:white; text-align:center; width: 500px;"
|-
|'''USB Paging Transmitter'''
|-
|[[File:InstallPage1.png|center|300px]]
|-
|Installation Instructions - [[VT3000_-_Install_Paging_Transmitter_-_USB|<u>'''CLICK HERE'''</u>]]
|-
|Replace an Existing Paging Transmitter - [[VT3000 - Replace Paging Transmitter - USB|<u>'''CLICK HERE'''</u>]]
|}
|}
{|style="margin:auto;"
|valign="top" |
{|class="wikitable" style="background:white; text-align:center; width: 500px;"
|-
|'''Remote Paging Transmitter'''
|-
|[[File:InstallPage2.png|center|300px]]
|-
|Same Subnet Installation Instructions - [[VT3000_-_Install_Paging_Transmitter_-_Remote_-_Same_Subnet|<u>'''CLICK HERE'''</u>]]
|-
|Different Subnet Installation Instructions - [[VT3000_-_Install_Paging_Transmitter_-_Remote_-_Different_Subnet|<u>'''CLICK HERE'''</u>]]
|}
|}
|}
|}
<br>
----
<br>
{|style="margin:left; width: 100px; background:#eaf3ff; padding:5px; border:2px solid #000000;"
|-
|<big>'''Phone Module'''</big>
{|style="margin:left; width: 800px; background:#F0F0F0; padding:5px; border:2px solid #000000;"
|valign="top" |
|-
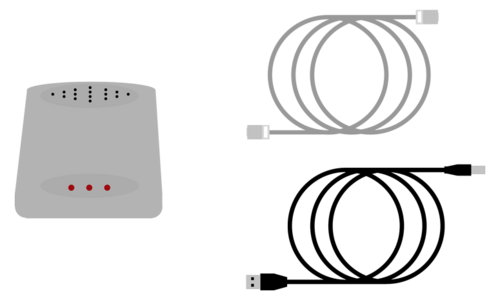
|The Phone Modem will only be on your order if you purchased it. This device makes phone calls to individual phones and plays an audio message when answered.
{|style="margin:auto;"
|valign="top" |
{|class="wikitable" style="background:white; text-align:center; width: 600px;"
|-
|'''USB Phone Modem'''
|-
|[[File:InstallPhone1.png|center|200px]]
|-
|Installation Instructions on computer/server Not Provided by VersaCall - [[VT3000 - Install Phone Modem|<u>'''CLICK HERE'''</u>]]
|-
|Installation Instructions on computer/server Provided by VersaCall - [[VT3000 - Install Modem - NEW VersaCall Provided Computer|<u>'''CLICK HERE'''</u>]]
|}
|}
|}
|}
<br>
----
----
<br>
<BR>
{|style="margin:left; width: 100px; background:#eaf3ff; padding:5px; border:2px solid #000000;"
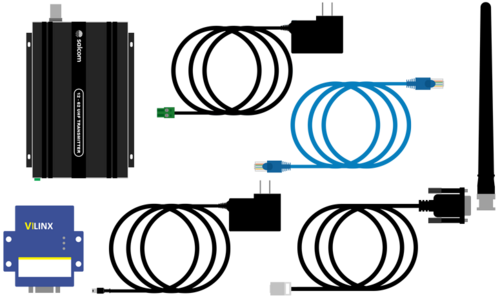
<span style="font-family:Linux Libertine; color:#0072bc; font-size:170%">'''Remote - Real-Port - Ethernet Connected'''</span>
|-
<BR>
|<big>'''Radio Module'''</big>  
[[File:Real-Coor-All-Parts.png|500px]]
{|style="margin:left; width: 800px; background:#F0F0F0; padding:5px; border:2px solid #000000;"
<BR>
|valign="top" |
<BR>
|-
:<span style="border:thin solid #90A4AE; border-radius:5px; padding:5px">[[VT3000 - Install Coordinator - Real-Port - Same Subnet|'''Installation Instructions for the Same Subnet''']]</span>
|The Radio Module will only be on your order if it was purchased. This device sends audio messages over 2-way radio channels.
<BR>
{|style="margin:auto;"
:<span style="border:thin solid #90A4AE; border-radius:5px; padding:5px">[[VT3000 - Install Coordinator - Real-Port - Different Subnet|'''Installation Instructions for the Different Subnets''']]</span>
|valign="top" |
<BR>
{|class="wikitable" style="background:white; text-align:center; width: 500px;"
<BR>
|-
|'''2-Way Radio Module'''
|-
|[[File:InstallRadio1.png|center|200px]]
|-
|Installation Instructions - [[VT3000 - Install 2-Way Radio Module|<u>'''CLICK HERE'''</u>]]
|-
|Installation Troubleshooting Guide - [[VT3000 - Radio Install Troubleshooting|<u>'''CLICK HERE'''</u>]]
|}
|}
|}
|}
<br>
----
----
<br>
<BR>
{|style="margin:left; width: 100px; background:#eaf3ff; padding:5px; border:2px solid #000000;"
<span style="font-family:Linux Libertine; color:#0072bc; font-size:170%">'''Remote - Serial RS-232 - Ethernet Connected'''</span>
|-
<BR>
|<big>'''Mini PC Device'''</big>  
[[File:RS232-Coor-All-Parts.png|500px]]
{|style="margin:left; width: 800px; background:#F0F0F0; padding:5px; border:2px solid #000000;"
<BR>
|valign="top" |
<BR>
|-
:<span style="border:thin solid #90A4AE; border-radius:5px; padding:5px">[[VT3000 - Install Coordinator - Remote - Same Subnet|'''Installation Instructions for the Same Subnet''']]</span>
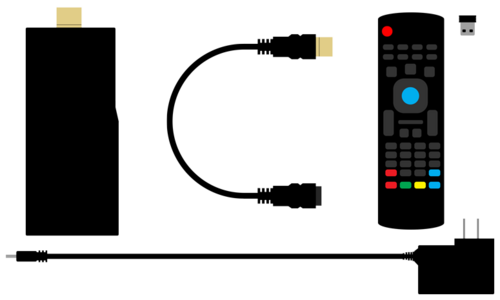
|The Mini PC Device is used to view panels on monitors. This device connects to an existing TV/Monitor through the HDMI port and has an app that allows you to view panels.
<BR>
{|style="margin:auto;"
:<span style="border:thin solid #90A4AE; border-radius:5px; padding:5px">[[VT3000 - Install Coordinator - Remote - Different Subnet|'''Installation Instructions for the Different Subnets''']]</span>
|valign="top" |
</div>
{|class="wikitable" style="background:white; text-align:center; width: 780px;"
<BR>
|-
<BR>
|'''Mini PC'''
[[File:Paging-HeadII.png|300px|link=Installation]]
|-
<div style="box-shadow:2px 2px 15px #90A4AE; border-radius:5px; padding:10px">
|[[File:Mini100.png|center|300px]] || [[File:Mini200.png|center|200px]] || [[File:Mini300.png|center|200px]]
<span style="font-family:Linux Libertine; color:#0072bc; font-size:170%">'''Model 12-62 - USB Connected'''</span>
|-
<BR>
|align="center" |'''Andriod Device''' || align="center" | '''Power Cord''' || align="center" | '''HDMI Extender'''
[[File:1262-USB-All-Parts.png|500px]]
|-
<BR>
|colspan="3" | [[File:Mini400.png|center|300px]]
<BR>
|-
:<span style="border:thin solid #90A4AE; border-radius:5px; padding:5px">[[VT3000_-_Install_Paging_Transmitter_-_USB|<u>'''Installation Instructions'''</u>]]</span>
|colspan="3" | '''Remote Control with USB Dongle'''
<BR>
|}
:<span style="border:thin solid #90A4AE; border-radius:5px; padding:5px">[[VT3000 - Replace Paging Transmitter - USB|<u>'''Replacement Instructions'''</u>]]</span>
{|class="wikitable" style="background:white; text-align:center; width: 780px;"
<BR>
|-
<BR>
|Installation Instructions - [[VT3000 - Install Android HDMI Mini PC|<u>'''CLICK HERE'''</u>]]
|}
|}
|}
|}
<br>
=<big>'''Module Installation'''</big>=
<br>
{|style="margin:left; width: 100px; background:#eaf3ff; padding:5px; border:2px solid #000000;"
|-
|<big>'''Call Station'''</big>  
{|style="margin:left; width: 800px; background:#F0F0F0; padding:5px; border:2px solid #000000;"
|valign="top" |
|-
|There are 2 types of Call Stations - Battery Powered & 110VAC Powered. Select the guide for the Call Station that you purchased.
{|style="margin:auto;"
|valign="top" |
{|class="wikitable" style="background:white; text-align:center; width: 500px;"
|-
|'''Battery Powered Call Station'''
|-
|[[File:InstallCS1.png|center|150px]]
|-
|Installation Instructions - [[VT3000_-_Install_Call_Station_-_Battery|<u>'''CLICK HERE'''</u>]]
|}
|}
{|style="margin:auto;"
|valign="top" |
{|class="wikitable" style="background:white; text-align:center; width: 500px;"
|-
|'''Powered (110VAC) Call Station'''
|-
|[[File:InstallCS2.png|center|300px]]
|-
|Installation Instructions - [[VT3000_-_Install_Call_Station_-_Powered|<u>'''CLICK HERE'''</u>]]
|}
|}
|}
|}
<br>
----
----
<br>
<BR>
{|style="margin:left; width: 100px; background:#eaf3ff; padding:5px; border:2px solid #000000;"
<span style="font-family:Linux Libertine; color:#0072bc; font-size:170%">'''Model 12-62 - Ethernet Connected'''</span>
|-
<BR>
|<big>'''BSC Module'''</big>  
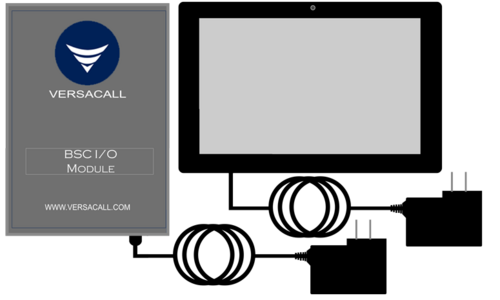
[[File:1262-Remote-All-Parts.png|500px]]
{|style="margin:left; width: 800px; background:#F0F0F0; padding:5px; border:2px solid #000000;"
<BR>
|valign="top" |
<BR>
|-
:<span style="border:thin solid #90A4AE; border-radius:5px; padding:5px">[[VT3000_-_Install_Paging_Transmitter_-_Remote_-_Same_Subnet|<u>'''Same Subnet Installation'''</u>]]</span>
|The BSC Module has 2 pieces - a Touch Screen & an I/O Module.
<BR>
{|style="margin:auto;"
:<span style="border:thin solid #90A4AE; border-radius:5px; padding:5px">[[VT3000_-_Install_Paging_Transmitter_-_Remote_-_Different_Subnet|<u>'''Different Subnet Installation'''</u>]]</span>
|valign="top" |
<BR>
{|class="wikitable" style="background:white; text-align:center; width: 500px;"
<BR>
|-
|'''I/O Module''' || '''Touch Screen'''
|-
|[[File:InstallBSC1.png|center|200px]] ||[[File:bscin18.png|center|200px]]
|-
|colspan="2"|Installation Instructions - [[VT3000_-_Install_Call_Station_-_Battery|<u>'''CLICK HERE'''</u>]]
|}
|}
|}
|}
<br>
----
----
<br>
<BR>
{|style="margin:left; width: 100px; background:#eaf3ff; padding:5px; border:2px solid #000000;"
<span style="font-family:Linux Libertine; color:#0072bc; font-size:170%">'''Model 20-62 - USB Connected'''</span>
|-
<BR>
|<big>'''PSM Module'''</big>  
[[File:2062-USB-Parts.png|500px]]
{|style="margin:left; width: 800px; background:#F0F0F0; padding:5px; border:2px solid #000000;"
<BR>
|valign="top" |
<BR>
|-
:<span style="border:thin solid #90A4AE; border-radius:5px; padding:5px">[[VT3000_-_Install_Paging_Transmitter_-_USB|<u>'''Installation Instructions'''</u>]]</span>
|The PSM has 2 pieces - a Touch Screen & an I/O Module.
<BR>
{|style="margin:auto;"
<BR>
|valign="top" |
{|class="wikitable" style="background:white; text-align:center; width: 500px;"
|-
|'''I/O Module''' || '''Touch Screen'''
|-
|[[File:InstallPSM1.png|center|200px]] ||[[File:bscin18.png|center|200px]]
|-
|colspan="2"|Installation Instructions - [[VT3000_-_Install_PSM_with_IO|<u>'''CLICK HERE'''</u>]]
|}
|}
|}
|}
<br>
----
----
<br>
<BR>
{|style="margin:left; width: 100px; background:#eaf3ff; padding:5px; border:2px solid #000000;"
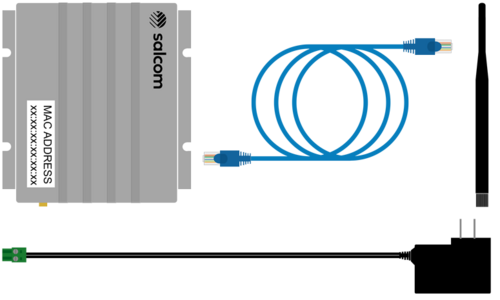
<span style="font-family:Linux Libertine; color:#0072bc; font-size:170%">'''Ethernet Connected Transmitter - 12-62 Model'''</span>
|-
<BR>
|<big>'''Repeater'''</big>  
[[File:2062-All-Parts.png|500px]]
{|style="margin:left; width: 800px; background:#F0F0F0; padding:5px; border:2px solid #000000;"
<BR>
|valign="top" |
<BR>
|-
:<span style="border:thin solid #90A4AE; border-radius:5px; padding:5px">[[VT3000 - Install 2062 Paging Transmitter - Remote - Ethernet Connected|<u>'''Installation Instructions'''</u>]]</span>
|A Repeater is used to extend the mesh signal range.
</div>
{|style="margin:auto;"
<BR>
|valign="top" |
<BR>
{|class="wikitable" style="background:white; text-align:center; width: 500px;"
[[File:Phone-Head.png|300px|link=Installation]]
|-
<div style="box-shadow:2px 2px 15px #90A4AE; border-radius:5px; padding:10px">
|'''Repeater'''
<span style="font-family:Linux Libertine; color:#0072bc; font-size:170%">'''Phone Modem'''</span>
|-
<BR>
|[[File:InstallRep1.png|center|200px]]
[[File:Modem-All-Parts.png|500px]]
|-
<BR>
|Installation Instructions - [[VT3000_-_Install_a_Repeater|<u>'''CLICK HERE'''</u>]]
<BR>
|}
:<span style="border:thin solid #90A4AE; border-radius:5px; padding:5px">[[VT3000 - Install Phone Modem|<u>'''Install Instructions - VersaCall Provided Computer'''</u>]]</span>
|}
<BR>
|}
:<span style="border:thin solid #90A4AE; border-radius:5px; padding:5px">[[VT3000 - Install Modem - NEW VersaCall Provided Computer|<u>'''Install Instructions - New or Non-VersaCall Provided Computer'''</u>]]</span>
|}
</div>
<br>
<BR>
<BR>
[[File:Radio-Head.png|300px|link=Installation]]
<div style="box-shadow:2px 2px 15px #90A4AE; border-radius:5px; padding:10px">
<span style="font-family:Linux Libertine; color:#0072bc; font-size:170%">'''2-Way Radio Module'''</span>
<BR>
[[File:Radio-All-Parts.png|500px]]
<BR>
<BR>
:<span style="border:thin solid #90A4AE; border-radius:5px; padding:5px">[[VT3000 - Install 2-Way Radio Module|<u>'''Install Instructions'''</u>]]</span>
<BR>
:<span style="border:thin solid #90A4AE; border-radius:5px; padding:5px">[[VT3000 - Radio Install Troubleshooting|<u>'''Troubleshooting'''</u>]]</span>
</div>
<BR>
<BR>
[[File:Android-Head.png|300px|link=Installation]]
<div style="box-shadow:2px 2px 15px #90A4AE; border-radius:5px; padding:10px">
<span style="font-family:Linux Libertine; color:#0072bc; font-size:170%">'''Mini PC - Android Device'''</span>
<BR>
<BR>
[[File:Mini-PC-All-Parts.png|500px]]
<BR>
:<span style="border:thin solid #90A4AE; border-radius:5px; padding:5px">[[VT3000 - Install Android HDMI Mini PC|'''Installation Instructions''']]</span>
</div>
<BR>
<BR>
[[File:Call-Station-Head.png|300px|link=Installation]]
<div style="box-shadow:2px 2px 15px #90A4AE; border-radius:5px; padding:10px">
<span style="font-family:Linux Libertine; color:#0072bc; font-size:170%">'''Call Station - Battery Powered'''</span>
<BR>
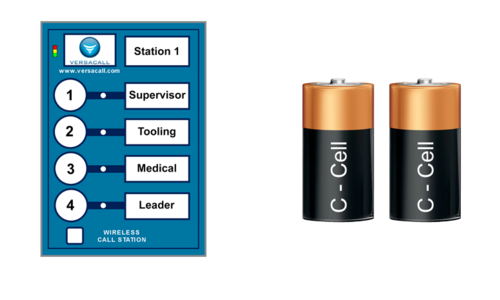
[[File:CS-Battery-All-Parts.png|500px]]
<BR>
:<span style="border:thin solid #90A4AE; border-radius:5px; padding:5px">[[VT3000_-_Install_Call_Station_-_Battery|'''Installation Instructions''']]</span>
<BR>
<BR>
----
----
<br>
<BR>
{|style="margin:left; width: 100px; background:#eaf3ff; padding:5px; border:2px solid #000000;"
<span style="font-family:Linux Libertine; color:#0072bc; font-size:170%">'''Call Station - Powered (110VAC)'''</span>
|-
<BR>
|<big>'''Wireless Audio Module'''</big>  
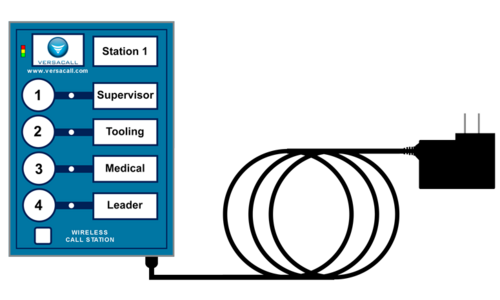
[[File:CS-Power-All-Parts.png|500px]]
{|style="margin:left; width: 800px; background:#F0F0F0; padding:5px; border:2px solid #000000;"
BR>
|valign="top" |
:<span style="border:thin solid #90A4AE; border-radius:5px; padding:5px">[[VT3000_-_Install_Call_Station_-_Powered|'''Installation Instructions''']]</span>
|-
</div>
|An Audio Module is used to play tones/melodies on the plant floor. This device is exteremly loud when activated, use caution when testing.
<BR>
{|style="margin:auto;"
<BR>
|valign="top" |
[[File:BSC-Head.png|300px|link=Installation]]
{|class="wikitable" style="background:white; text-align:center; width: 500px;"
<div style="box-shadow:2px 2px 15px #90A4AE; border-radius:5px; padding:10px">
|-
<span style="font-family:Linux Libertine; color:#0072bc; font-size:170%">'''BSC Module'''</span>
|'''Audio Module'''
<BR>
|-
[[File:BSC-All-Parts.png|500px]]
|[[File:InstallAudio1.png|center|200px]]
<BR>
|-
<BR>
|Installation Instructions - [[VT3000_-_Install_Wireless_Tone_Audio_Module|<u>'''CLICK HERE'''</u>]]
:<span style="border:thin solid #90A4AE; border-radius:5px; padding:5px">[[VT3000 - Install BSC with IO|'''Installation Instructions''']]</span>
|}
</div>
|}
<BR>
|}
<BR>
|}
[[File:PSM-Head.png|300px|link=Installation]]
<br>
<div style="box-shadow:2px 2px 15px #90A4AE; border-radius:5px; padding:10px">
<span style="font-family:Linux Libertine; color:#0072bc; font-size:170%">'''PSM Module'''</span>
<BR>
[[File:PSM-All-Parts.png|500px]]
<BR>
<BR>
:<span style="border:thin solid #90A4AE; border-radius:5px; padding:5px">[[VT3000_-_Install_PSM_with_IO|'''Installation Instructions''']]</span>
</div>
<BR>
<BR>
[[File:Repeater-Head.png|300px|link=Installation]]
<div style="box-shadow:2px 2px 15px #90A4AE; border-radius:5px; padding:10px">
<span style="font-family:Linux Libertine; color:#0072bc; font-size:170%">'''Repeater'''</span>
<BR>
[[File:Repeater-All-Parts.png|500px]]
<BR>
<BR>
:<span style="border:thin solid #90A4AE; border-radius:5px; padding:5px">[[VT3000_-_Install_a_Repeater|'''Installation Instructions''']]</span>
</div>
<BR>
<BR>
[[File:Audio-Head.png|300px|link=Installation]]
<div style="box-shadow:2px 2px 15px #90A4AE; border-radius:5px; padding:10px">
<span style="font-family:Linux Libertine; color:#0072bc; font-size:170%">'''Wireless Audio Module'''</span>
<BR>
[[File:Wireless-Audio.png|500px]]
<BR>
<BR>
:<span style="border:thin solid #90A4AE; border-radius:5px; padding:5px">[[VT3000_-_Install_Wireless_Tone_Audio_Module|'''Installation Instructions''']]</span>
</div>
<BR>
<BR>
[[File:Light-Head.png|300px|link=Installation]]
<div style="box-shadow:2px 2px 15px #90A4AE; border-radius:5px; padding:10px">
<span style="font-family:Linux Libertine; color:#0072bc; font-size:170%">'''Wireless Stack Light Module'''</span>
<BR>
[[File:WCM-All-Parts.png|500px]]
<BR>
<BR>
:<span style="border:thin solid #90A4AE; border-radius:5px; padding:5px">[[VT3000_-_Install_Wireless_Light_Module|'''Installation Instructions''']]</span>
</div>
<BR>
----
----
<br>
{|style="margin:left; width: 100px; background:#eaf3ff; padding:5px; border:2px solid #000000;"
|-
|<big>'''Wireless Lights Module'''</big>
{|style="margin:left; width: 800px; background:#F0F0F0; padding:5px; border:2px solid #000000;"
|valign="top" |
|-
|Wireless Light Modules has an I/O Module with a Light Stack attached. The Light Stack can be 1 to 5 lights.
{|style="margin:auto;"
|valign="top" |
{|class="wikitable" style="background:white; text-align:center; width: 500px;"
|-
|'''Light Stack'''
|-
|[[File:ltsin1.png|center|400px]]
|-
|Installation Instructions - [[VT3000_-_Install_Wireless_Light_Module|<u>'''CLICK HERE'''</u>]]
|}
|}
|}
|}
<br>
----
----
<br>
<br>
Line 442: Line 255:
|<inputbox>type=search</inputbox>
|<inputbox>type=search</inputbox>
|}
|}
|}
<br>
----
----
<br>
<br>
Line 453: Line 268:
|[[File:BlogIcon.png|View our Blog|link=https://www.versacall.com/blog/]]
|[[File:BlogIcon.png|View our Blog|link=https://www.versacall.com/blog/]]
|}
|}
<br>

Revision as of 18:40, 5 October 2023

Call Now 858-677-6766 SubmitTckBtn.png EmailUsBtn.png

GenInfot-Head.png

This page is designed to help you get your VersaCall system installed properly. There are 3 sections that will cover different aspects of the installation. You only need to open the guides that apply to the equipment you received/purchased.


ITInfo-Head.png

System Architecture Overview


Minimum Computer/Server Requirements


Computer-Head.png

If you received a Computer or Server from VersaCall in your order, click on the appropriate link below for installation instructions.
If your IT Department or Facility is providing the Computer or Server, skip to the bottom of this section for links related to Pre-Requisites and Software Installation.

VersaCall Provided
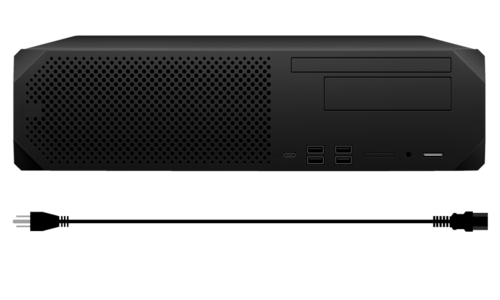
Computer-All-Parts.png

Installation Instructions


IT or Facility Provided

Step 1 - Install/Setup all Pre Installation Settings & Features.


Step 2A - Install SQL Server Express.


Step 2B - Use an existing SQL Server Instance.


Step 3 - Install the VersaCall (VT3000) Software.


Coordinator-HeadII.png


USB Connected
USB-Coor-All-Parts.png

Installation Instructions


Replacement Instructions


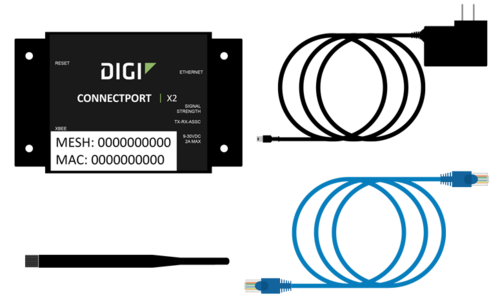
Remote - Real-Port - Ethernet Connected
Real-Coor-All-Parts.png

Installation Instructions for the Same Subnet


Installation Instructions for the Different Subnets


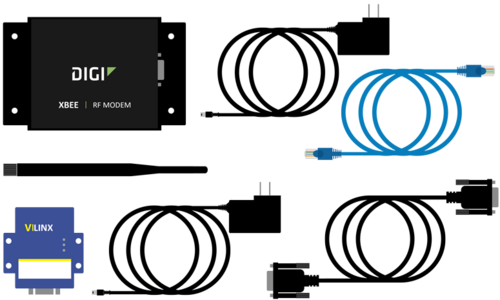
Remote - Serial RS-232 - Ethernet Connected
RS232-Coor-All-Parts.png

Installation Instructions for the Same Subnet


Installation Instructions for the Different Subnets


Paging-HeadII.png

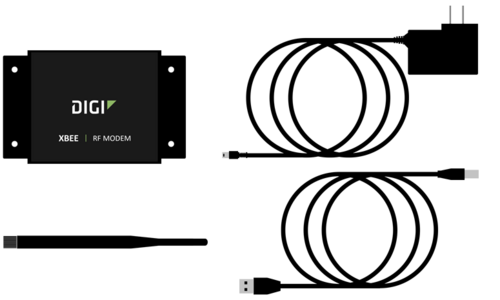
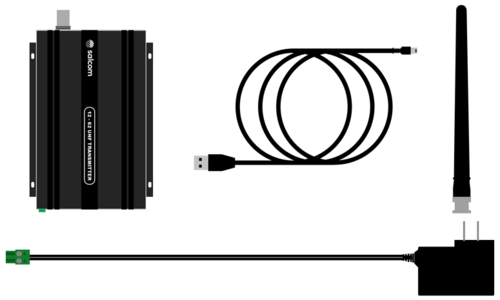
Model 12-62 - USB Connected
1262-USB-All-Parts.png

Installation Instructions


Replacement Instructions


Model 12-62 - Ethernet Connected
1262-Remote-All-Parts.png

Same Subnet Installation


Different Subnet Installation


Model 20-62 - USB Connected
2062-USB-Parts.png

Installation Instructions


Ethernet Connected Transmitter - 12-62 Model
2062-All-Parts.png

Installation Instructions


Phone-Head.png

Phone Modem
Modem-All-Parts.png

Install Instructions - VersaCall Provided Computer


Install Instructions - New or Non-VersaCall Provided Computer


Radio-Head.png

2-Way Radio Module
Radio-All-Parts.png

Install Instructions


Troubleshooting


Android-Head.png

Mini PC - Android Device

Mini-PC-All-Parts.png

Installation Instructions


Call-Station-Head.png

Call Station - Battery Powered
CS-Battery-All-Parts.png

Installation Instructions


Call Station - Powered (110VAC)
CS-Power-All-Parts.png BR>

Installation Instructions


BSC-Head.png

BSC Module
BSC-All-Parts.png

Installation Instructions


PSM-Head.png

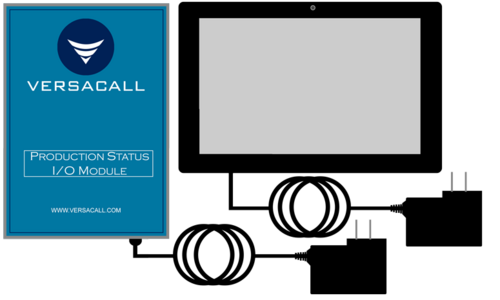
PSM Module
PSM-All-Parts.png

Installation Instructions


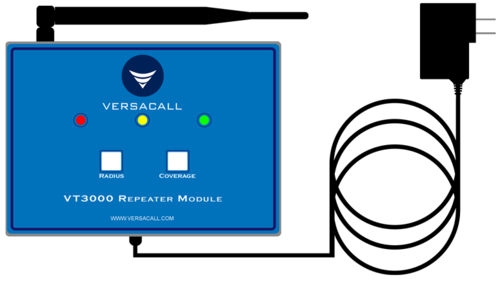
Repeater-Head.png

Repeater
Repeater-All-Parts.png

Installation Instructions


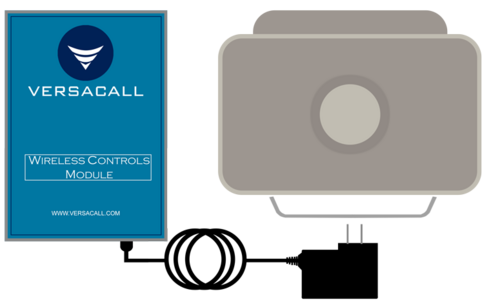
Audio-Head.png

Wireless Audio Module
Wireless-Audio.png

Installation Instructions


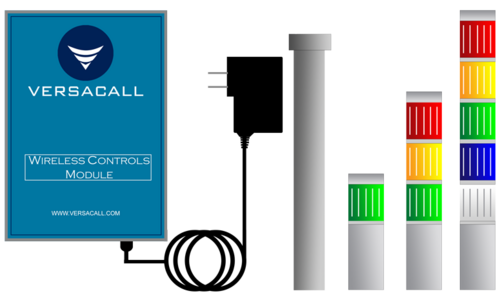
Light-Head.png

Wireless Stack Light Module
WCM-All-Parts.png

Installation Instructions


SearchHeader.png


VC Footer.png
Follow Us On LinkedIn View our Blog